
Last Updated on December 4, 2023 by Ewen Finser
Thousands of forward-thinking multinationals use Stripe to process billions of dollars in revenue each year. Stripe’s online payment platform allows business owners to accept credit cards, debit cards, and bank transfer payments from a web browser or mobile device in more than 135 countries.
Salesforce CRM ensures that companies closely monitor and analyze their business data to make well-informed decisions. This CRM has many built-in features, such as its opportunity management capabilities, activity tracking, and lead management, among many others.
Integrating Stripe and Salesforce ensures that organizations securely send and receive recurring payments or complex billing statements. As a result, Stripe and Salesforce users can focus more on growing their business instead of worrying about the day-to-day management of their financial transactions.
This article demonstrates how to integrate Stripe with Salesforce. It will also provide insight into Stripe and Salesforce APIs to assist administrators with customizing these integrations.
Benefits of Integrating Stripe and Salesforce

Here are some of the benefits of integrating Stripe vs Salesforce:
- Improve conversion: Accept all major credit cards and debit cards.
- Track key business metrics: Monitor and track revenue generated by your payment platform.
- Improve customer service: Reduce churn by offering reliable payment options.
- Unified omnichannel commerce: Facilitate subscriptions, in-person payments, marketplace payments and simplify reporting and reconciliation.
- Achieve compliance: Implement client-side tokenization, IPN, and other necessary protocols.
- Synchronize data: Ensure that data is available to all Salesforce users by sending and receiving information.
- Fraud protection: Stripe radar ensures that you proactively monitor and manage your risk.
- Access and modify Stripe contacts: Sync the necessary contacts to the appropriate Stripe customers.
Different Ways of Integrating Stripe and Salesforce
Stripe and Salesforce are two different systems with different functionalities. As a result, there are several different ways to integrate them. The integration should be seamless for the two systems to work in tandem.
There are two ways of integrating Stripe with Salesforce:
- Using Stripe for Salesforce Billing and CPQ
- Using AppExchange apps or third-party applications (APIs)
An administrator willing to integrate Stripe and Salesforce should set up and configure the two systems according to their individual needs. The options mentioned above give administrators some flexibility, and each one has its benefits and disadvantages.
Using Stripe for Salesforce Billing and CPQ
Configuring Stripe for Salesforce billing and CPQ allows users to track payments made through the platform. The functionality is straightforward, and it integrates seamlessly with Stripe’s APIs.
As a managed platform, Stripe for billing and CPQ must be installed on top of Salesforce’s billing and CPQ. The essence of this integration is to facilitate a seamless flow of information between Stripe and Salesforce. Users can process payments and track revenue using the Stripe payments gateway.
It exposes three types of transactions evident on the Salesforce Billing user interface (UI). The three transactions include:
- Tokenization
- Refund transaction
- Charge transaction
Stripe billing also offers API-based transaction types that developers can leverage to create custom solutions on Stripe. Such transactions include:
- Void token
- Authorize transaction
- Capture transaction Get payment status
- Get refund status
- Void transaction
Installing Stripe for Salesforce Billing

Before installing the Stripe for salesforce billing, you must first install the Salesforce CPQ and the Salesforce Billing packages. You can install these packages directly from the Salesforce Quote-Cash website. Navigate to the bottom of the website and identify the packages you want to install.
You can then follow the installation instructions on the website for your respective Salesforce edition. You will receive an email notification containing a link to the Salesforce Help documentation once your package is installed successfully.
How to Install Stripe for Salesforce Billing
Once the prerequisite packages are installed, install the Stripe for Salesforce billing package on your organization or production environment. However, you have to log in to your developer environment to do this.
Below are the links you will use to access the installation packages;
Follow these steps to proceed with installing the package:
- Once you log in, click the “Install for Admins Only” tab and click install
- Mark “Yes” on the grant access to third-party websites and click continue
- An email will popup once the Salesforce billings is installed
- Verify that the package is installed by navigating to the Setup>Apps>Packaging>Installed packages
How to Configure Stripe for Salesforce Billing and CPQ
Configuring Stripe for Salesforce billing and CPQ starts after installing the package.
First, you have to assign permission sets. Navigate to the Setup, click Users, and then Permission Sets.
- Assign the following permission sets for all the admin users in your organization: Stripe Payment Gateway Admin, Salesforce CPQ admin, and Stripe Payment Gateway Admin.
- Assign the following permission sets for all standard users in the organization; Stripe Payment Gateway User and Salesforce CPQ User.
Proceed to assign page layouts. The page layouts should contain the necessary base information and actions to complete the payment process flow.
Use the following procedure:
- Opportunity Object: Go to Setup, click Object Manager, and click Opportunity Object. Navigate to the Page Layouts tab then the page Layout Assignment. Navigate to the Edit Assignment tab, allow the System Admin and User to view the CPQ Opportunity Layout, and save the settings.
- Account: Go to Setup, then Object Manager, and click the Account tab. Navigate to Page Layouts and then click Page Layout Assignment. Go to Edit assignment, allow the Standard User and System Admin to view the Billing Account Layout, and save the settings.
- Order: Go to Setup, then Object Manager, and click Order. Navigate to the Page Layouts tab and click the Page Layout Assignment. Go to Edit Assignment and allow the Standard User and System Admin to view the Billing Order Layout, then click save.
- Order Product: Go to Setup, then Object Manager, and click Order Product. Proceed to the Page Layout tab and click Page Layout Assignment. Go to Edit Assignment and allow the Standard User and System Admin to view the Billing Order Product Layout, then click save.
- Product: Go to Setup, then Object Manager, and click Product. Proceed to the Page Layout tab and click Page Layout Assignment. Go to Edit Assignment and allow the Standard User and System Admin to view Product Billing, then click Save.
Add a Refund Action to Payment Method Objects
Once you finish with the page layouts, the next step is to configure the refund action to Payment Method. Normally, the refund UI comes packed in the Salesforce Billing. However, the settings aren’t available in the default configuration.
Go to settings, then click object Manager and then Payment Object. Navigate the page layout and click the Payment Layout. Click the Mobile and Lighting Actions, drag the refund action to the page layout, and save the settings.
Add a Verify Action to Payment Method
Salesforce Billing can’t verify ACH bank accounts. However, the Stripe for Salesforce billing package provides a configuration that enables ACH verification. Therefore, you need to verify the action to allow ACH payment methods in the Payment Method page layout.
Go to the Page Layouts then the Payment Method Layout. Navigate to the Mobile and Lighting, drag the Verify action to the page layout, and save the settings.
Add ACH Payment Method Button
Go to Setup, then Object Manager and click the Account Object. Go to the Page Layout, then the Billing Account Layout. Navigate to the Payment Methods list and click the wrench icon.
Go to the modal and click the plus buttons. Add new payment method ACH, clicks ok, and save.
Add Individual Bank Account Types
Go to Setup, then Object Manager and click the Payment Method. Navigate the fields and Relationship tab and click the Bank Account Type.
Proceed to the Values tab and click the view bank and account type Value set. Click New and add “Company” and “Individual,” then add new picklist values to all the record types and save.
Add Stripe as a Payment Gateway
Go to Setup, then object Manager and click Payment Gateway. Click the Fields and Relationship tab, then Gateway Type.
Go to values and click the View Gateway Type Value Set Tab. Click the New Tab and add Stripe. Proceed to add the new picklist value set to all records and save.
Stripe Payment Gateway Setup
Once you complete the configuration process, you need to set up the Stripe payment gateway. Launch the app by clicking the launch icon. Click the get started tab and turn the live mode on. To proceed, you’ll have to log into your Stripe account.
The page will take you to the System connections page, where you will see a message indicating that the Setup is authorized. Click the Finish icon at the bottom and save the settings. Once done, you have your Stripe payment gateway successfully installed in Salesforce.
Using Third-Party APIs for Stripe-Salesforce Integration
Apart from the Stripe Payment Gateway add-on, Salesforce users can apply third-party integrations with Stripe. The following are a few of the available options:
1. Chargent Payment Application
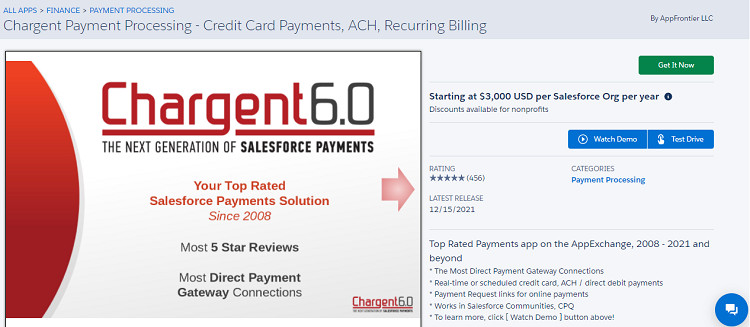
Chargent is an extension for Salesforce Commerce Cloud, which allows you to integrate with Stripe. The extension is particularly useful in simplifying the setup process by utilizing the pre-built configuration settings. It’s native to the Salesforce ACH payment system and can support multiple currencies.
The installation process is easy and fast. It doesn’t require any programming skills or knowledge of backend infrastructure. The extension also provides several features that facilitate customers and partners, including built-in support for subscriptions, refunds, and coupons.
2. Zapier

Zapier is an automation tool that lets you integrate Stripe with other cloud applications, including Salesforce. Zapier is ideal for users who prefer third-party apps to the native solution. It’s easy to set up and offers some unique features.
One of its key features is designating specific data for populating dynamic fields in Salesforce. You can also use it to create Salesforce records when certain Stripe events are triggered programmatically. Zapier is easy to use and doesn’t require any coding to set up or maintain. It offers unlimited integrations and the capacity to run large volumes of transactions.
3. Hevo Activate

Hevo Activate is a payment automation solution that integrates Stripe with Salesforce. It facilitates direct data transfer, which means your payment forms are automatically populated in Salesforce.
The extension allows you to integrate Stripe with other systems, including Magento, Shopify, BigCommerce, and WooCommerce. The transfer is instantaneous and takes place without interrupting the user experience. Hevo activate is a wholly managed platform meaning that you don’t need to invest any time maintaining the solution on your end.
4. Blackthorn Payments

Blackthorn is part of the Salesforce AppExchange, which can be easily installed using the Salesforce package installer. It seamlessly integrates Stripe payments with other payment gateways supported by Salesforce Commerce Cloud, including CyberSource and Authorize.Net.
The integration also allows for instant retrieval of order information. Using this integration, Salesforce users can process orders in real-time and handle refunds and cancellations automatically. The extension ensures that the user has a frictionless experience while shopping.
Blackthorn’s flexibility ensures seamless integration with your existing Salesforce environment. It also allows for customization of the checkout process, making it ideal for B2C and B2B applications. Notably, the API is level 3 PCI compliant, which means your data is safe. It can also manage multiple currencies, allowing you to conduct transactions in different currencies without manually updating the Stripe account.
FAQs
Question: Can Salesforce Process Payments?
Answer: Salesforce doesn’t process payments. However, it has the necessary infrastructure that facilitates integration with third-party services, including Stripe, which can process payments. Tools such as the Chargent payment application and Hevo Activate allow you to integrate Stripe with Salesforce easily.
Question: How Does Stripe Integrate with Salesforce?
Answer: Stripe integrates with Salesforce either through a third-party app or Stripe for Salesforce Billing and CPQ app. The former uses the Stripe API and Salesforce’s built-in infrastructure to integrate Stripe with Salesforce. The latter is a fully managed application, which means it has its backend infrastructure and dedicated support staff. It requires no coding skills or technical expertise to set up and maintain.
Question: Why is Stripe Webhook Secret?
Answer: The Stripe Webhook is secret because Stripe uses it to authenticate webhook requests. This is critical since the secret ensures you get data from the right source rather than a malicious user trying to access your information. An incorrect webhook secret may result in your data getting compromised.
Stripe Salesforce Integration Guide: Conclusion
Understanding the Stripe Salesforce integration is important if you intend to conduct sales or accept payments with the help of this tool. It’s straightforward to set up and offers numerous benefits for users, including designating specific data for dynamic fields, instant order retrieval, and a user-friendly checkout process.
The essence of the Stripe Salesforce integration is non-intrusive to users and provides a frictionless experience. The Stripe Salesforce solution facilitates data transfer and ensures that your checkout process is efficient and maintains high-security standards.