- Bottom Line Upfront
- Main Differences Between LearnDash vs Moodle
- LearnDash
- The WordPress Dashboard and a LearnDash Overview
- Adding, Updating and Navigation Your Courses
- Lessons, Topics and Quizzes
- Other LearnDash Areas and Add-Ons
- LearnDash Pros and Cons
- Moodle
- My Experience Using Moodle
- Decision-Making Tips When Looking for a Learning Management System
- Alternatives to LearnDash and Moodle
- FAQs
- Compare LearnDash vs Moodle: Wrapping Up
Last Updated on June 1, 2023 by Ewen Finser
Whether you’re a lifelong teacher or you’re an expert in your field and have the knowledge to share, setting up an online course can connect you with students willing to learn. But designing an online course from scratch isn’t easy, especially if you don’t have the right tools for the job.
That’s where learning management systems come in, providing all of the functionality you could ask for when designing, publishing and managing your courses. In this article, I’m going to compare LearnDash vs Moodle, two leading — but very different — LMS options for educators.
For this comparison, I’m mainly focused on the firsthand experience I had with both tools. In some sections, I’ll show you how to do certain things, like add course content, but that’s for the purpose of showcasing how easy (or difficult) the feature is to use.
This isn’t a full walkthrough by any means; instead, it’s a way to illustrate what you may experience when using with the software.
I have a lot of experience with WordPress — working with it, writing about it, and reviewing WordPress plugins and software. I also have a similar experience with other, non-WordPress software. I’m used to finding my way around dashboards, figuring out how different elements interact with one another, and determining how useful the tool will be in the long run if I were to depend on it regularly.
Now that you know what we’re about to do and why I’m the right person for the job, let’s get into it!
Bottom Line Upfront
LearnDash vs Moodle are both learning management systems (LMS) that let educators of all types set up courses for students.
While they share many similarities when it comes to the type of content that can be added to a course and how courses are delivered to students, the one glaring difference is ease of use. LearnDash is much more user-friendly than Moodle, and it’s more robust, too. Overall, LearnDash is the better product, even compared to the free-to-use Moodle LMS.
The most trusted WordPress LMS plugin, created by learning industry professionals with Fortune 500 experience. Transform your site in less than 5 minutes.
Main Differences Between LearnDash vs Moodle
The main differences between LearnDash vs Moodle are:
- LearnDash is a paid product that starts at $199 per year for the WordPress plugin, while Moodle is free, open-source software.
- LearnDash can integrate with WordPress, while Moodle is stand-alone software.
- LearnDash has an organized interface with various options for different content types, while Moodle is more difficult to navigate.
- LearnDash’s installation is simple, while Moodle requires multiple installation steps or advanced knowledge for a quick-start setup.
LearnDash
LearnDash is a “learning management system for WordPress,” and the company claims that you can “create professional, engaging courses in just a few clicks.” To put it more simply, it’s WordPress-specific software that lets you create and launch a course on your website.
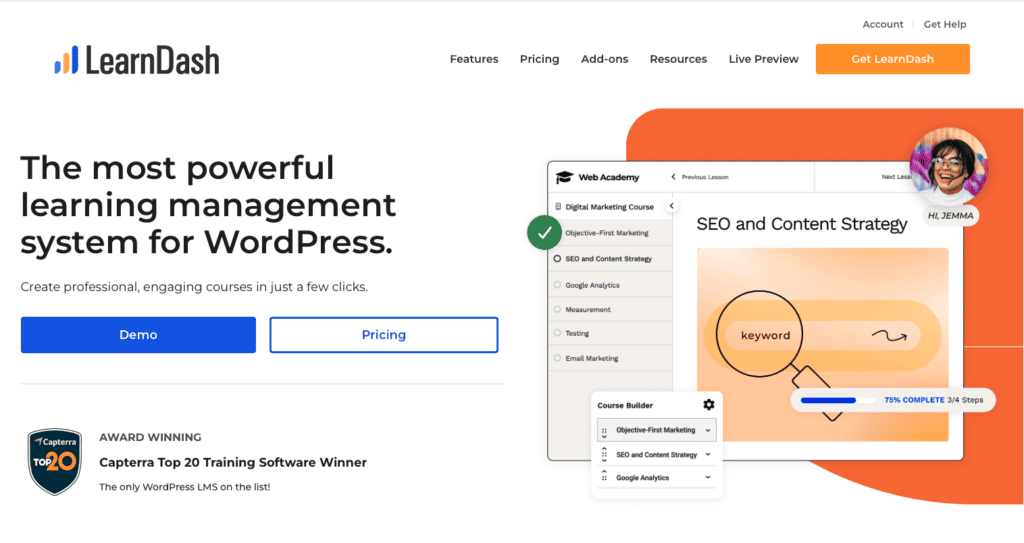
Of course, anyone who’s ever tried to update their website knows that “a few clicks” turns into half a day of making changes, usually followed by a headache. And while LearnDash isn’t difficult to use, you certainly can’t get a course up and ready for students in a matter of minutes.
On the LearnDash homepage, the company also says that LearnDash is designed to “maximize content delivery,” meaning content is delivered to students in a way that makes it more likely they’ll complete it.
However, this is a little misleading, as they don’t do this for you; you have to set up the course content and decide how it’ll be delivered. So while the opportunity is there to create a primed-to-be-completed course, you’re responsible for determining the best method.
With LearnDash, you have a lot of control over your classes when it comes to the business and marketing side of things, including:
- You can choose your pricing model, including one-time sales, subscriptions, bundles and memberships.
- You can choose your payment gateway, like PayPal, Stripe and others.
- You can send automatic notifications to encourage students to renew their subscription or membership.
Let’s dive into LearnDash’s key features.
Key Features of LearnDash
- User Management: You have the ability to segment students into groups and sub-groups, enroll multiple users at once, and revoke course access.
- Content Types: Create Lessons, Topics and Quizzes to become part of larger Courses that students will progress through.
- Drip Content: You can set a schedule and then auto-send content to your students. You can also opt to have a notification email sent when content goes out.
- Engagement Triggers: You can interact with your students based on the actions they take. For example, if a student has fallen behind, you can send them encouragement to keep going.
- Reward System: Offer badges, certificates and points to learners who complete quizzes, tasks and courses.
My Experience Using LearnDash
In this section, I’m going to talk about my experience using LearnDash for the first time. I’ll go over the key areas that had the biggest learning curves, and then I’ll offer my broader views of LearnDash once I got the hang of it.
The Demo
You don’t have to decide that LearnDash is for you based on information online. With the free-to-use demo, you can experience LearnDash firsthand before making any decisions.
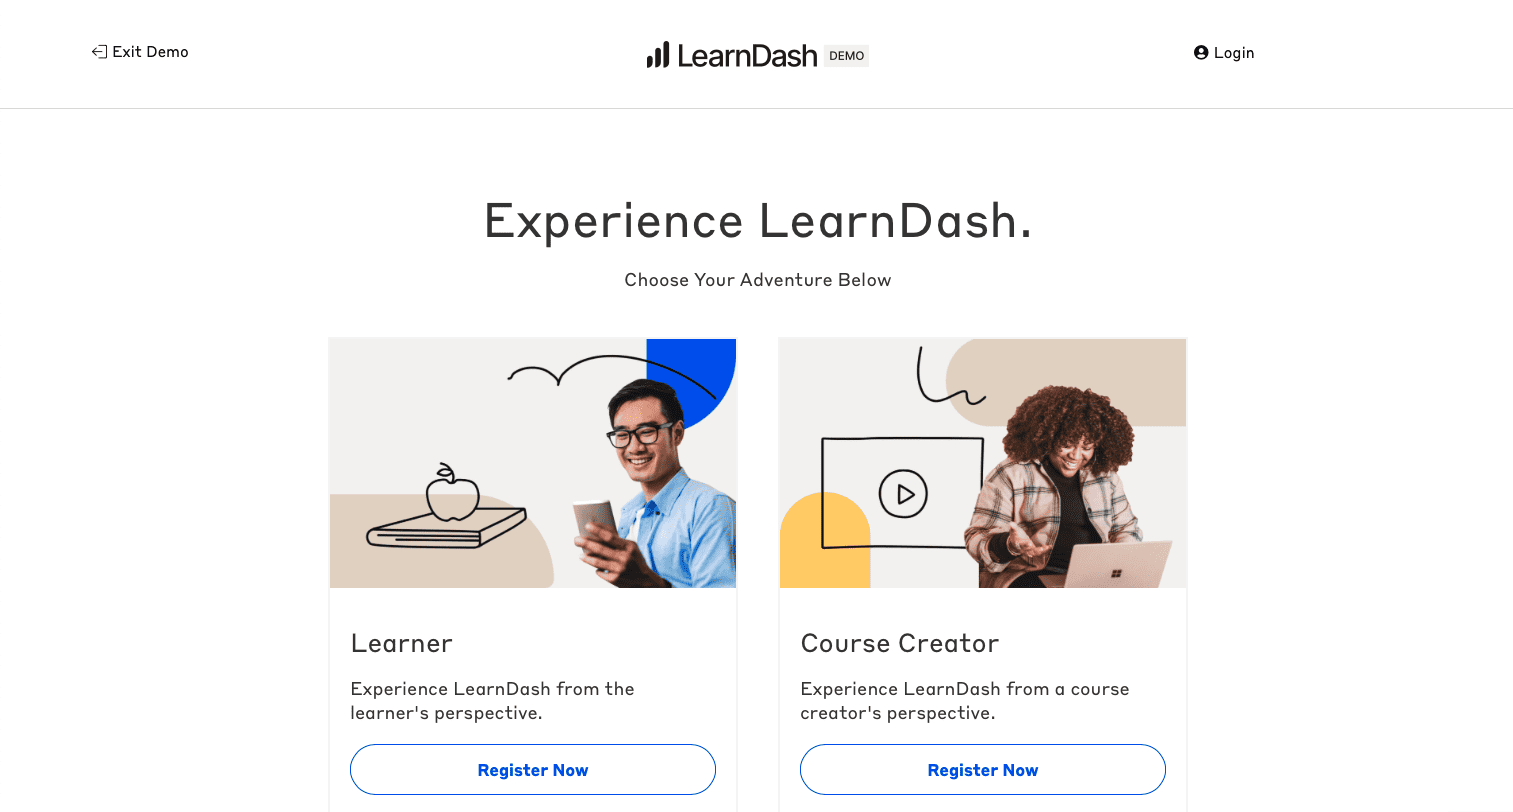
You provide your email address — no credit card needed — and the system builds a demo area for you to explore the tool.

They don’t bombard you with communication, either. You don’t have to talk to a live agent (or even a bot), you don’t have to wait to be accepted into the demo… none of that. That’s definitely easier than other tech tools, which tend to make you jump through hoops for a trial.
The most trusted WordPress LMS plugin, created by learning industry professionals with Fortune 500 experience. Transform your site in less than 5 minutes.
The WordPress Dashboard and a LearnDash Overview
From the WordPress dashboard, the LearnDash LMS link is on the top left, right under Dashboard. Clicking that brings you to the LearnDash Bootcamp page, which is an introduction to the tool. Also, under the LearnDash LMS link on the left of the dashboard is a list of different components of the tool.
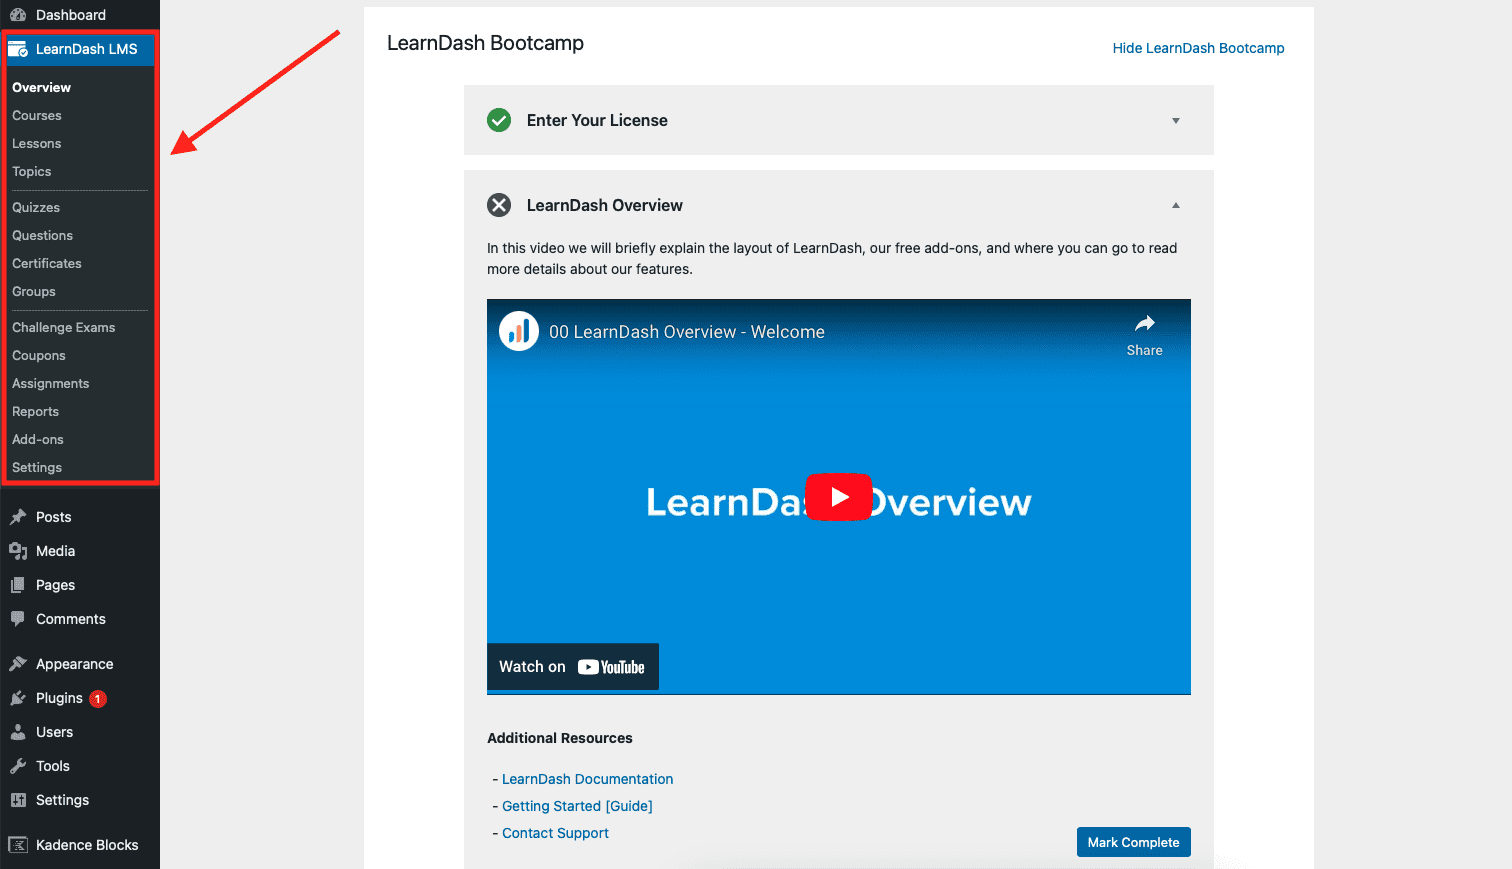
The LearnDash Overview video is short, under two minutes. This is a relief, because sometimes intro videos can be so long that they’re an instant turn-off to the tool. There are a number of videos underneath that Overview video, but you can still get started pretty quickly because you’ll be more familiar with the tool’s layout. Here are the topics of the other videos on this page:
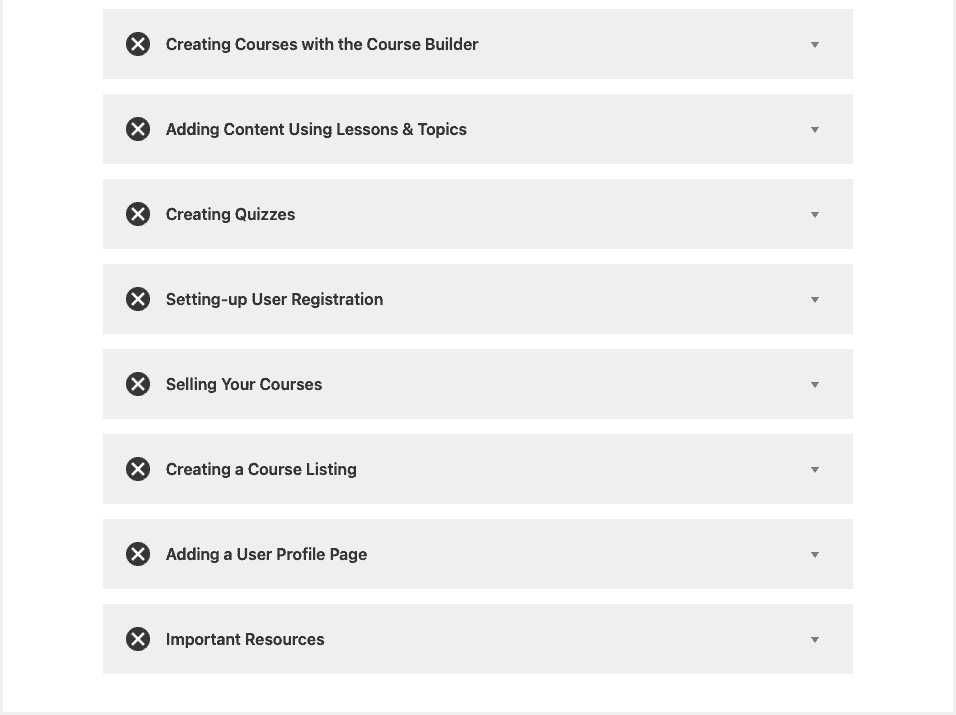
Underneath that is a Tips and Tricks section, news announcements, documentation and ways to contact LearnDash support.
My suggestion is that you watch the short Overview video and then play around with LearnDash on your own. If something doesn’t make sense or you want to make sure you didn’t miss anything, go back and watch those other videos. But if you try to watch everything first, without even experiencing LearnDash yet, the information probably won’t stick — and it could get overwhelming.
Adding, Updating and Navigation Your Courses
Adding courses is a little confusing at first, especially if you’re used to traditional WordPress posts and pages. This is what it looks like when you have course videos added:
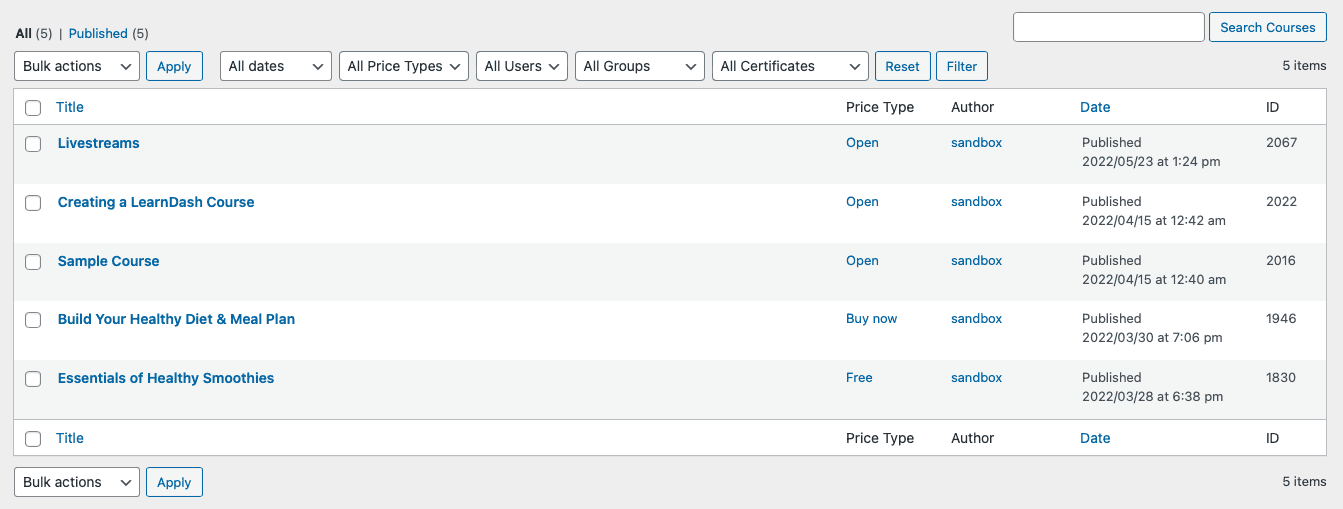
To edit the page, you can click on Edit or Builder.

The only difference is that the one you choose will take you to a different tab of the page you’re adding. Edit will take you to the Course Page tab, and Builder will take you to the Builder tab.

The Course Page is where you’ll put the page title. The Builder section is where you can update course content using the WordPress Gutenberg block editor.
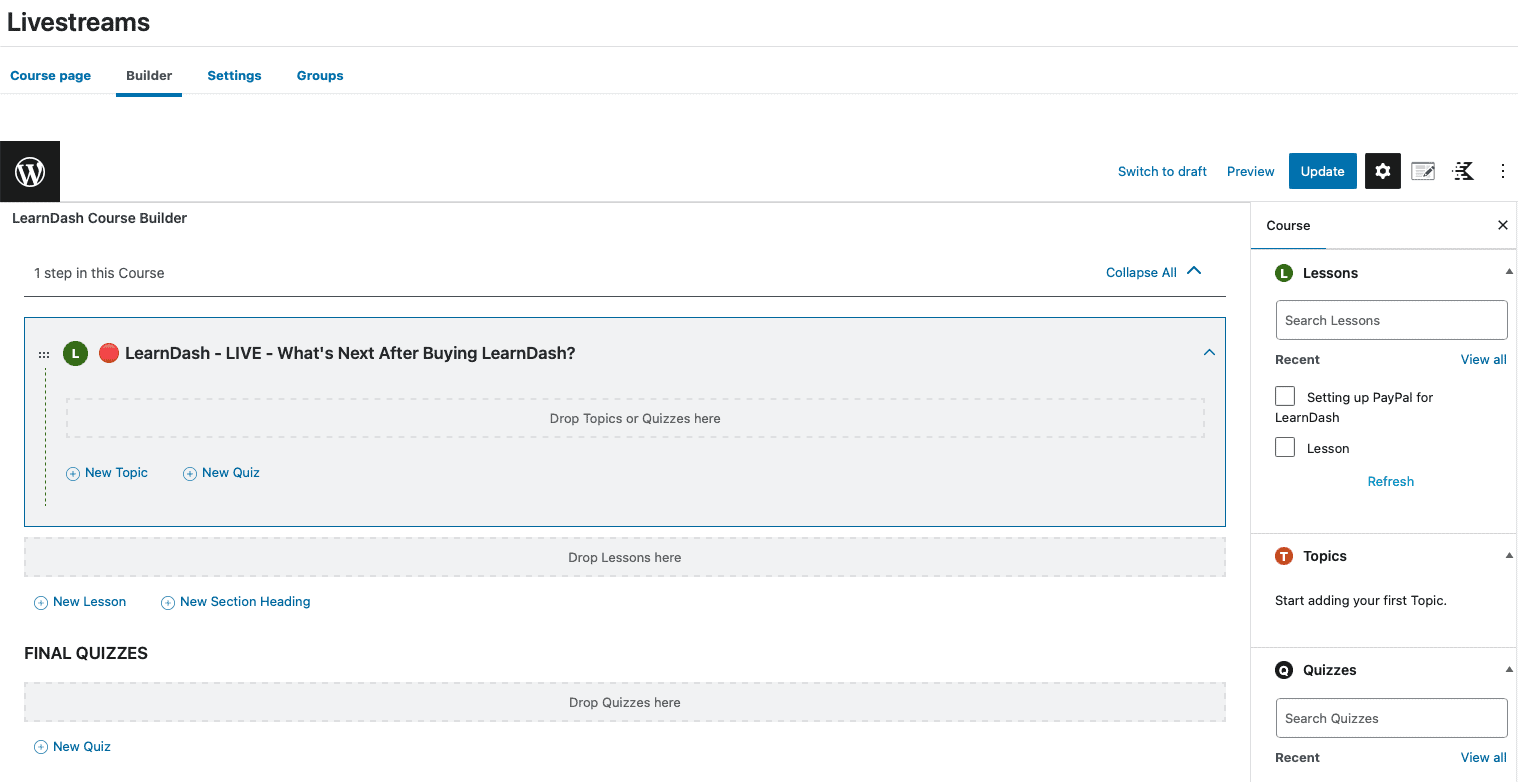
To add a new course, you simply click the Add New button on the top right of the page, and you’ll have a blank slate with Course Page, Builder, etc.
The Settings tab has the most straightforward information I’ve come across so far when using LearnDash. It’s very easy to understand the different options. You can do things like:
- Make the course free but protect it so that registration is required.
- Require that learners purchase the course with a recurring fee.
- Set prerequisites to complete before the course can be taken.
- Designate how many points are awarded when the learner completes the courses.
- Set an access period that will expire after a certain number of days.
Again, this is all very easy to understand and set up, so there’s no learning curve.
Lessons, Topics and Quizzes
This is a good example of a time when it pays to watch a training video: I had no idea what the difference between Courses, Lessons and Topics was, so I watched the Adding Content Using Lessons and Topics video.
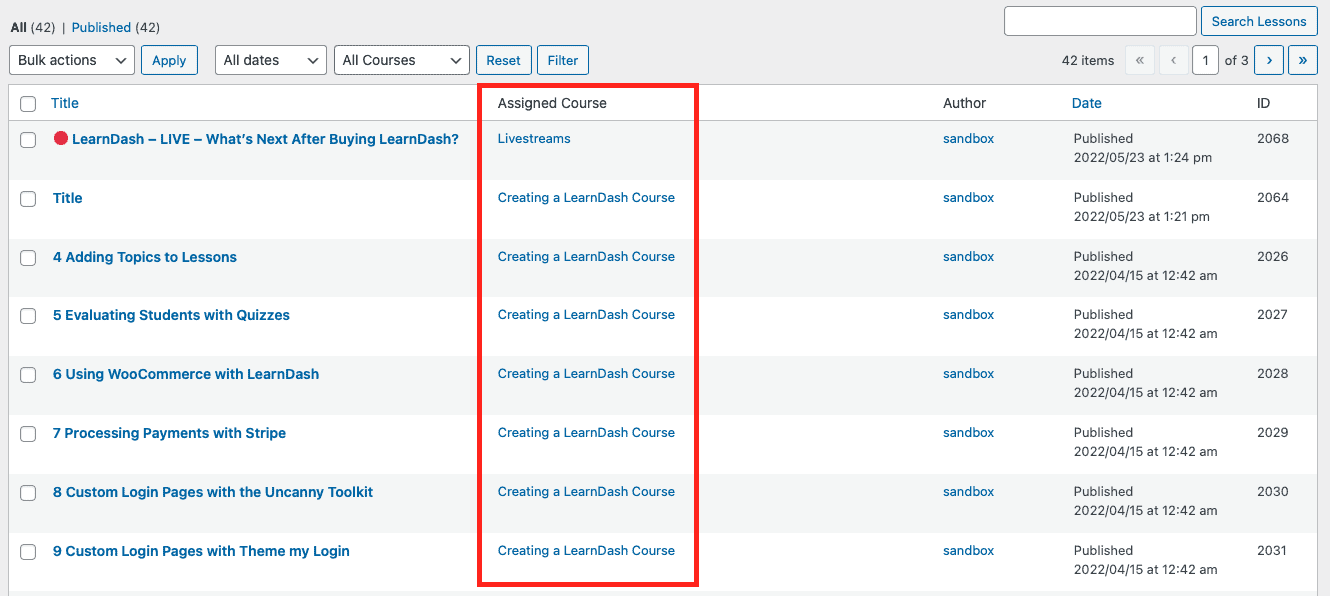
It turns out that Lessons and Topics are parts of courses. Topics can be added to Lessons, and Lessons are added to Courses. From the Lessons page, you can see the course it belongs to under the Assigned Course column:
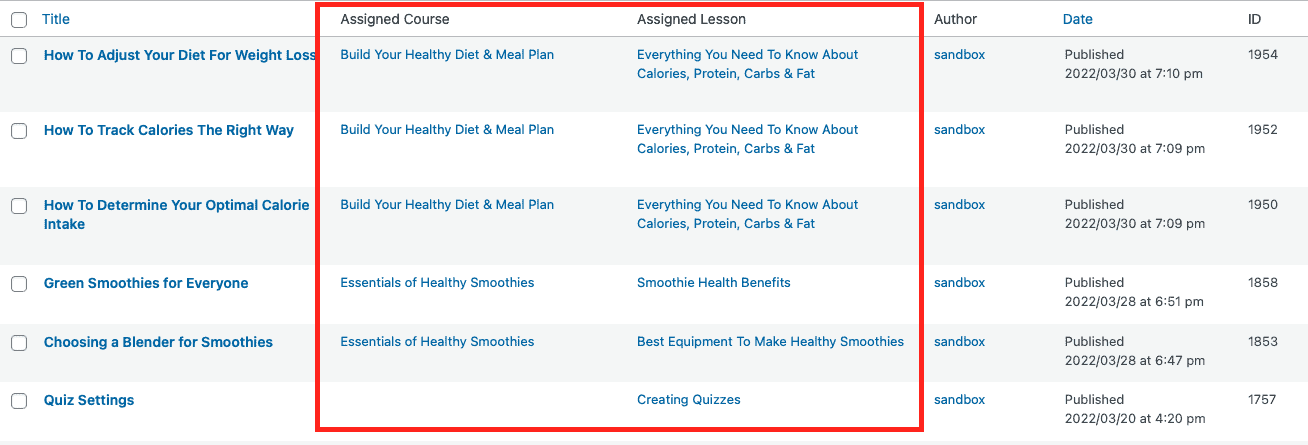
From the Topics page, you can see the Assigned Course and Assigned Lesson is belongs to:
Adding or updating a Lesson or Topic is easy. It works like any other WordPress page, pretty much. You add a page name, write an intro (optional) and then add whatever content you want using Gutenberg blocks.
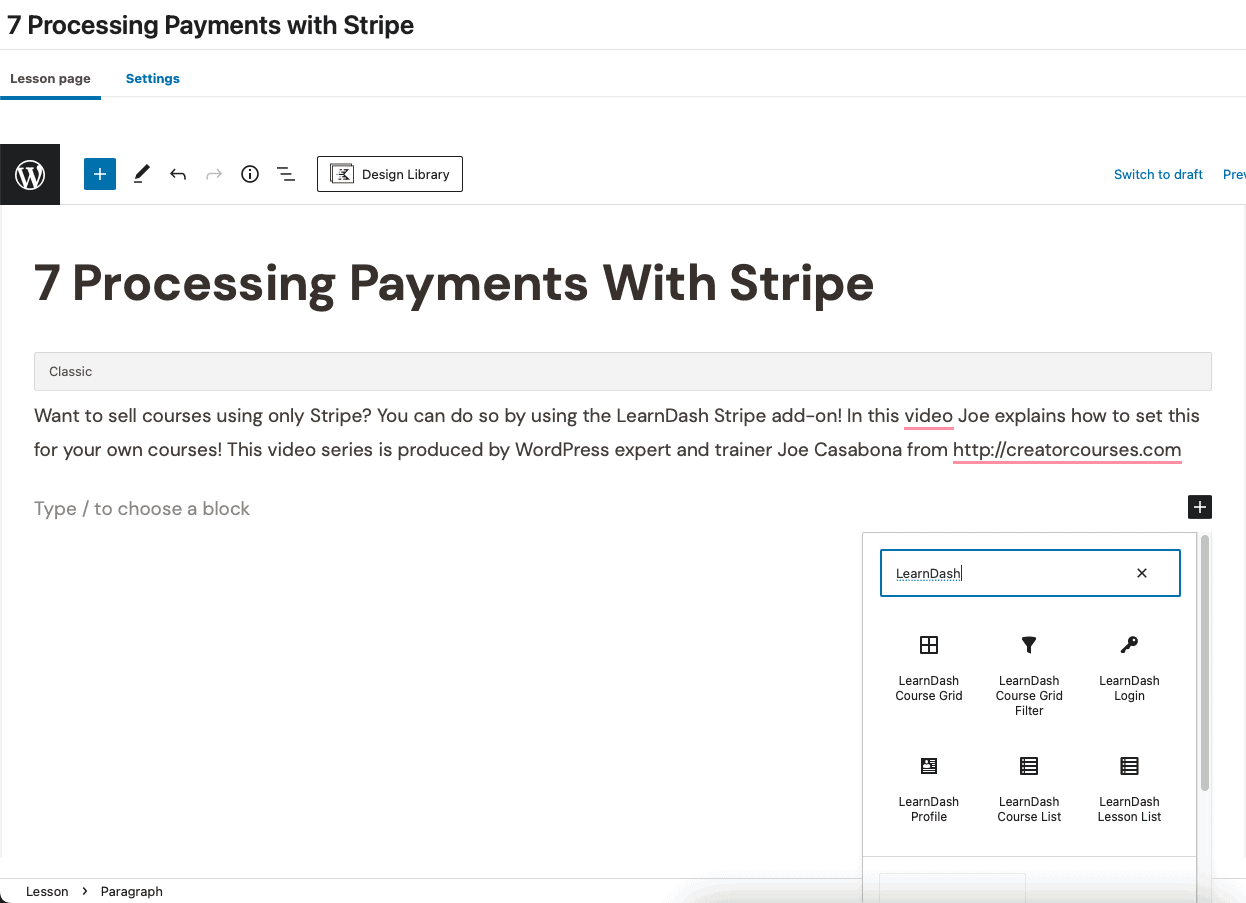
If you click the Settings tab at the top of the editor page, you can make a lot of decisions about the content, including:
- Which support materials the lesson requires.
- If the video has to be watched so the student can progress through the course.
- When the lesson will be released.
Quizzes work similarly. They fall under Lessons, just like Topics do, and you can use the LearnDash Quiz Builder to make a quiz with different answer types.
You’ll add a question, which will also be added to the Questions page, and you can then edit it to choose the answer type (multiple choice, fill-in-the-blank, essay, etc.). Depending on the answer style, you may have to add the correct answer, too.
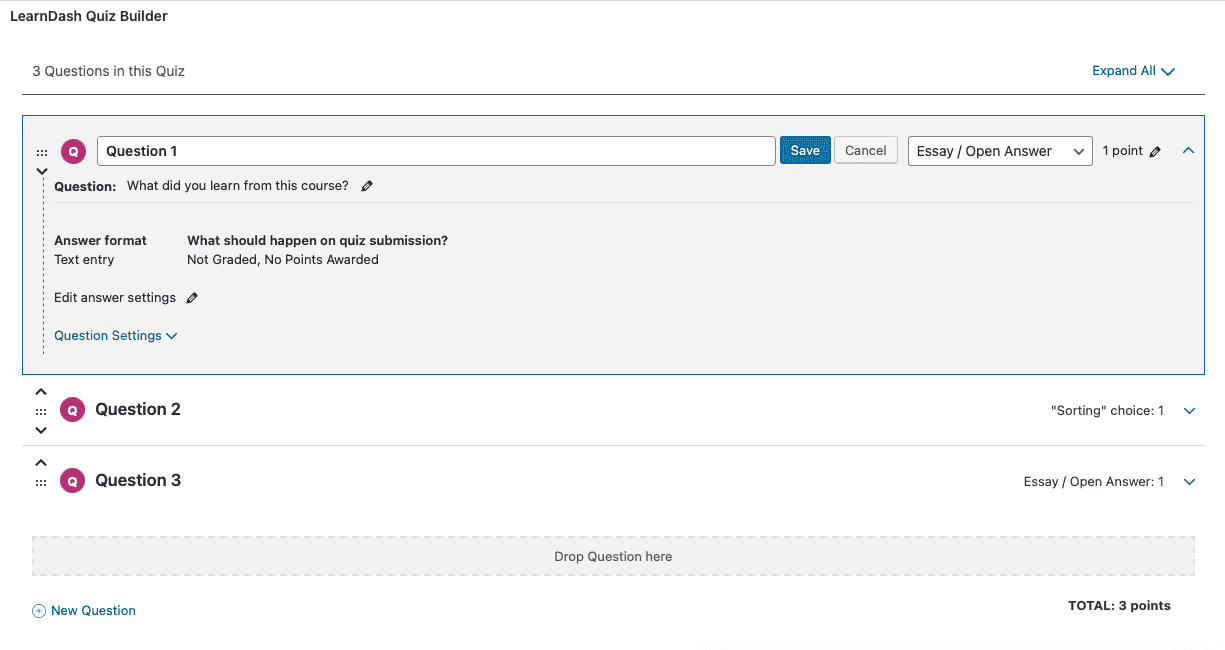
All in all, it’s a breeze to use. There’s enough detail to create the quiz exactly how you want it but not so much to do that it’s difficult.
Other LearnDash Areas and Add-Ons
The rest of the LearnDash areas are similar, meaning they’re easy to understand and use, and they all function about the same. There’s a main section where you can add or update content, and there’s a Settings tab at the top of the editor where you’ll make decisions about that content.
The Add-Ons page has a lot of options, including payment gateways, WooCommerce integration and different ways to interact with learners. There are both LearnDash add-ons and third-party add-ons, too.
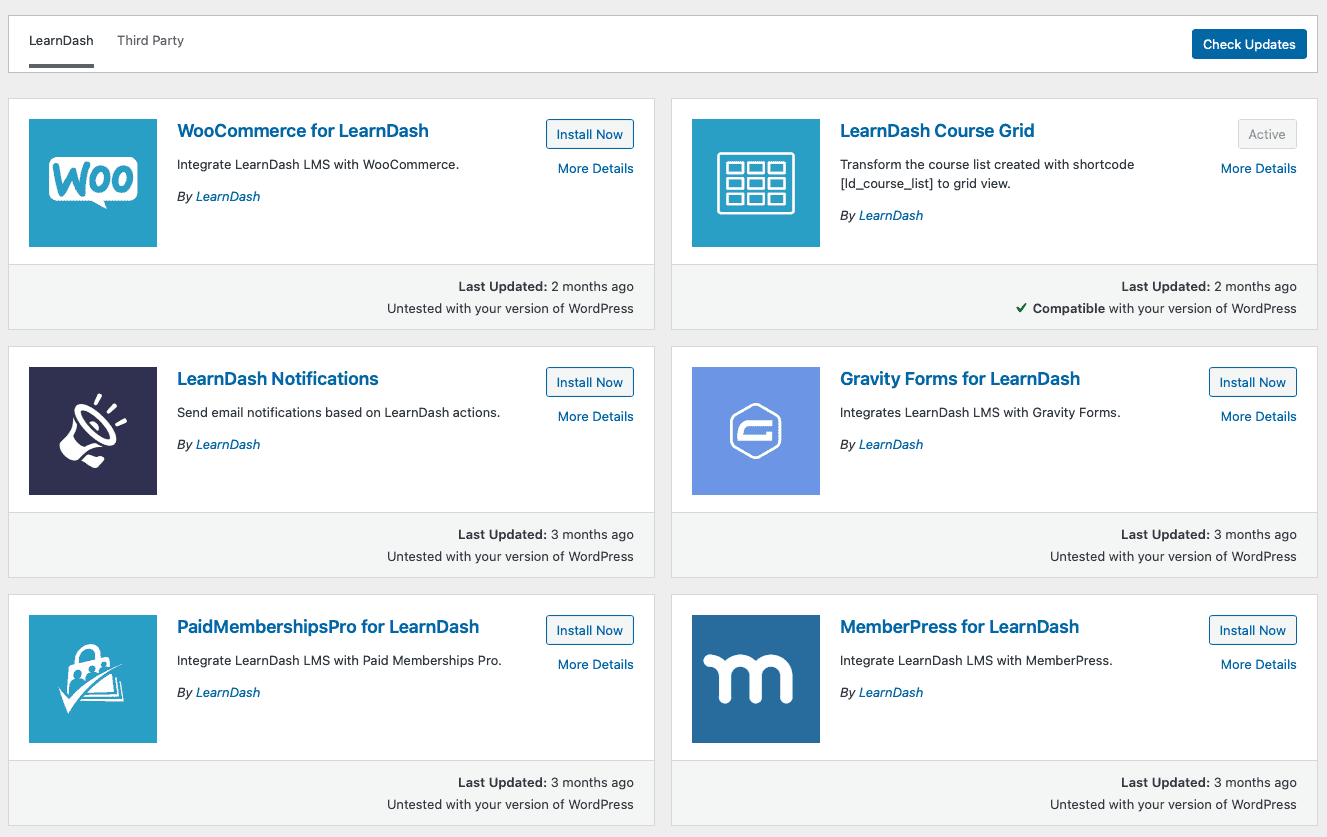
This can be overwhelming at first, and adding a bunch of plugins at once can slow down your site and give you too much to work with. My suggestion is to start with LearnDash out of the box. As you go along, you’ll notice that you’re missing functionality you wish you had. That’s a good time to go to the Add-Ons page to see if there’s a solution.
Doing it this way prevents overload for both your brain and your site!
Settings
The Settings page (the last link on the dashboard sidebar) has a lot of options, and it’s important to spend time here so that your courses function the way you want. You can choose design elements, payment gateways, registration options and more.
There’s a good amount to go through here, but none of it is hard to understand, so you won’t get stuck at this stage.
My suggestion is to do this after you’ve added course material. You’ll have a better idea of how you want your LMS to function once the content’s there. Plus, if you start with the Settings page, you could get caught up making a bunch of small decisions when you could be handling the bigger tasks first.
LearnDash Pros and Cons
Pros
- The demo is extremely easy to get started with. LearnDash doesn’t put up any barriers to entry, other than asking for your email address.
- LearnDash functions very similarly to standard WordPress, which makes the learning curve much easier if you already have WordPress experience.
- Once you get the hang of how the LearnDash modules and pages function, they’ll all be easy to navigate.
Cons
- There are a fair amount of typos in the software, which is never a good sign to me.
- The sandbox website that I used to test the tool had plugins that couldn’t be updated. Errors like that in the demo made me nervous about what would happen if it were installed on my own site.
- There’s a lot to learn, and it takes a while to decide how all of your content will be linked to and interact with other content.
Moodle
Moodle’s open-source learning platform is officially called Moodle LMS. The software lets you build courses and add all types of content to them. You can also manage users and grades, decide what is required to fully complete a course, and offer badges for students to earn.
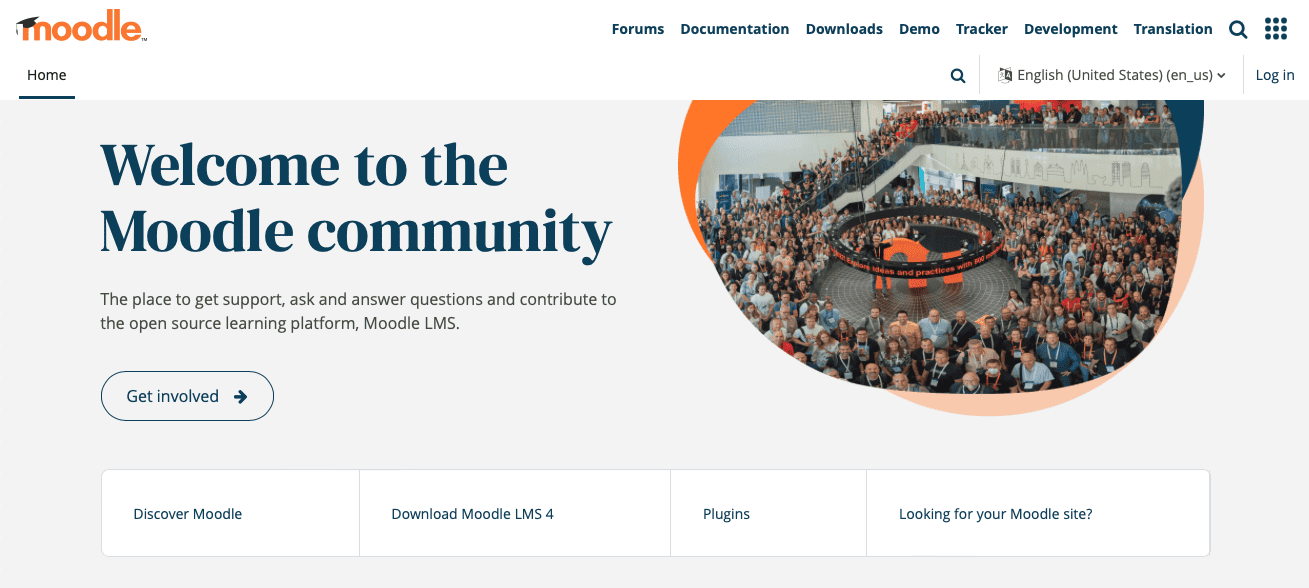
Moodle gives you plenty of control over your classes, and you can customize the LMS for whatever your teaching and whoever you’re teaching it to.
Moodle is well-known for offering an active learning experience to students, and built-in tools like chat and forums promote engagement and interaction. Also, like LearnDash, Moodle doesn’t make you do anything extra to get started with the demo. You just log in and start playing.
Moodle gives you a lot of control over your courses and ways to interact with students:
- You can quickly turn off Edit Mode to see what the course looks like to students.
- You’re able to organize all of your quiz questions and a lot of your content into dedicated “banks.”
- You can decide what’s required to take the course and how students earn badges along the way.
Now let’s get into Moodle’s key features.
Key Features of Moodle
- Calendar: The Moodle dashboard has a timeline and a calendar to keep track of events and your schedule.
- Edit Mode Toggle: Toggling the Edit Mode on and off lets you make changes to the course and then see what it looks like when you’re done with updates.
- Courses Organization: You can set courses as favorites or remove them from view to keep your My Courses overview page organized.
- Build Courses with Content: There are several types of content to add to a course, ranging from chat and forums to written lessons, quizzes and multimedia.
- Content Library: You can organize all of your quiz questions and other content into libraries (or “banks”).
My Experience Using Moodle
Installation and the Moodle Demo
Right off the bat, installing Moodle is a headache. Here’s the main Installation page, which has links to an Installation Quickstart page and an Installing Moodle page. The quick installation is for people who have experience with web server applications, so that leaves me out. And the regular installation page has a list of contents that’s long enough to intimidate me:
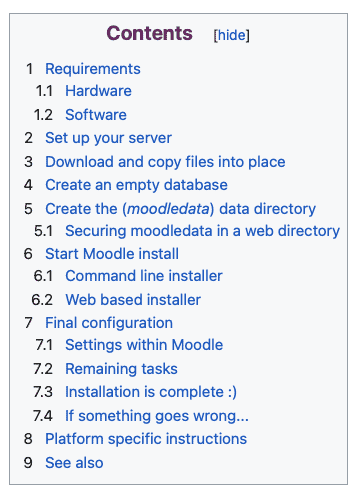
Plus, I’m nervous to install unfamiliar software on my Mac. For now, I’m going to use the Moodle demo, which will also give me more points of comparison between this and LearnDash.
The demo isn’t as enticing as LearnDash’s either, unfortunately. It resets every hour, which gives you a very limited amount of time to experiment with it, and the webpage says that other people can be using the demo site at the same time, which “can result in unexpected things happening.” Once your time is up, you’re logged out automatically. Yes, you could log back in, but any flow you’re in will be interrupted.
The Welcome Page and Dashboard
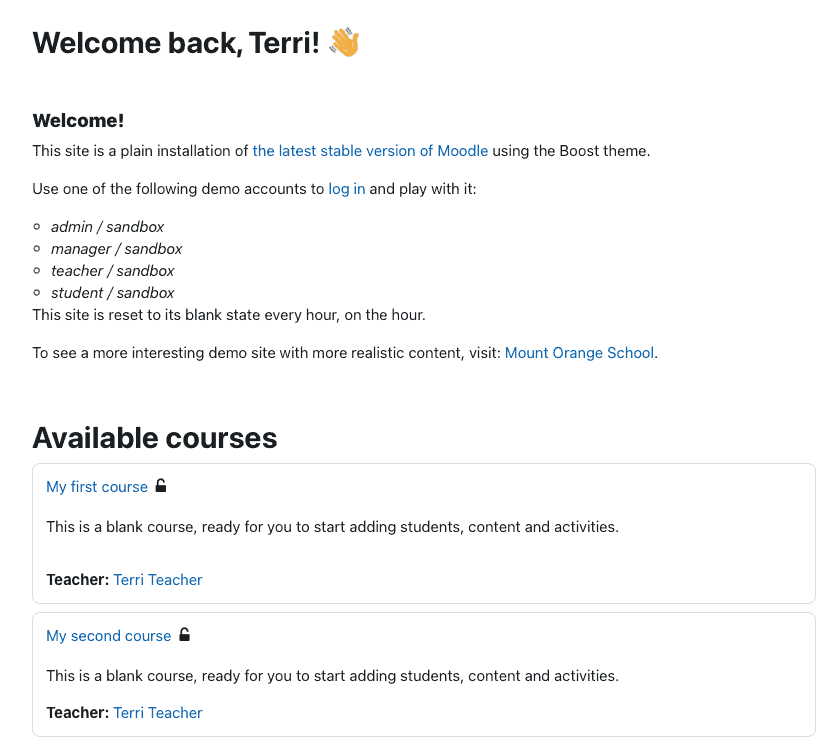
When you log in to Moodle, there’s a greeting and a list of your courses:
The Dashboard has a Timeline at the top and a Calendar underneath:
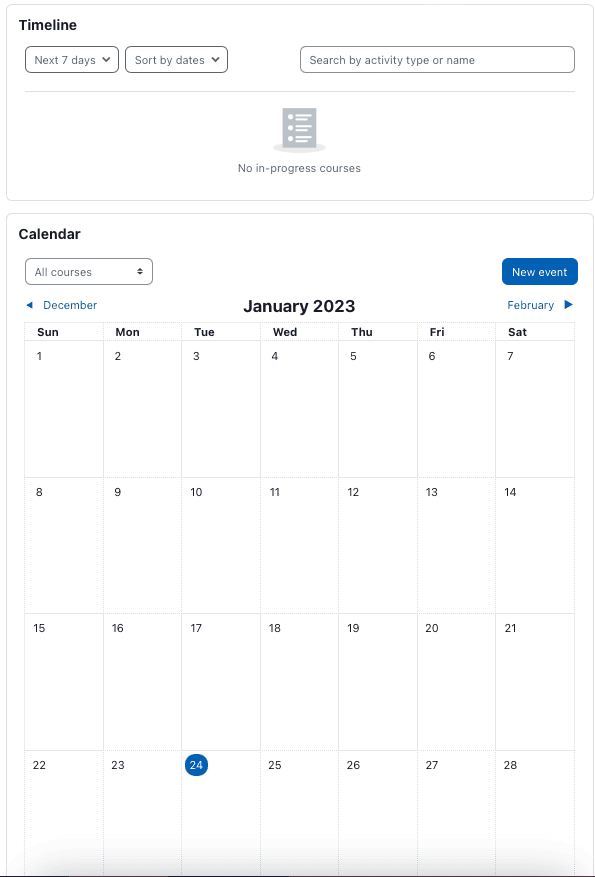
I’m not really sure what these are for. I went into My Courses and updated the start and end date for a course, and nothing showed up on the calendar. I suppose it could be for students who will be taking the course? You can add events, but that would just make this a standard calendar for organizing events or tasks.
My Courses
Next to the Dashboard link is a My Courses link. Clicking it takes you to an overview page of the courses you’ve set up. Clicking the course name opens it up so you can see your content and make changes.
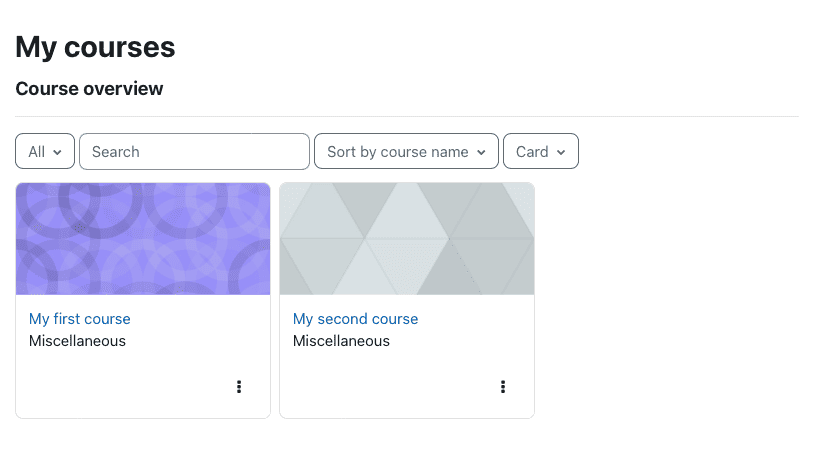
It took me a while to figure out that you have to toggle on Edit Mode on the top-right in order to add content.

Once you do that, there are blocks underneath each section of the course where you can add content:
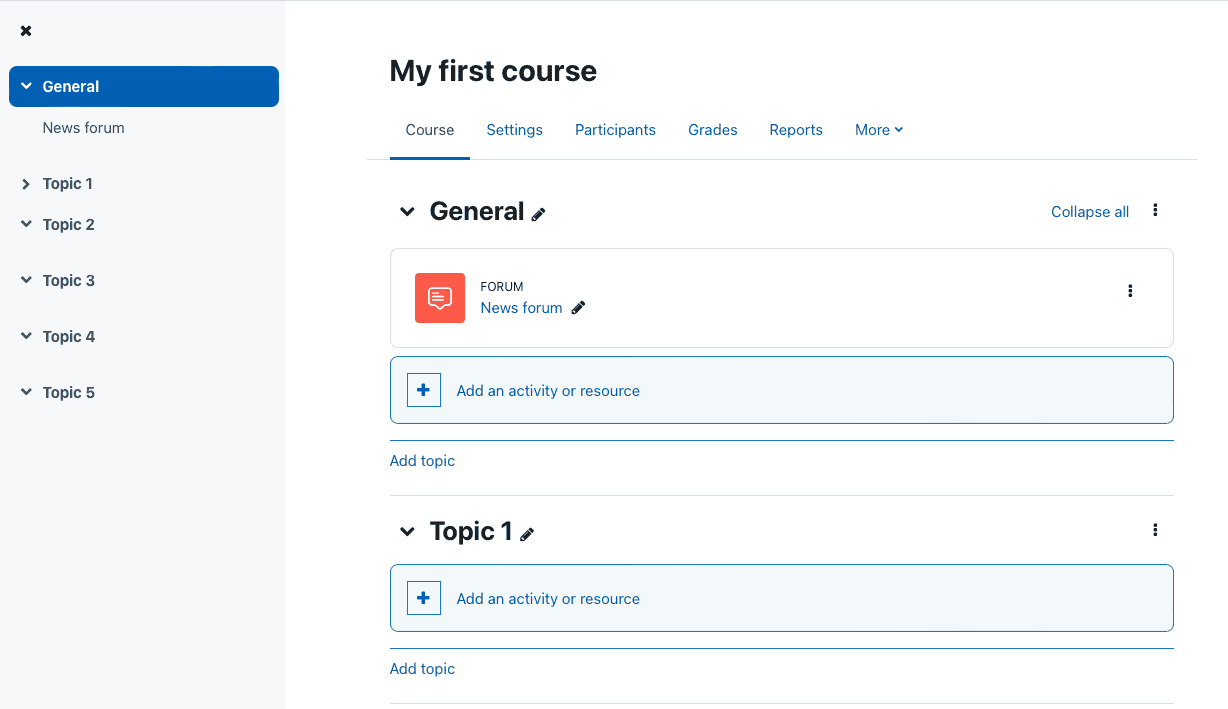
Lessons are less robust in Moodle than in LearnDash, but that has more to do with naming conventions than anything else. For example, in LearnDash, Lessons fall under Courses. In Moodle, Topics fall under Courses, so they’re more similar to LearnDash’s Lessons. And Moodle’s Lessons are more similar to LearnDash’s Topics.
This may be an easier way to understand what I mean. Here’s the content structure in each tool, going from broad to narrow:
- LearnDash: Courses, Lessons, Topics
- Moodle: Courses, Topics, Lessons
You can change the name of a topic by clicking on the Pencil icon to the right of it. Then you can click the Plus Sign to add content. There are a good amount of content options, including assignments, forums, lessons, quizzes and workshops.
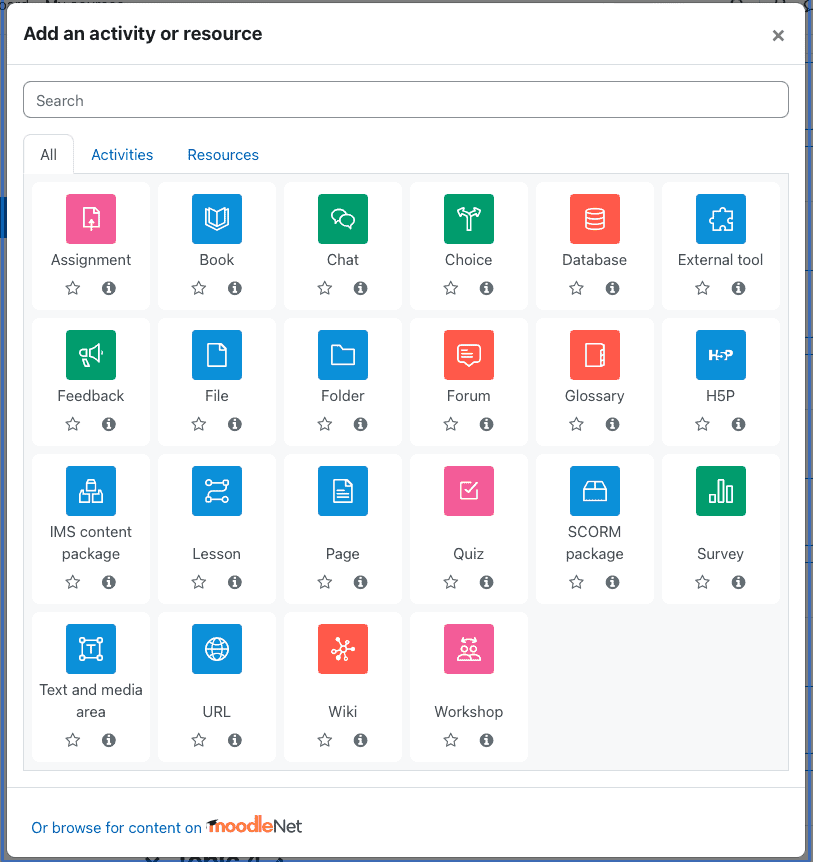
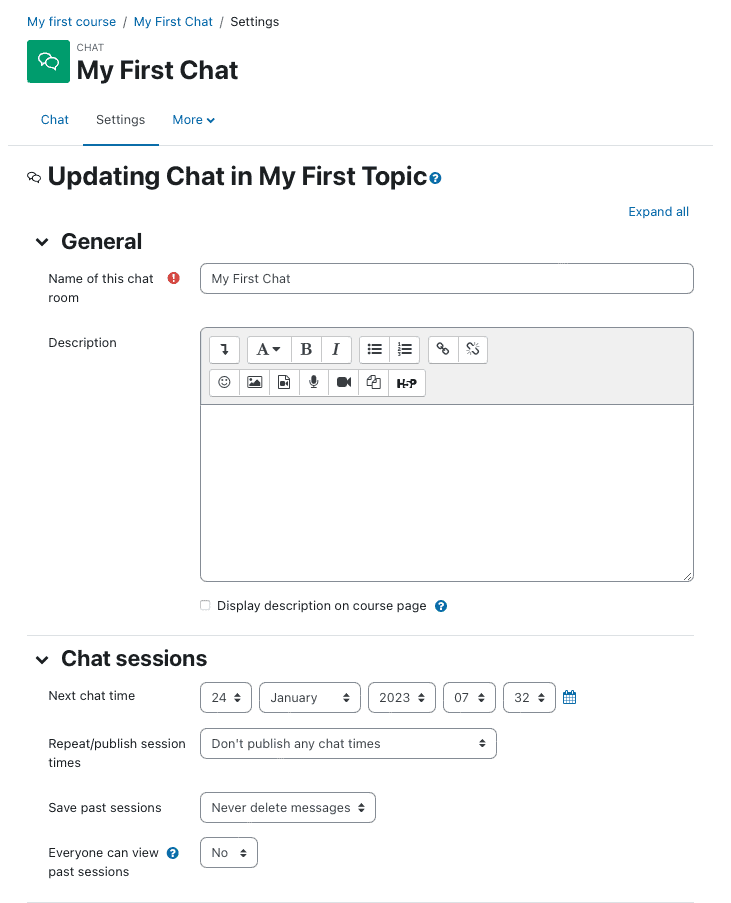
You can add these activities and resources to build out the different sections of the course. They all function relatively the same, at least in terms of layout. When you add an activity or resource, you’ll be brought to a setup page. You’ll create a name, add a description and then select settings for the content. You can also enroll students, add grades, process reports and more.
When you want to see what your courses look like when you’re not editing them, you can turn off Edit Mode. This is what the page will look like:
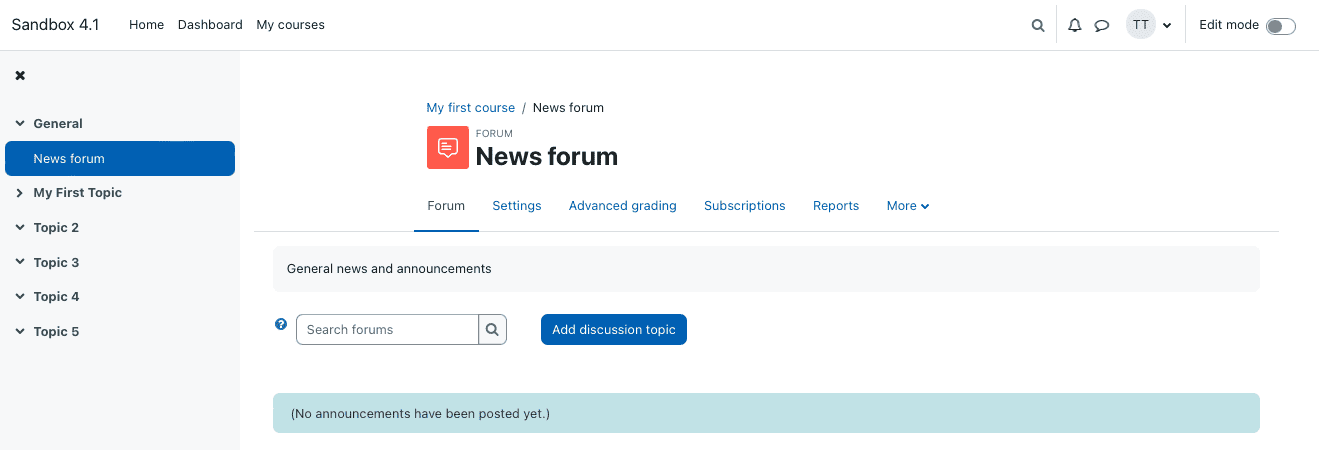
There’s also a More drop-down menu under the course name. To make changes here, you’ll need to toggle Edit Mode back on.
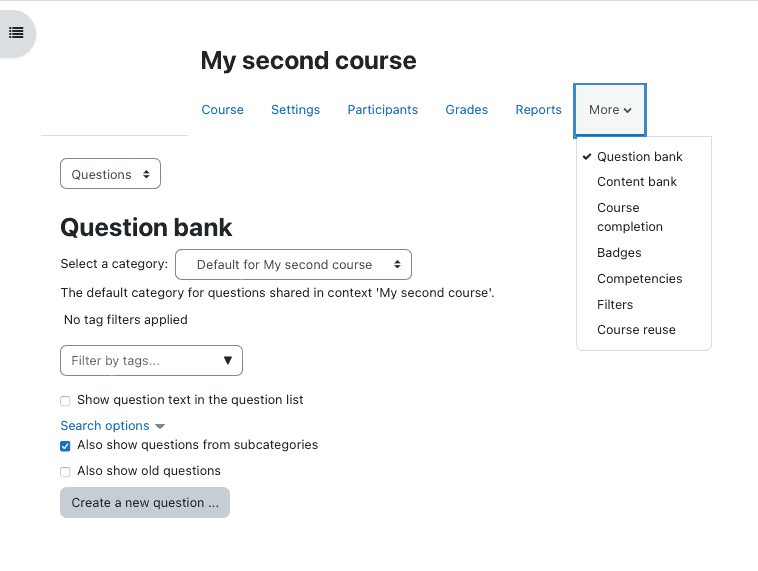
This is where your question and content banks are, where you determine what it takes to complete the course, where you add badges, etc.
It’s an important area for educators, but it’s not very easy to understand. For example, if you click on Content Bank from the drop-down, you’ll be brought to this page, where you can add different types of content:
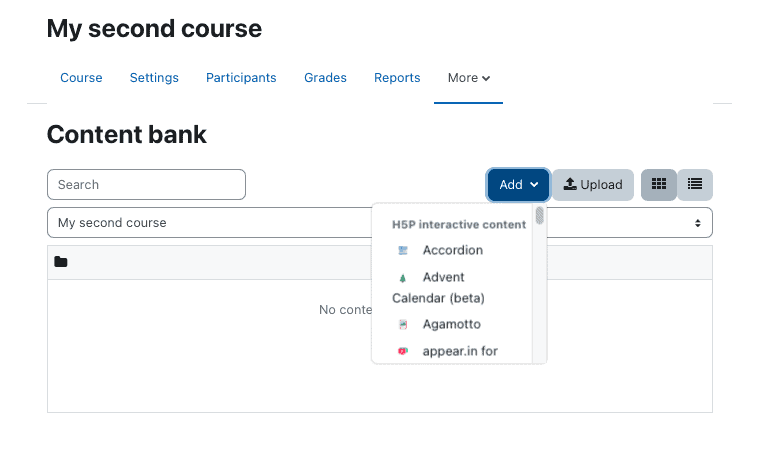
The drop-down menu is small and difficult to read, and you have to scroll a lot to explore all of the content options. It’s not obvious what many of them are, so unless you know exactly what you want to add (and what it’s called), you could spend a lot of time here just figuring it out.
Moodle Pros and Cons
Pros
- Moodle is free, open-source software, so you don’t need to pay to access its features.
- The interface is slim and easy to navigate, which means that getting started isn’t confusing.
- Each content type follows a similar format. You’ll add a title and description, then set up specifics for that content type.
Cons
- Installation is quite difficult, and you may need someone with experience to install it for you or at least guide you through it.
- The timeline and calendar on the Dashboard don’t serve much of a purpose.
- Adding content to the bank is difficult because the drop-down menu is hard to read and doesn’t have easy-to-understand options.
Decision-Making Tips When Looking for a Learning Management System
There are a number of considerations when choosing the right LMS for you. Here’s what I suggest you consider before spending time and/or money setting up your course:
Existing Knowledge
It’s important to decide how much you already know and/or how much you’re willing to learn.
A tool like LearnDash is better for beginners than Moodle is, but it comes at a price. If you haven’t designed a course before or you’re looking for the most straightforward way to get one up and running quickly, this is the best choice.
Moodle is less robust and more geared toward experienced course designers, but if you can’t use it effectively, the fact that it’s free isn’t going to get you very far. If you already have the knowledge necessary or you have the interest and time to learn the ropes before you start using it, Moodle is definitely the more cost-effective choice.
Whether you’re considering Learn Dash vs Moodle or other LMS options, comparing them in this way will be helpful.
Features
There are some features that are nice to have (like Moodle’s timeline and calendar), and there are features that are must-haves, like the ability to see student progress. Here are the features to look for:
- Course Progress: This is how you’ll see student performance, which you can use to motivate those that need it most — and reward over-achievers, too.
- Email Automation: Automatic emails will be sent to admins, instructors and students to alert them to new course material, earned certificates, etc.
- Tests: A quality LMS will incorporate exams and quizzes so that you can assess how well your students understand the material and decide whether or not they’re ready to move forward.
- User Management: You’ll want a way to see everyone who’s enrolled in your course and to manage students individually.
Next, let’s talk about how important usability is.
Usability
When designing a course, the main tool you’ll be working with in your LMS is the course builder. You want to make sure that it’s easy to navigate and use, and that you understand how to add the materials you want. You need to be able to use the course builder to add, update and publish courses, so you definitely don’t want it to be so clunky that it gets in your way of completing your work.
Alternatives to LearnDash and Moodle
There are a lot of learning management systems to consider if you’re looking to create an online course. Here are four top competitors to LearnDash and Moodle.
Cypher Learning
Cypher Learning is best for educators who want to add e-commerce functionality to their online courses. Another excellent feature of Cypher is that students can set goals, which enables the AI to set a learning path to meet those goals. Unfortunately, pricing isn’t transparent, and you’ll have to speak with a sales rep to find out how much you’ll pay.
LearnPress
Like LearnDash, LearnPress is a WordPress plugin. It’s designed for beginners, and you don’t need any code to use it. It’s also free, and you can pay for premium add-ons if you want to add features. One complaint about LearnPress is that its documentation is limited and support is lacking.
TalentLMS
TalentLMS is best for small businesses, and it’s super easy to use, thanks to drag-and-drop functionality. Plus, if you have a small team of under five people, you can use the software for no cost. Unfortunately, you will have to pay if you want to use your own domain name, and you may also run into upload limits.
FAQs
Question: What is the Main Function of LMS?
Answer: The main function of an LMS is to create, publish and manage learning courses or courses. LMS software covers the full gamut of a course for students, from administrative and tracking tools to recording progress, enhancing courses, and engaging with students.
Question: Is LearnDash User-Friendly?
Answer: Yes, LearnDash is very user-friendly, especially if you’re already familiar with WordPress. The LearnDash plugin integrates into WordPress and lets you edit your course pages in much the same way that you edit WordPress pages and posts. There are enough options to make your courses robust without there being so many that it’s confusing or overwhelming to use.
Question: What is the Difference Between Moodle and WordPress?
Answer: The difference between Moodle and WordPress is that Moodle is a learning management system (LMS) while WordPress is a content management system (CMS). Online courses are one of the types of content you can integrate with WordPress using an LMS plugin. Moodle, however, is stand-alone, open-source software; it’s not part of WordPress.
Compare LearnDash vs Moodle: Wrapping Up
I really enjoyed the experience of using LearnDash. I found it easy to figure out and use, and I love how it integrates with WordPress. As a regular WordPress user, I was already familiar with how pages functioned, and getting up to speed with LearnDash didn’t take more than a minute or two. Also, for such a simple-to-use tool, it had a lot of features, so I didn’t fear that I’d be stuck making a simplistic course.
Moodle was another animal. For people with experience building courses or doing some of the more advanced steps necessary to get it set up, it could be an excellent option. You can’t beat the free price tag, and with the right dedication, I’m sure you could build out a great course. However, I didn’t find it nearly as straightforward to use as LearnDash, and that made a big difference to me.
If you’re on the hunt for an LMS, a great way to explore them and determine which one is best for you is to take advantage of a demo or free trial. You can poke around the software to get a feel for how it works before paying for it or uploading any coursework.
The most trusted WordPress LMS plugin, created by learning industry professionals with Fortune 500 experience. Transform your site in less than 5 minutes.


