

- Tool Overview: A Quick Glance
- PDFfiller and Adobe Tool Overview
- PDFfiller Overview
- Adobe Acrobat Overview
- Tool Comparison Step-By-Step Walkthrough
- Step 1 - Uploading, Creating, and Editing Documents
- PDFfiller Demo:
- Adobe Demo:
- Document Upload, Edit, and Creation Comparison:
- Step 2 - E-Signature & Fillable Field Workflows
- PDFfiller Demo:
- Adobe Demo:
- E-signing Comparison: PDFfiller vs Adobe
- Tool Use Cases
- My Final Takeaway: PDFfiller vs Adobe
Last Updated on May 4, 2026 by Ewen Finser
I’ve lost hours fighting formatting and spacing on documents, which is why I’ve tested out some alternatives that I can rely on for everyday use. Both PDFfiller and Adobe are popular tools, but each allows a slightly different level of editing and other features that I’ve found useful in different scenarios.
Adobe tends to be my go-to when I need a familiar PDF tool with strong compliance features and deeper capabilities. I prefer using PDFfiller when I need something that’s not only easy to use but also ideal for setting up quick signatures and other features that make it more versatile for everyday use.
Most organizations are going paperless and need to support their teams with having tools on hand to make this easy to manage. With both AirSlate’s PDFfiller and Adobe Acrobat being popular choices, it’s important to determine which is best for you and your business based on your main priorities and needs.
The Bottom Line Up Front: If you’re in a rush, here’s my final verdict: I prefer PDFfiller. It’s just easier to learn, it has a lower price point, which is helpful for smaller businesses, and I like the pre-made templates available. Adobe Acrobat has more flexibility when converting files, and it is better in terms of security, as you can individually password-protect documents.
Tool Overview: A Quick Glance
PDFfiller | Adobe | |
Ideal use case | Teams needing a quick, user-friendly, intuitive tool for quick PDF editing and E-Signing | Enterprise teams needing more complex PDF editing and compliance controls. |
Standout features | Easy to use Easy to collect signatures Low learning curve Intuitive and smooth process, budget-friendly No lengthy installation and browser-based | AI-assisted features for summaries, help, form-filling, and more. OCR features and audit trails. |
Pros | Steep learning curve. Requires some upskilling. Lacks premade templates | Advanced features for larger organizations Offers deep editing capabilities Industry standard and trusted by legal teams |
Cons | Limited editing capabilities, not as advanced for complex requirements | Steep learning curveRequires some upskilling. Lacks premade templates |
Pricing | $96-$180 per user per year, depending on team size | $ 240–$288+ per annum, depending on individual or team plans & tiers, with unique pricing. |
Integrations | Google Sheets, Google Drive, Zapier, Slack, Gmail, Pipedrive, and more | Microsoft, Google Drive, Dropbox Business, OneDrive, Box |
Mobile App Capabilities | edit, annotate, sign, request signatures, and share. | edit, annotate, sign, request signatures, and share. |
Document conversion | Supports multiple document conversion formats, including TXT, Word, Excel, PNG, JPG, CSV, PPTx, and more. | Supports multiple document conversion formats, including TXT, Word, Excel, PNG, JPG, CSV, PPTx, and more. |
PDFfiller and Adobe Tool Overview
Before taking a closer look at the direct feature comparisons, it’s important to know what each tool does at a glance. No tools are the same, but they may have some key overlapping functionalities. However, it’s how well they can execute each of these functions that really counts.
Here’s a quick snapshot of PDFfiller and Adobe.
PDFfiller Overview
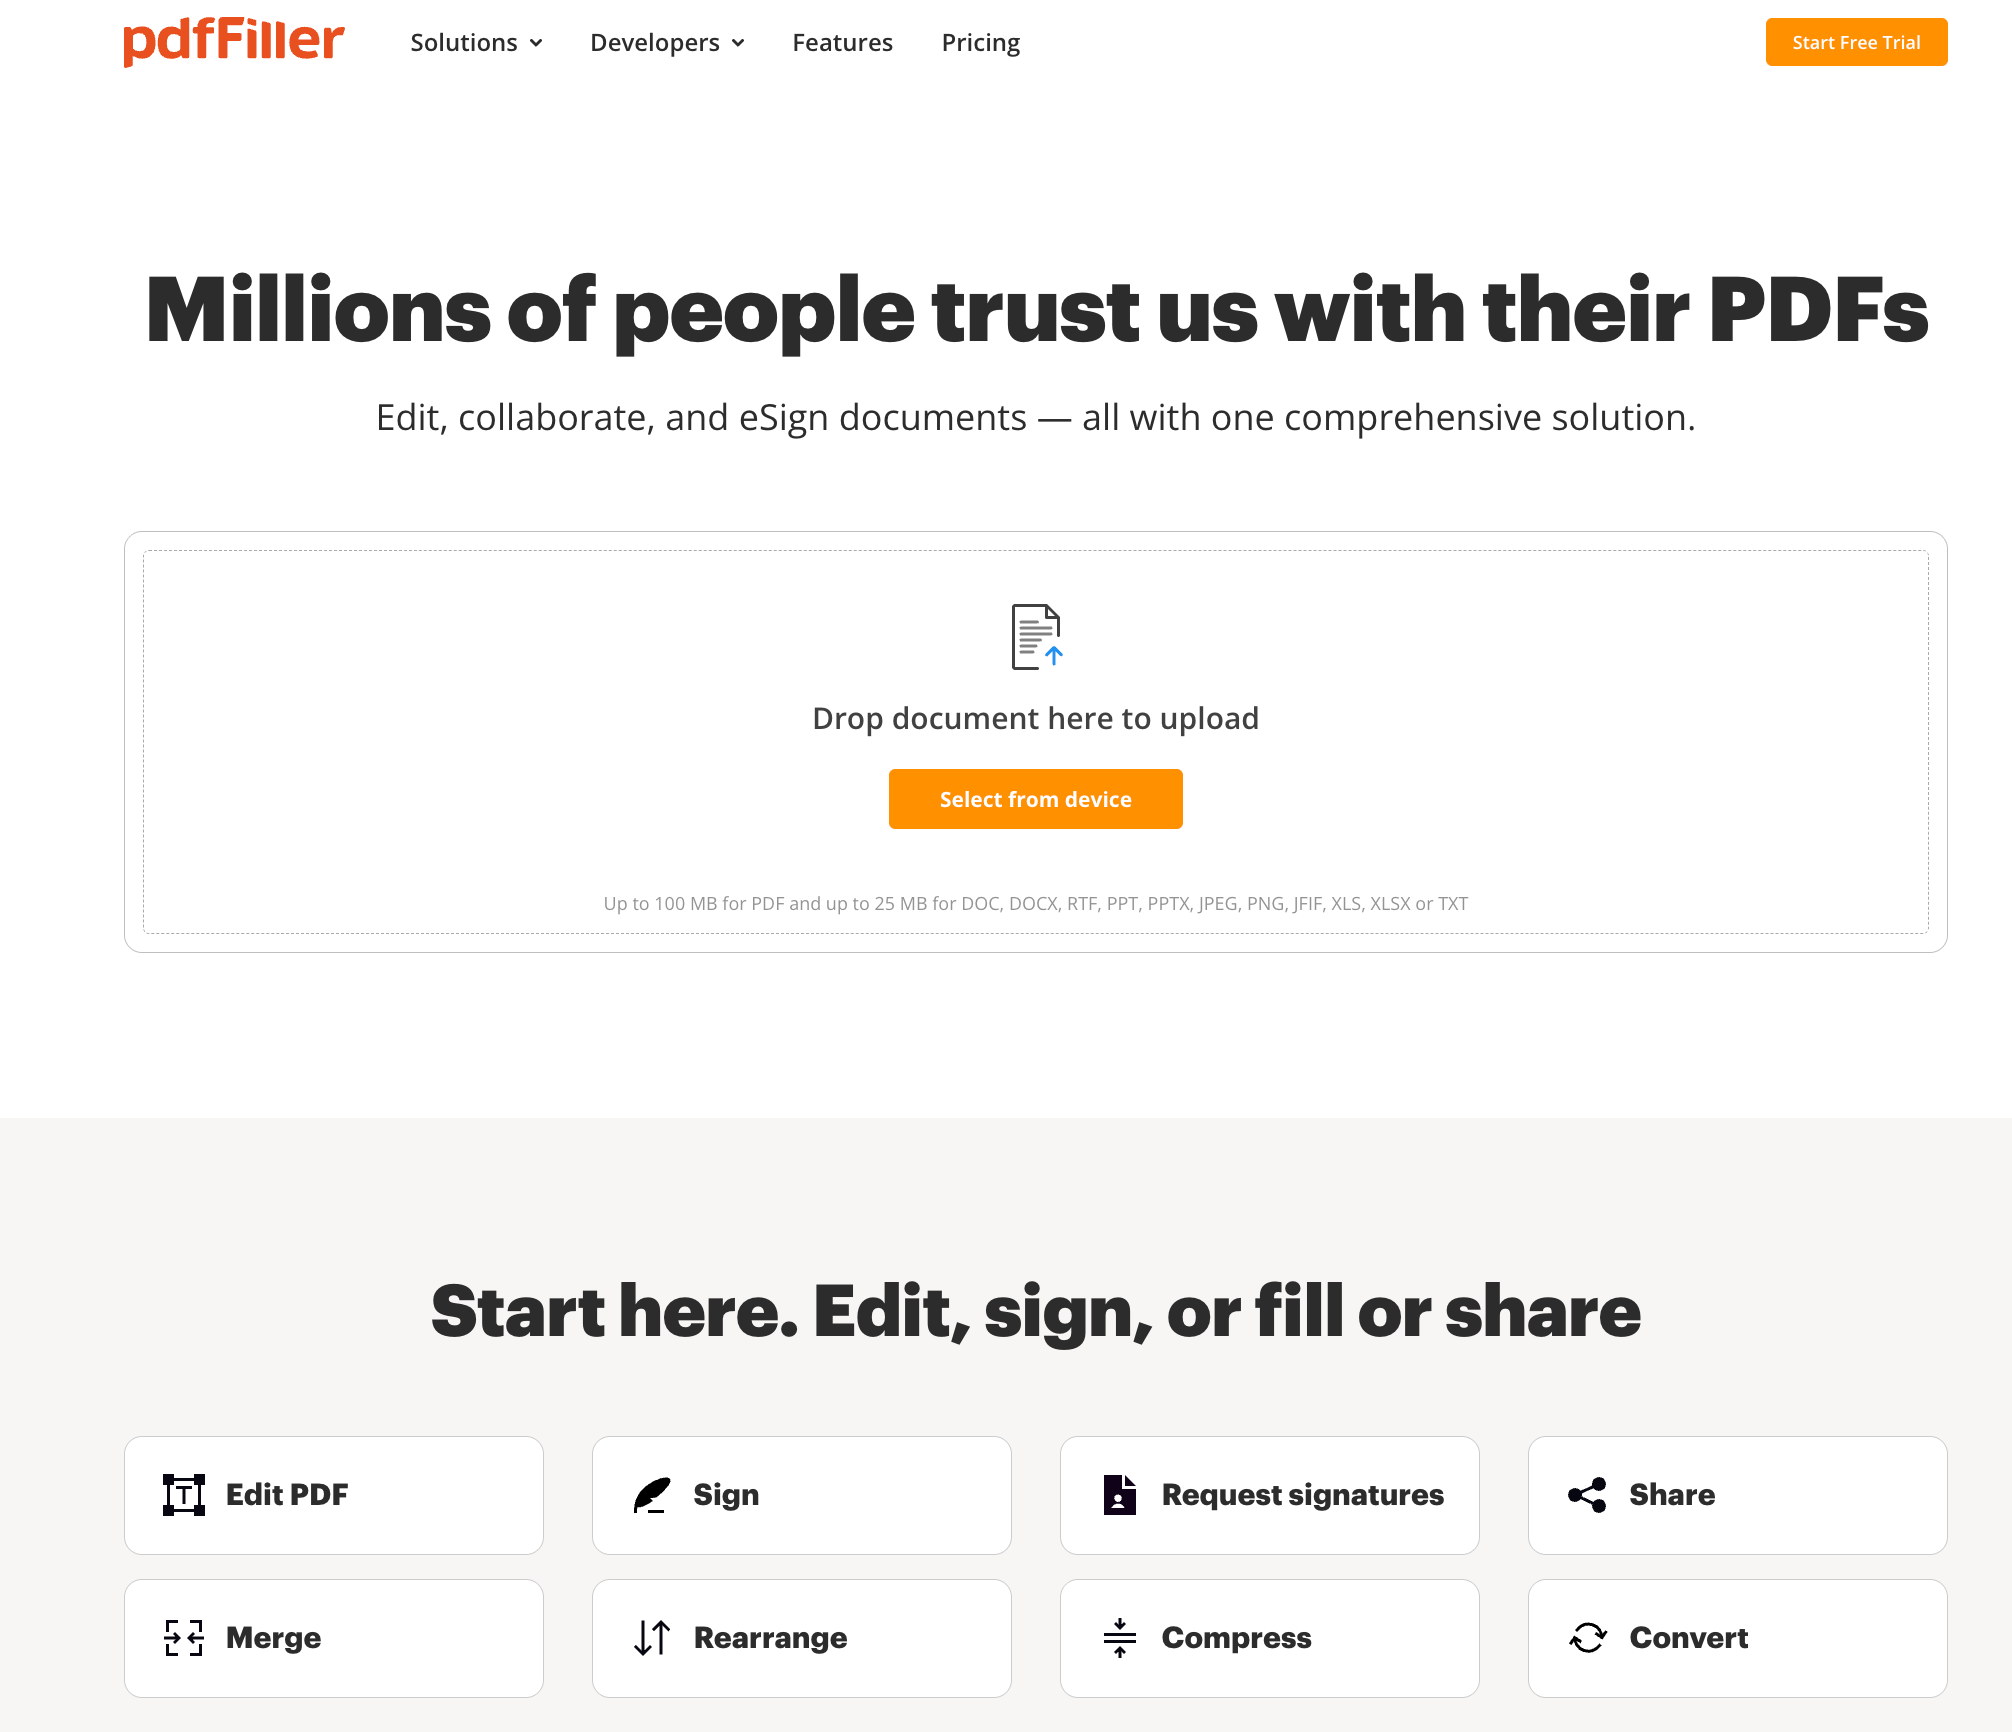
PDFfiller is a cloud native platform that helps you manage tasks such as:
- PDF creation, editing, merging, conversion, and more
- Collaborate with other users and teams
- Document storage and management
- PDF e-signature with SignNow (and integrated e-signature tool)
- Optical character recognition (OCR) tooling
PDFfiller has a great mobile app that lets you manage, edit, and sign PDFs on the go.
Adobe Acrobat Overview
Adobe is a widely used PDF editing tool that has become one of the most popular among organizations.
Some of the key Adobe functionalities include:
- Advanced PDF software for creating, editing, and managing PDF documents
- Editing tools for images, effects, and presentations
- Signature panel for e-signing via desktop or mobile
- Optical character recognition (OCR) tooling
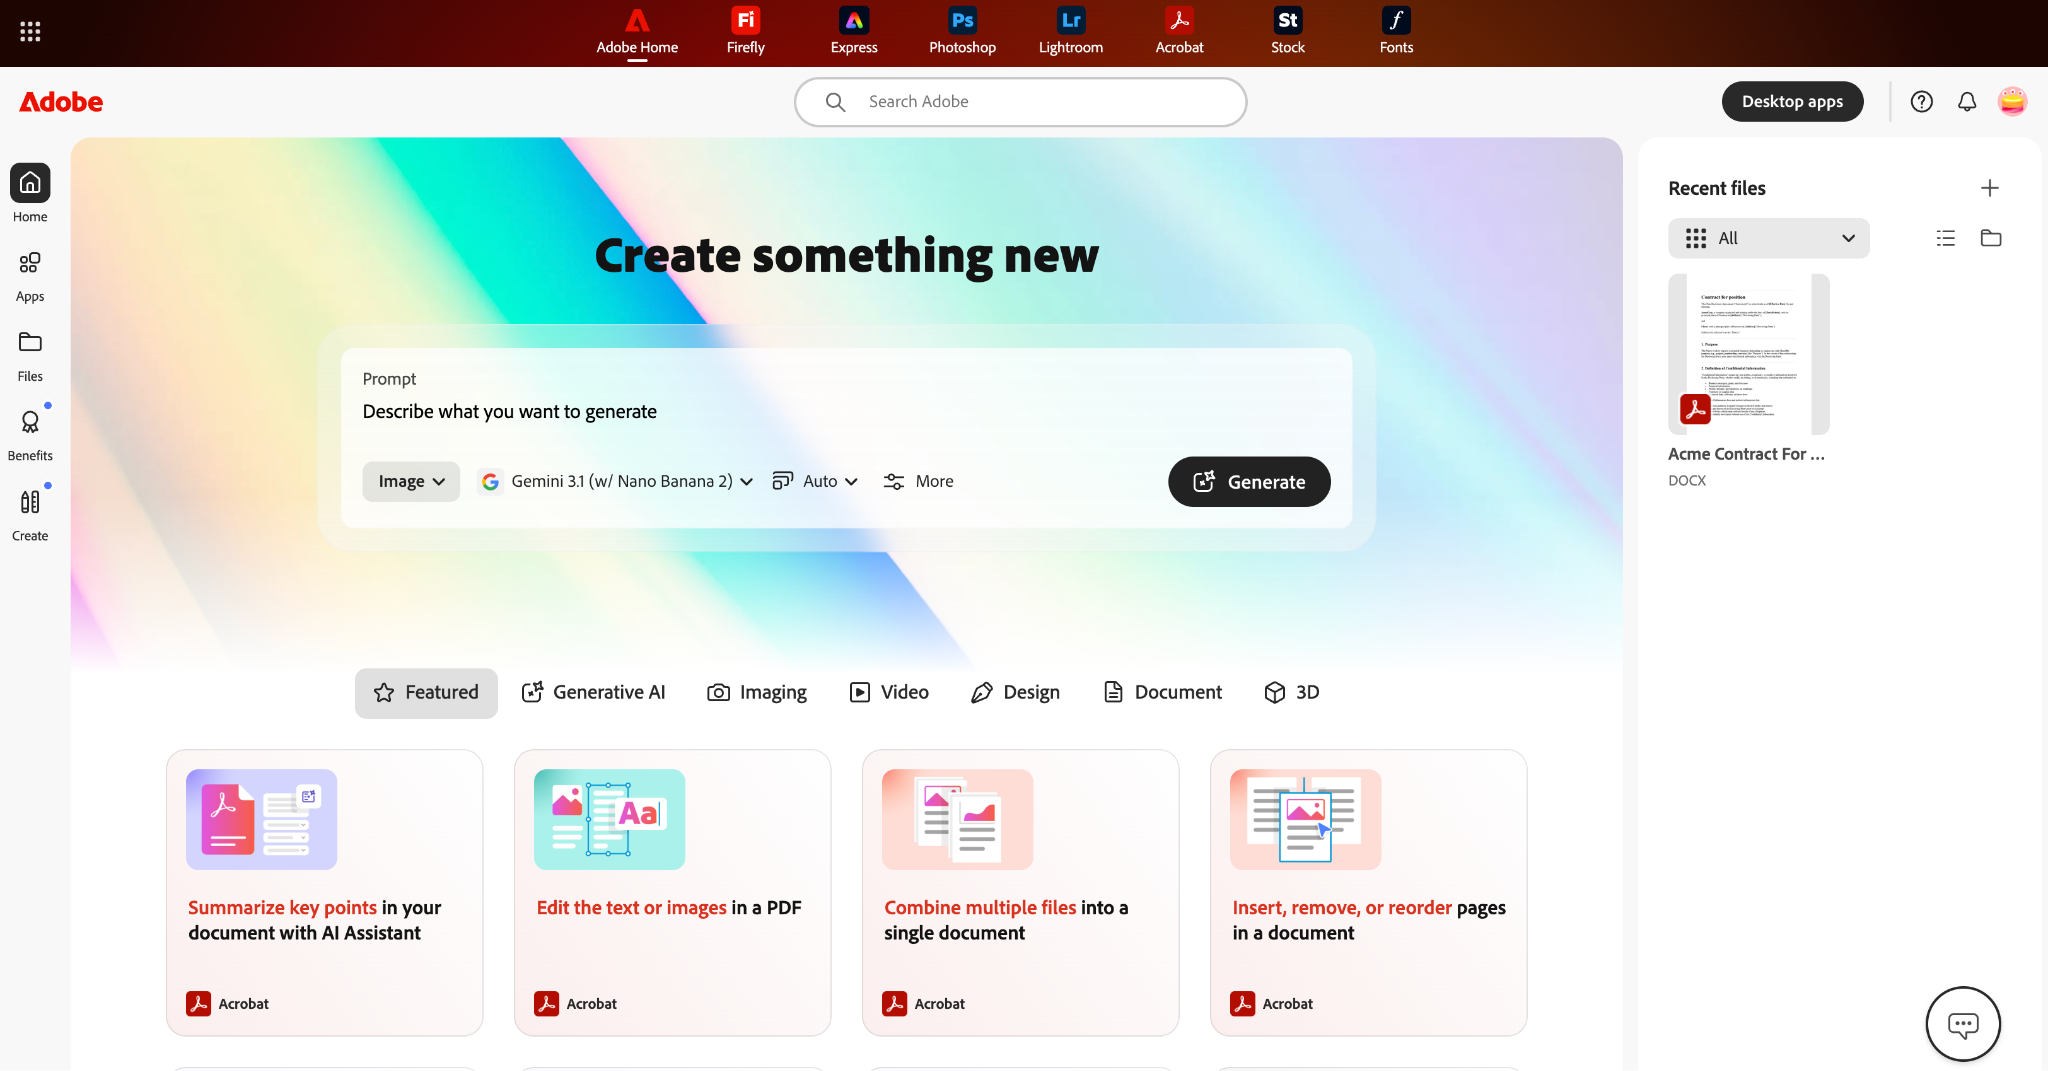
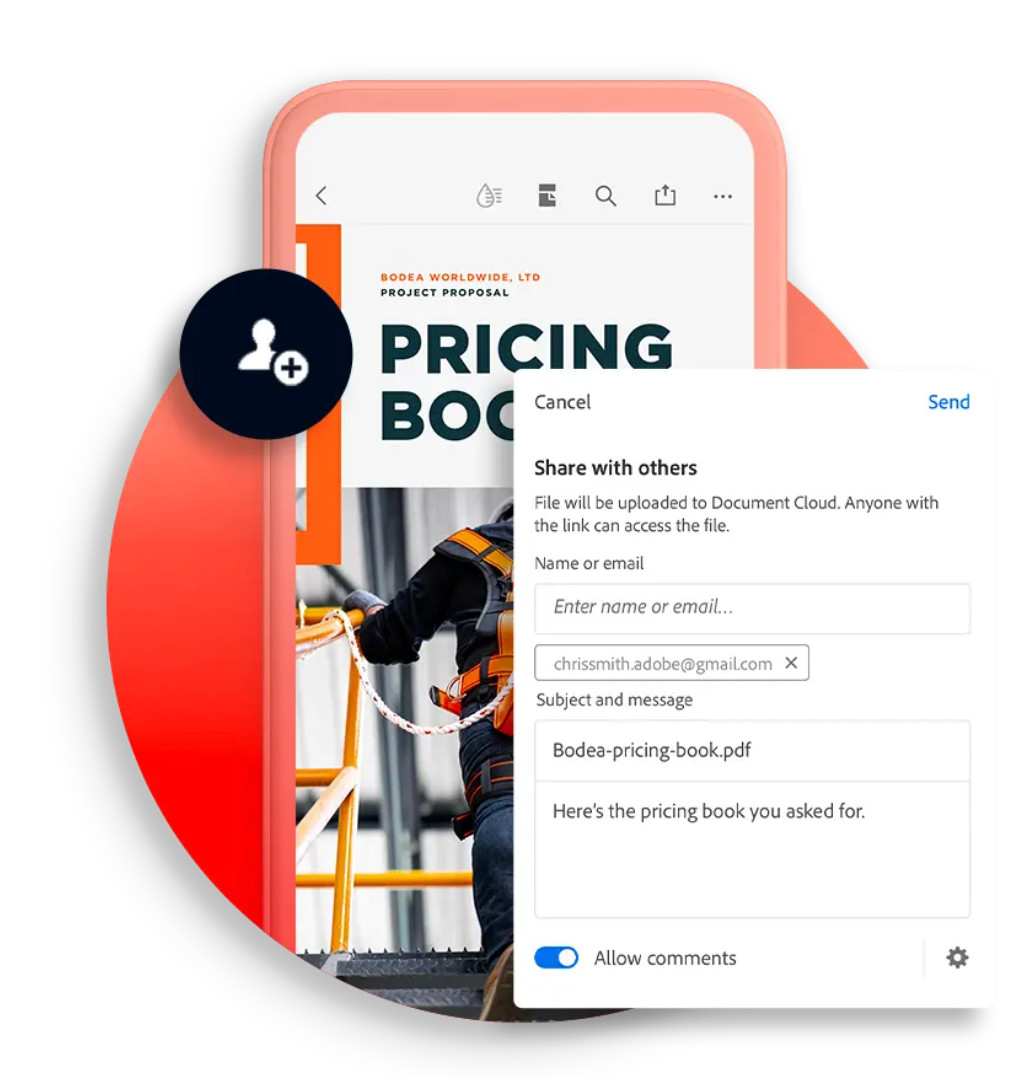
Adobe has a mobile app that allows you to fill, sign, and collect signatures from your mobile device.
Tool Comparison Step-By-Step Walkthrough
I prefer using a set of key criteria when comparing similar-looking tools to get a clear idea of each software’s strengths and weaknesses.
This helps me really understand what I like about them and know when each respective tool would be a good fit for me, depending on what I am trying to achieve.
For this demo, I’ve outlined a specific flow to help you understand what I tested and how I tested it.
- I’ve used the same document for each test.
- I’ll compare like-for-like features where possible.
- Each step will show a workflow and output to get an idea of the look and feel.
- I’ll evaluate these against specific criteria, including overall ease of use, look and feel, speed, accuracy, and overall user experience.
- Covering the most common/key PDF uses only, more advanced features are available within both platforms.
Step 1 – Uploading, Creating, and Editing Documents
I’ve created a baseline standard contract with fillable sections that I’ll use as a template for these tests. This is a commonly used document across multiple organizations and industries, so this will give you a good idea of how well each performs in these steps!
PDFfiller Demo:
1. Upload:
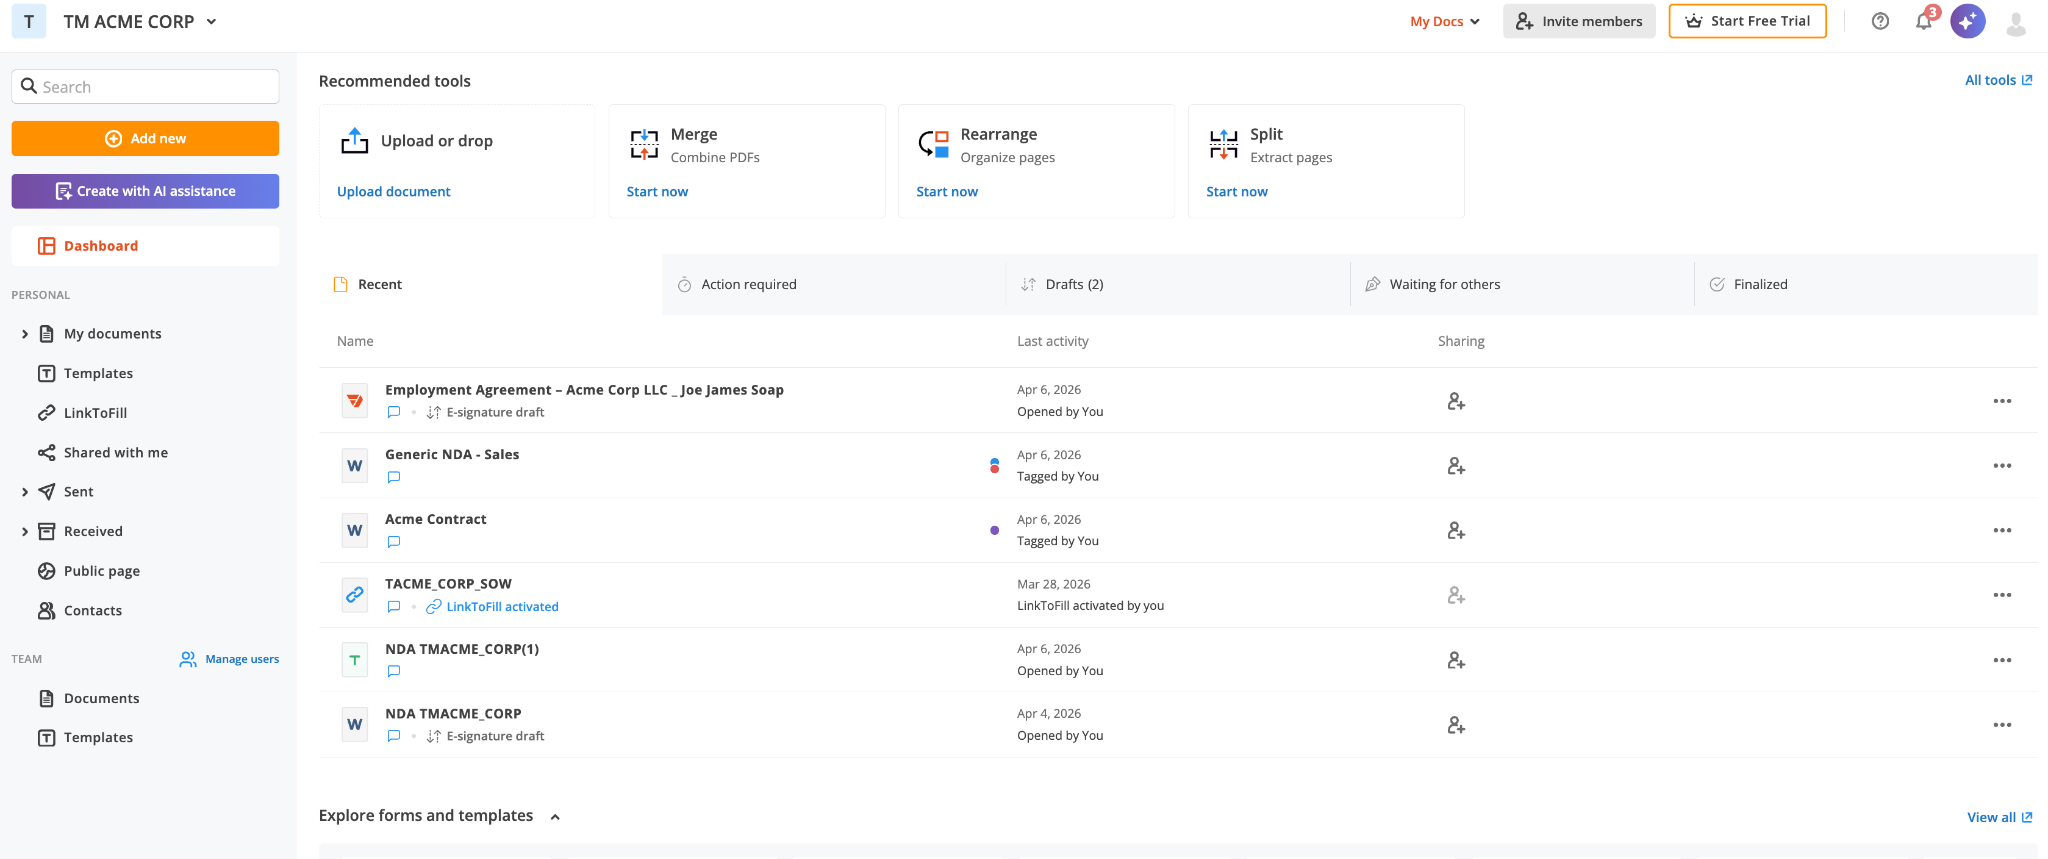
My typical first step will be to upload a document that I can create fillable fields in and save, so I can share it if needed.
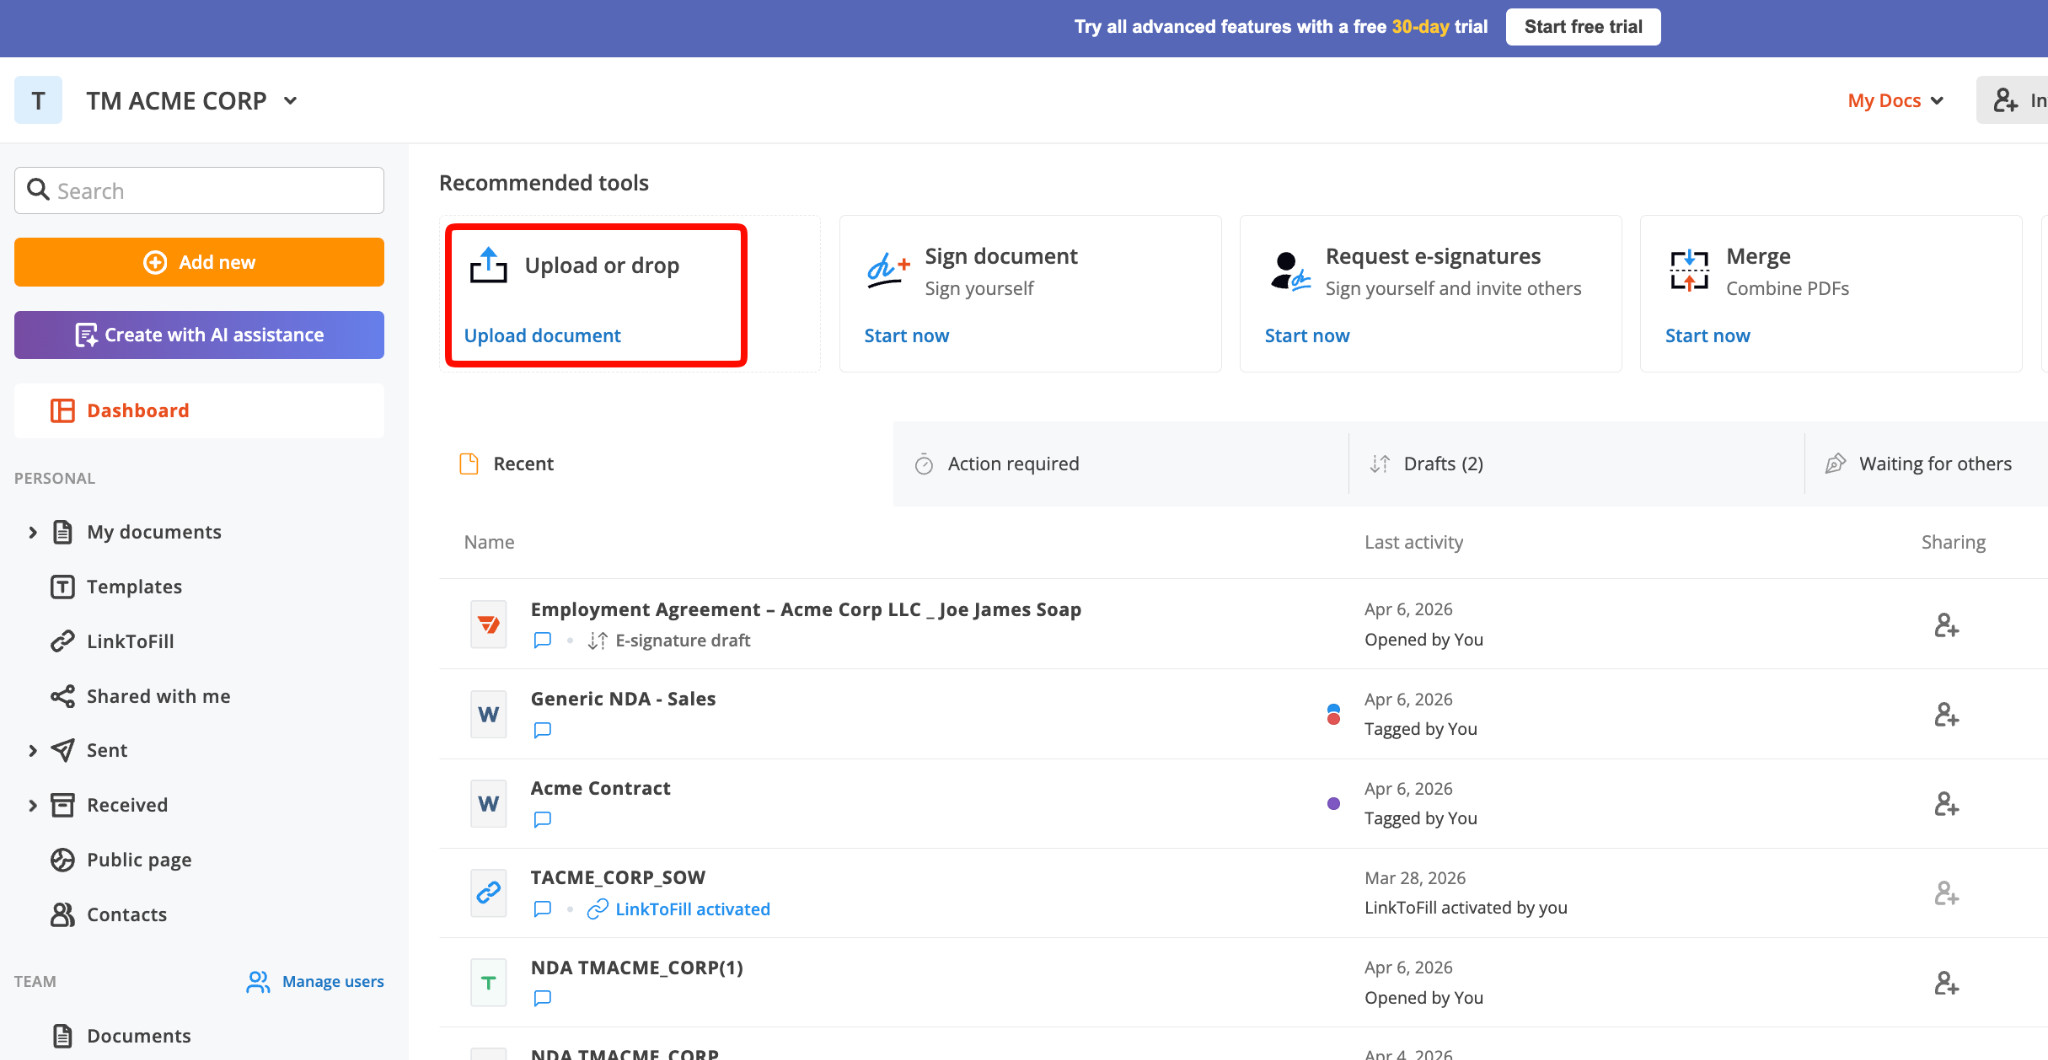
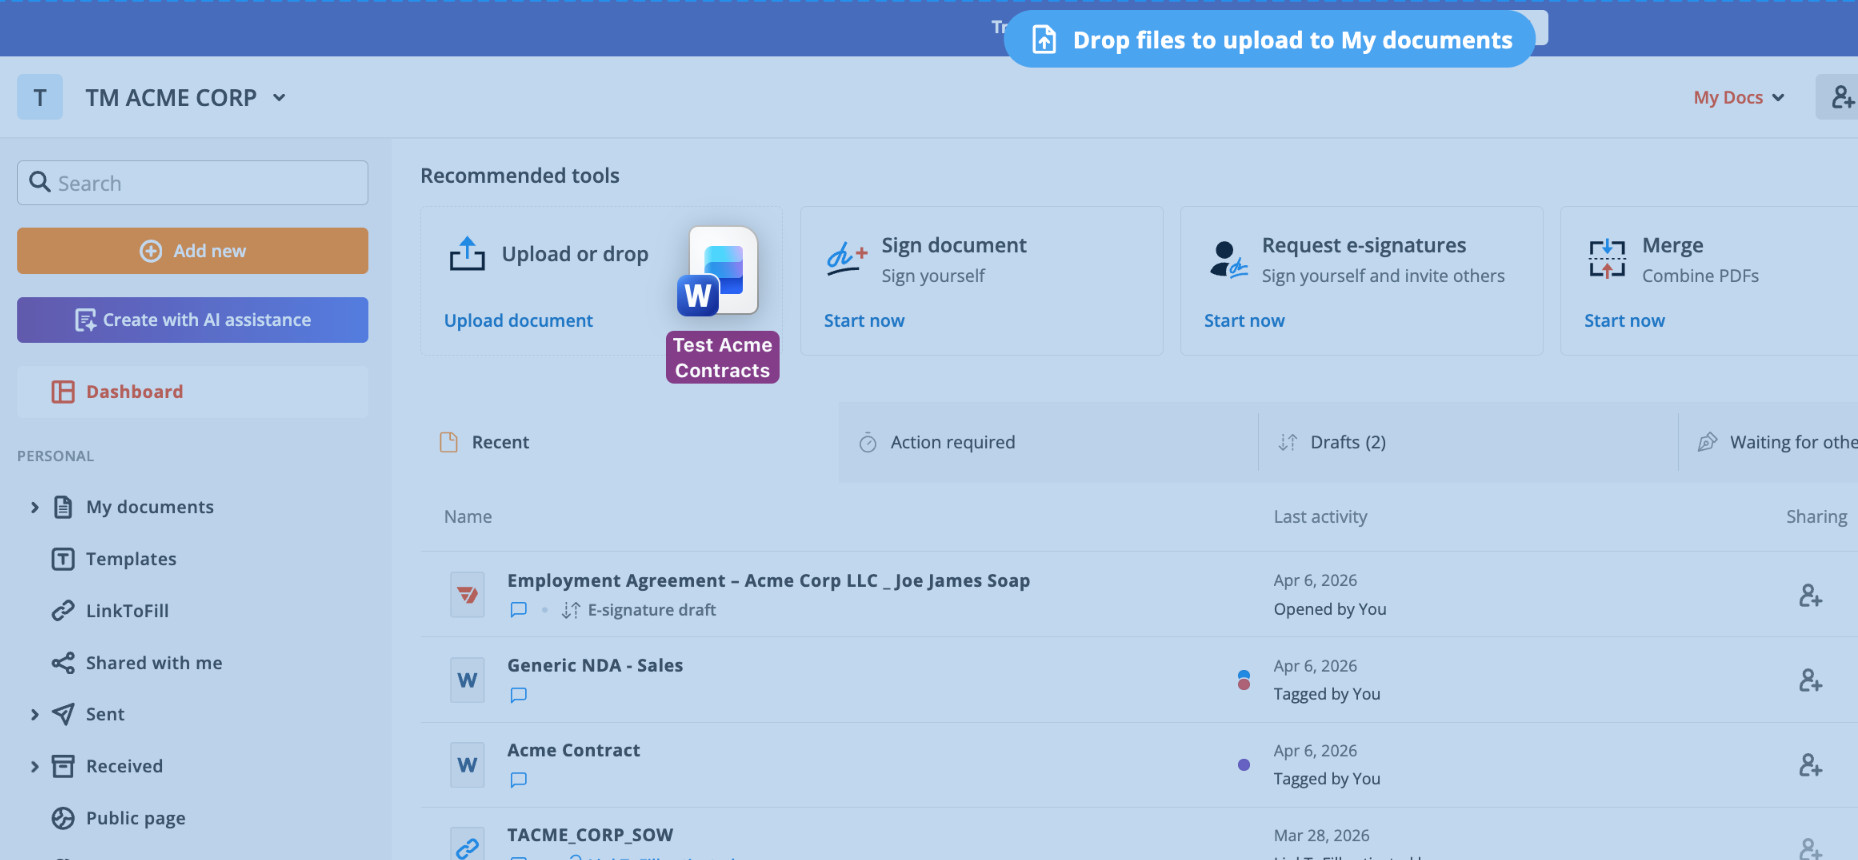
I prefer tools that have both upload and “drag and drop” options, as PDFfiller does.
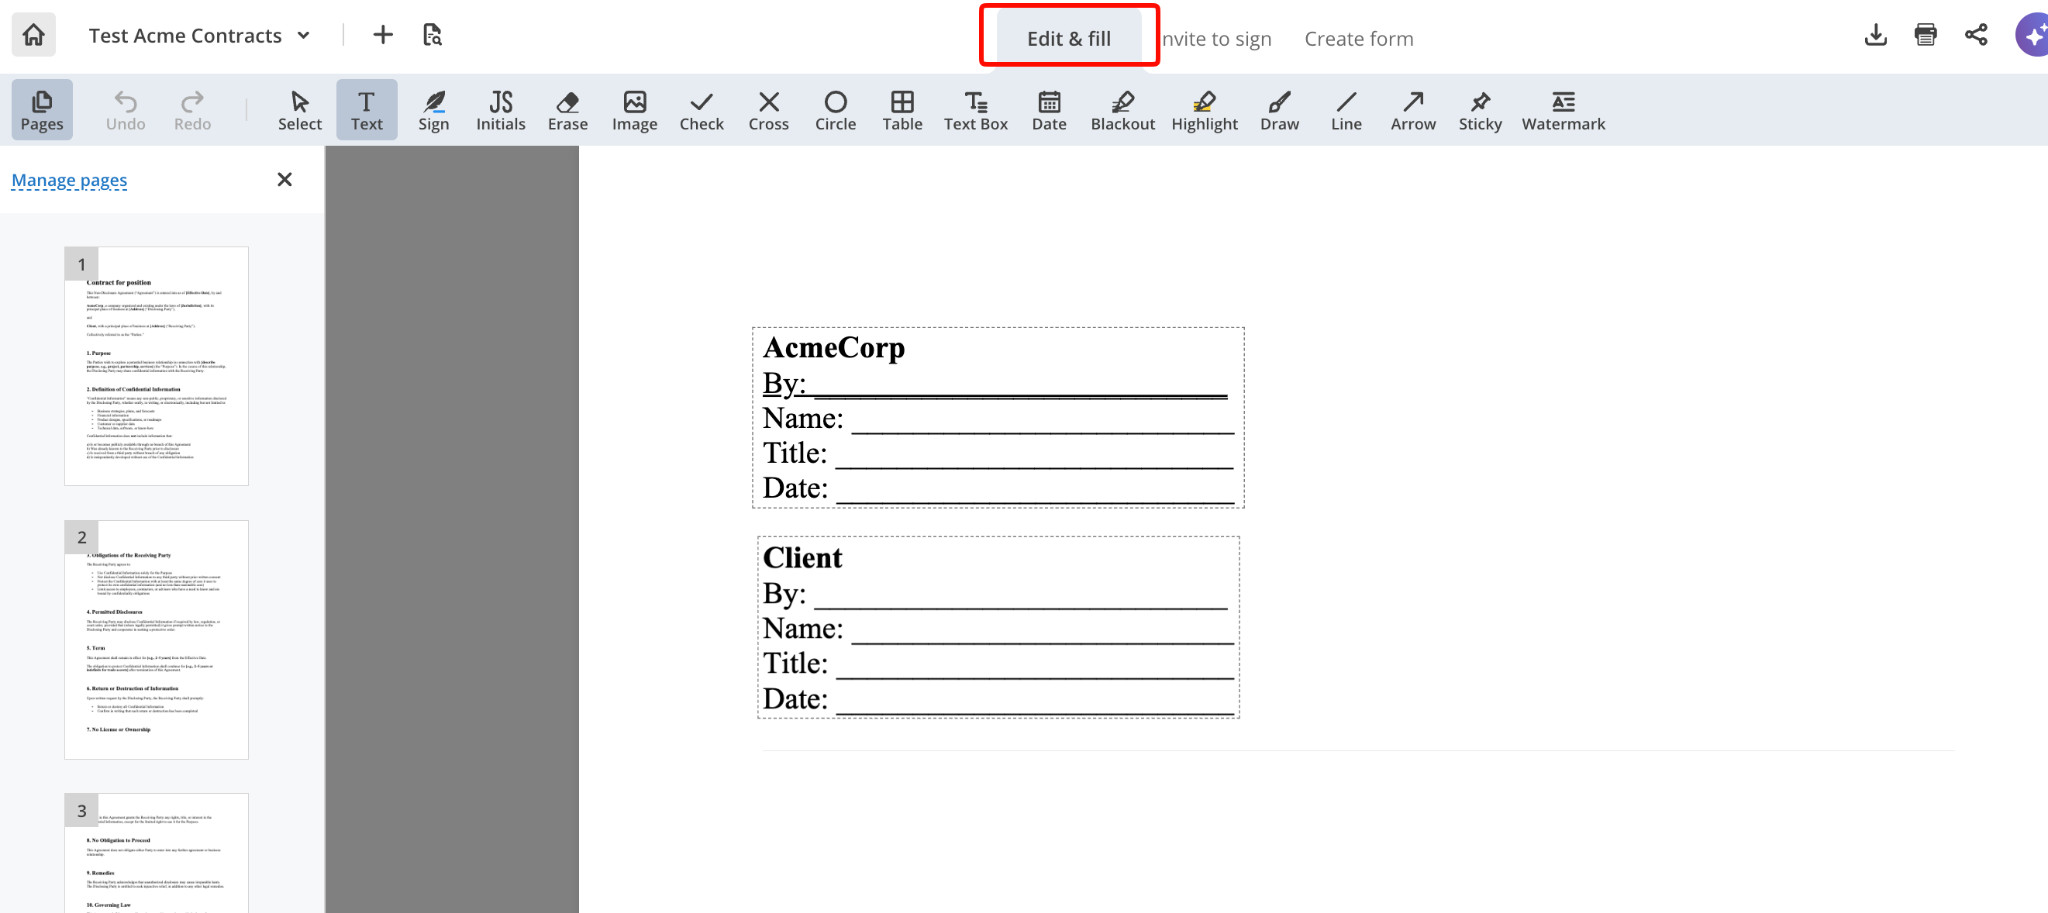
2. Edit and Fill:
It takes a few seconds to upload and start editing and filling your document, which can be in Word or PDF format.
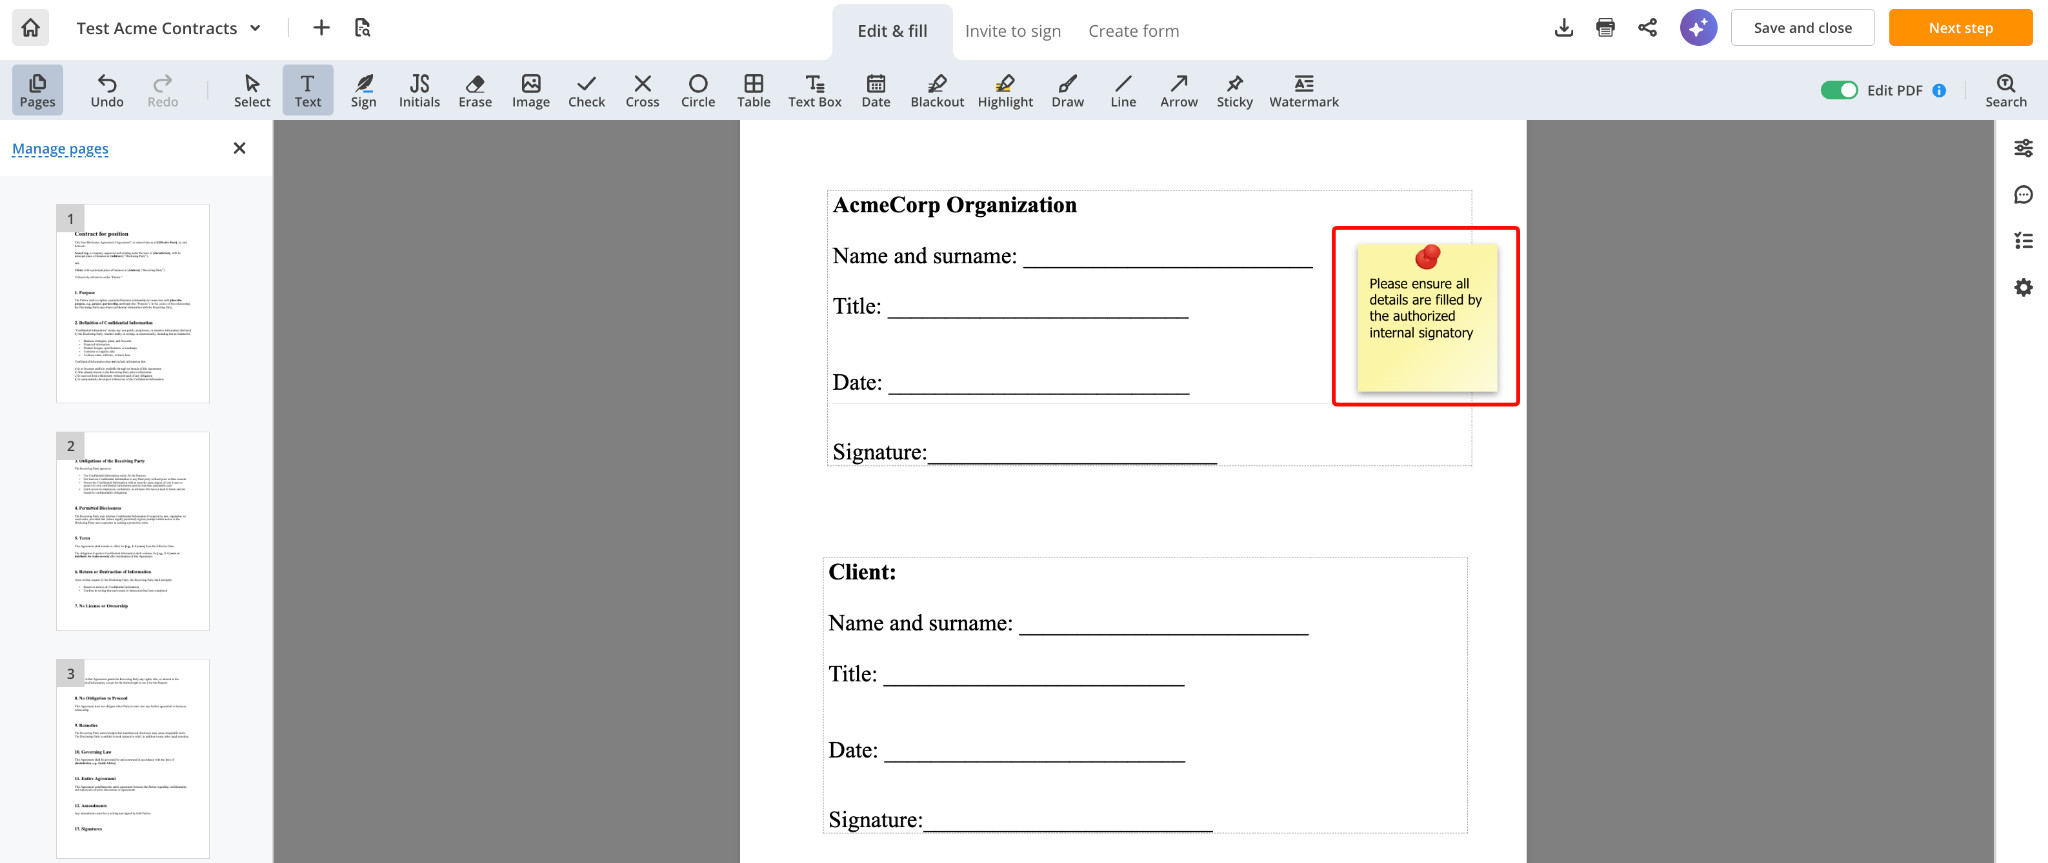
I like that the tabs already open in the correct place, and you don’t need to click around to try and find the right buttons for editing.
3. Features:
At this stage, I can amend key sections and also redact sensitive information if needed. I generally prefer making signature pages a little larger and easier for signatures, especially when requiring printed documents.
I also added a sticky note to see how this information and feature would work once I’ve saved and sent the document for signature.
4. Download and Save:
The download is quick and easy, and there are options to save and close, share via email or a secure link, or send to print without having to do this separately. You can also proceed to the “next step,” which would be “invite to sign”.
5. Final Output:
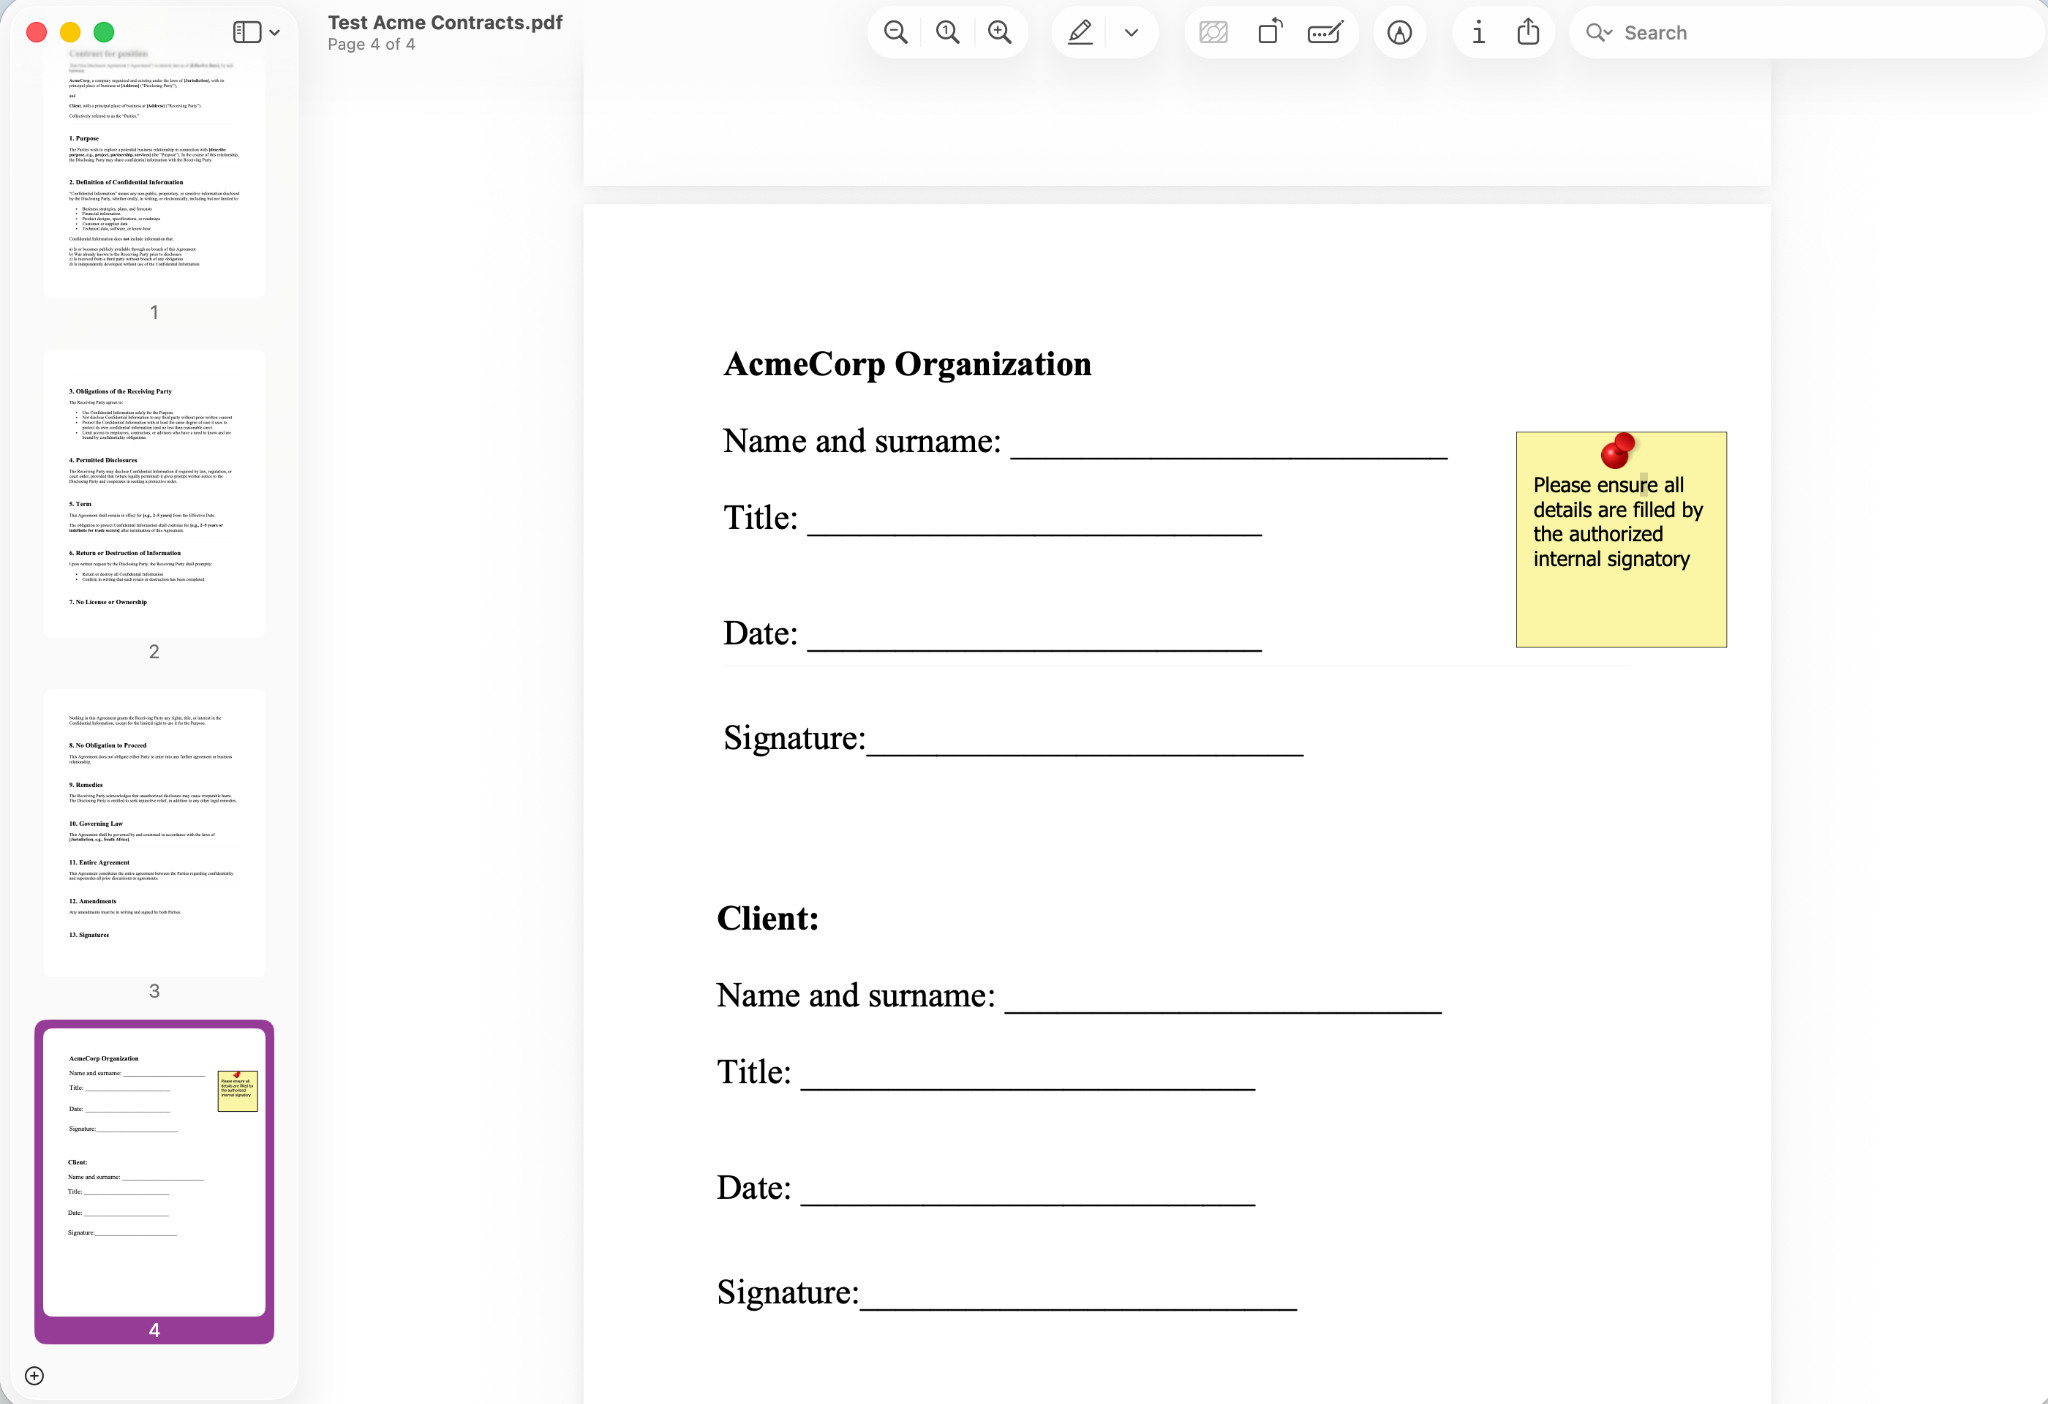
The output format defaults to PDF, and all alignment and spacing are maintained. Overall, it’s quick and intuitive, and doesn’t require any additional steps.
Adobe Demo:
1. Upload:
Again, the first step here is to upload a document that I can create fillable fields in and save, so I can share it if needed.
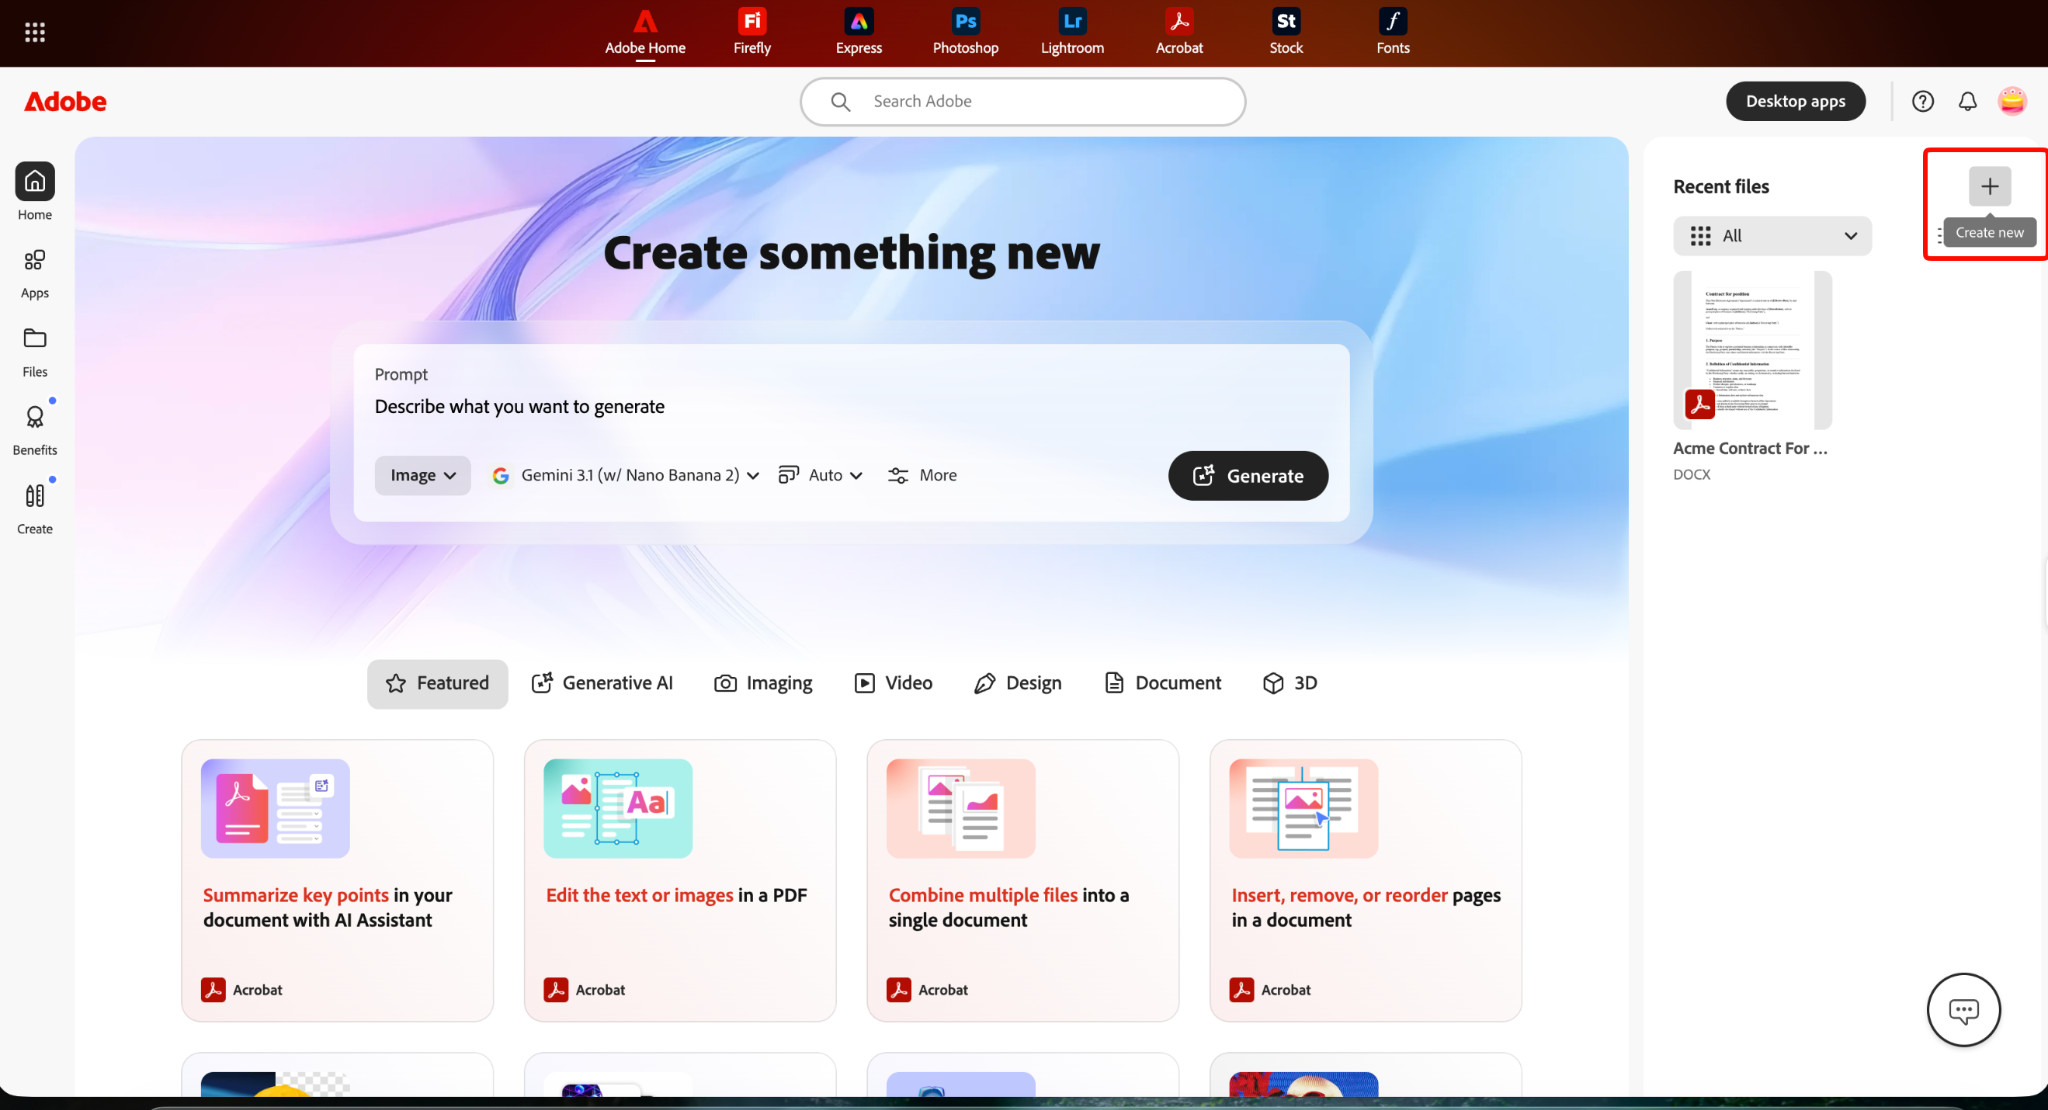
Unfortunately, there’s no “drag and drop” feature here unless you select a different interface, and you’ll only get a toast (popup) notification once your file has been uploaded.
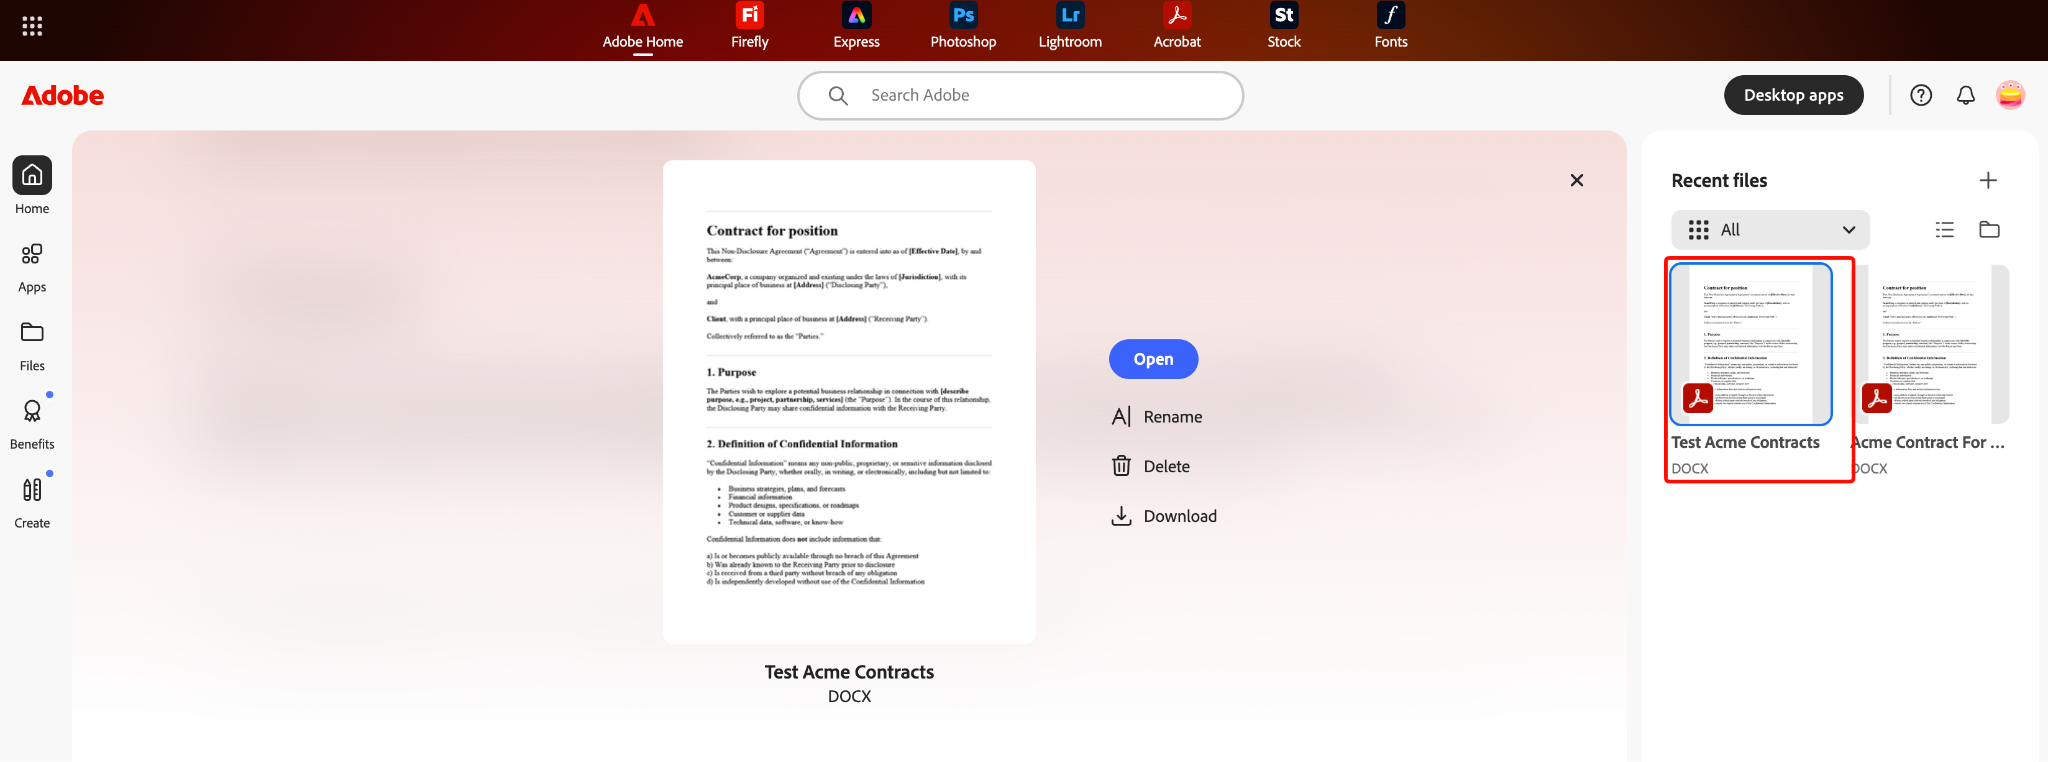
You’ll also need to click the document to open it and make edits.
2. Edit and Fill:
With the Adobe editor, you’ll have to select the document to open it and start filling in the details, unlike PDFfiller, which opens automatically.
Clicking edit will prompt you to open the document in Word rather than allowing you to edit directly from the page (PDF default) you have open.
I also felt there were extra friction points and pop-up prompts to use Microsoft at various steps, which I didn’t anticipate, given that this is a paid-for plan.
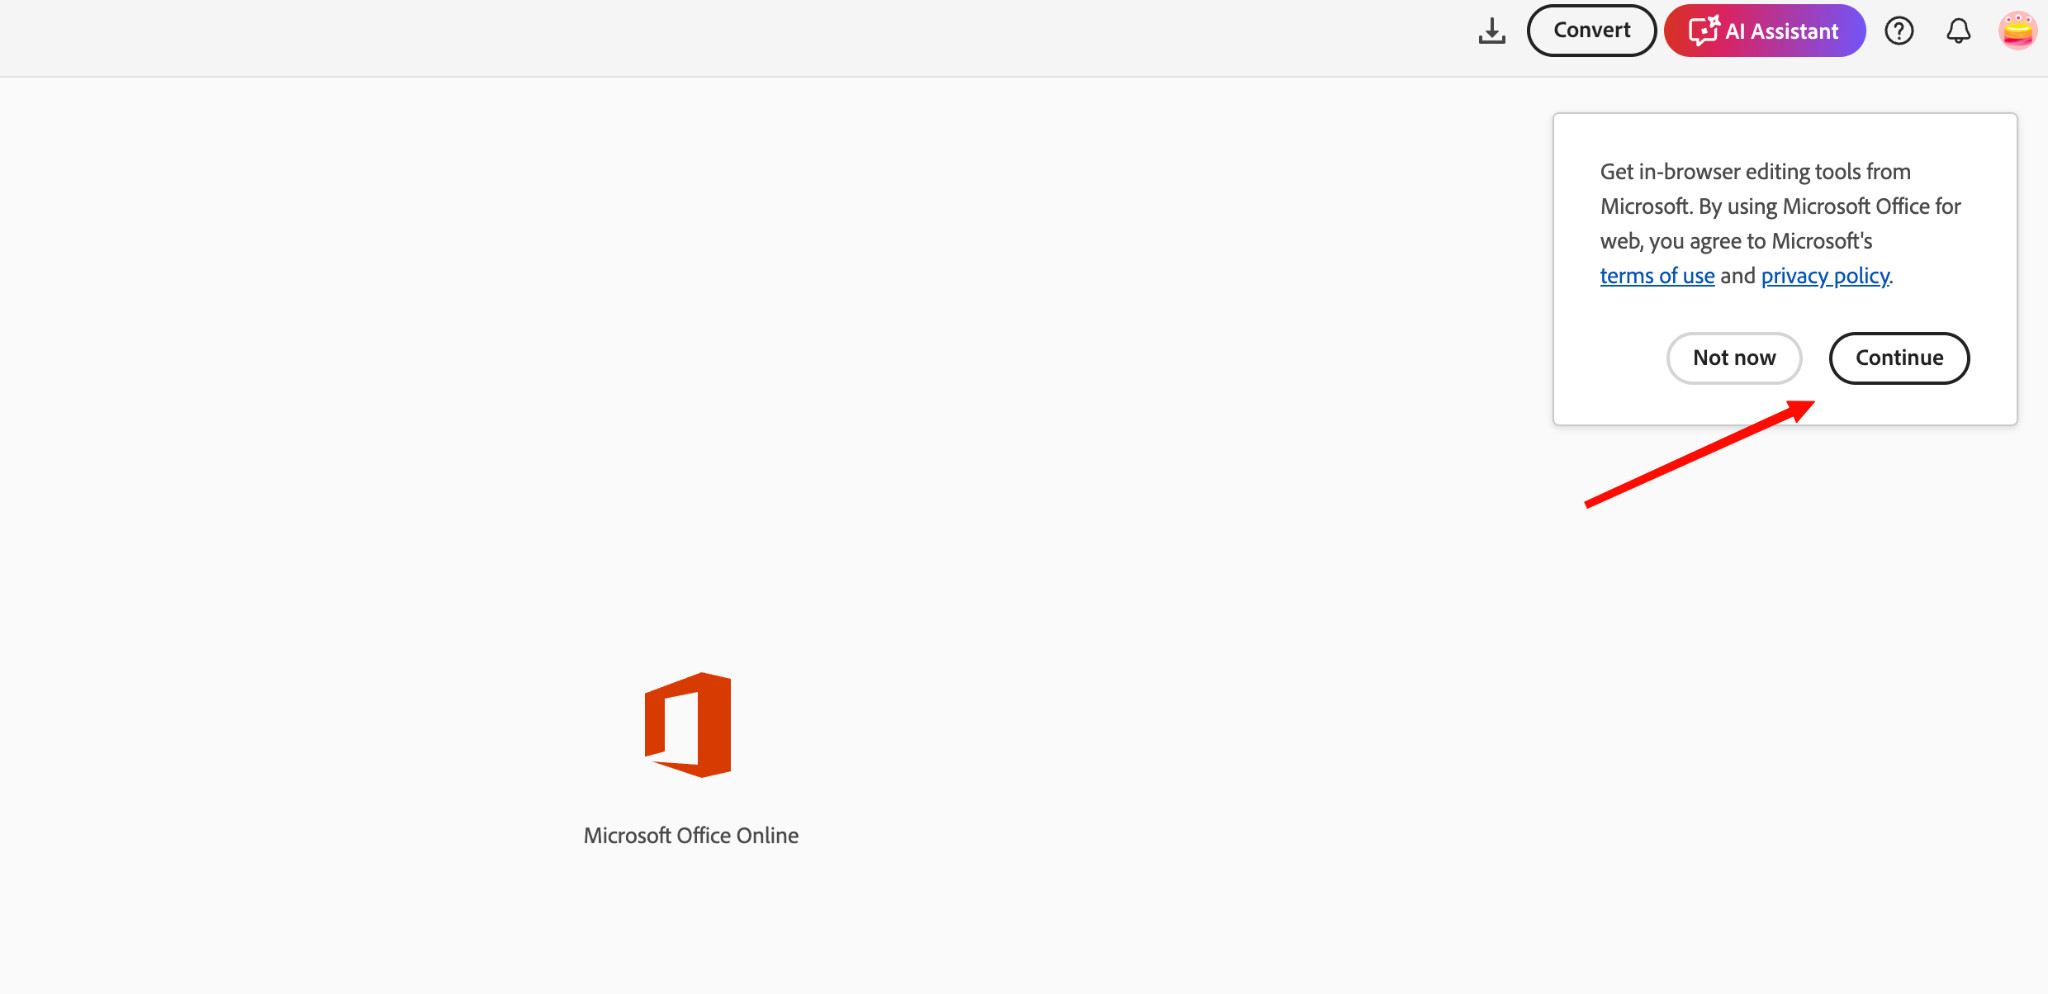
You’re then forced to convert this word so that you can make the relevant edits.
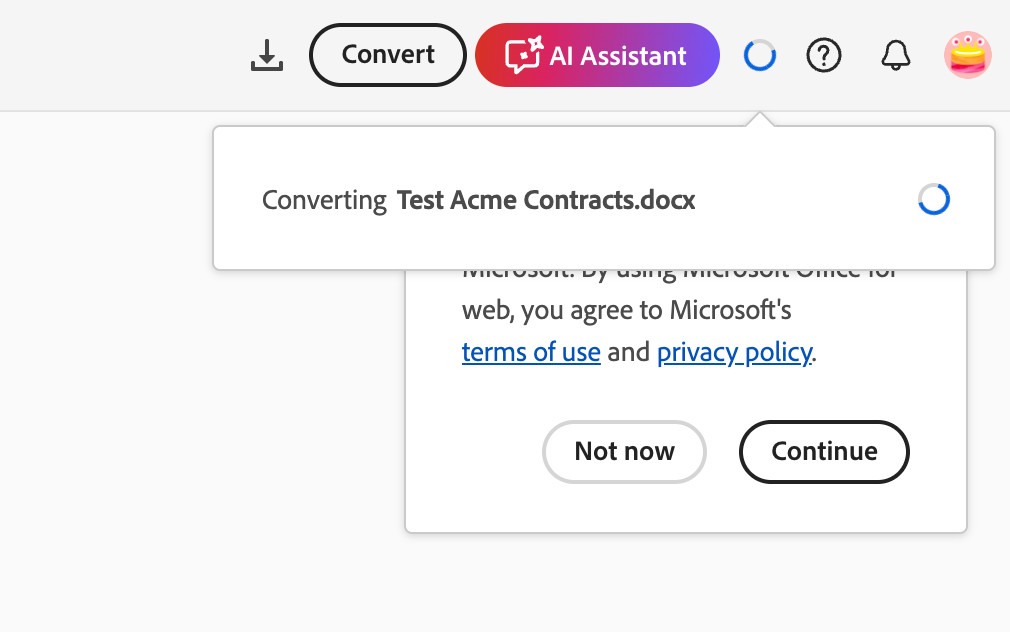
If you use a PDF document as a baseline, this process is much simpler. You’ll have the option to drag and drop and upload your document.
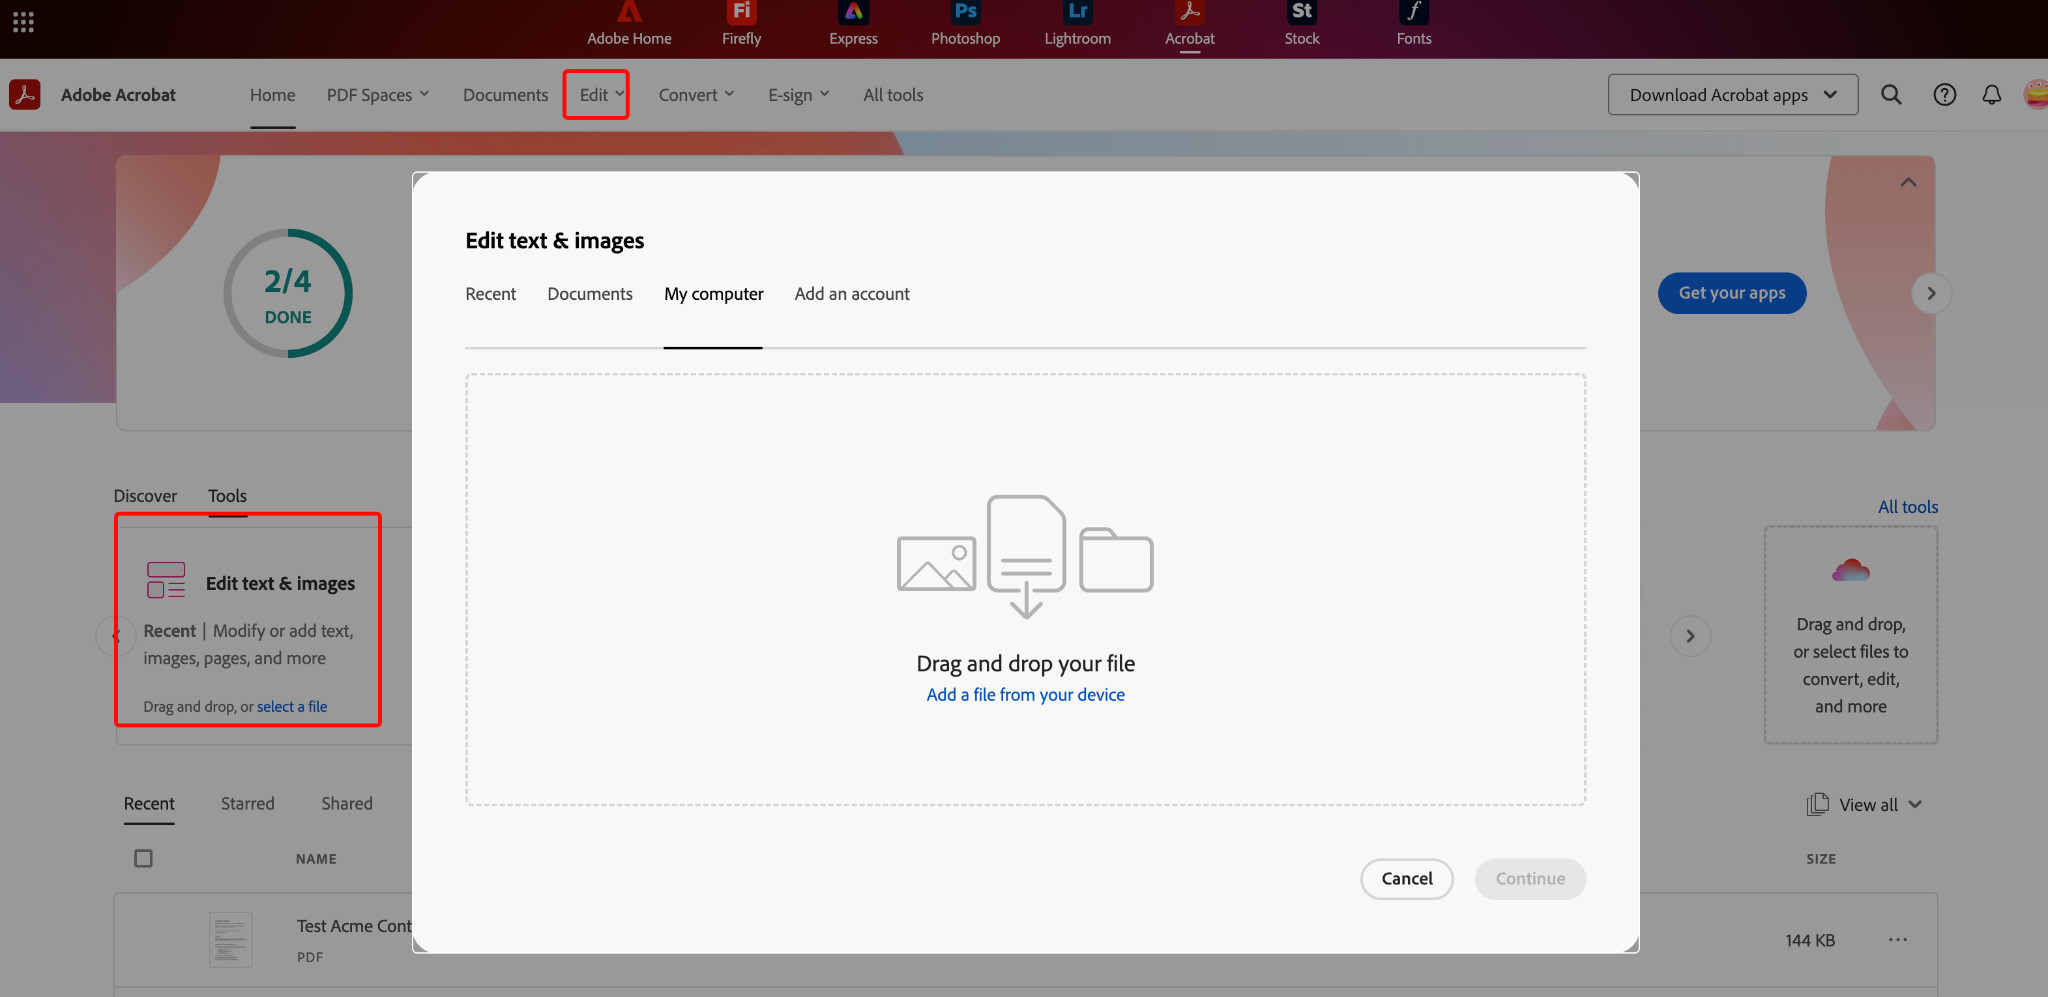
The interface is still less intuitive, and you’ll need to select “edit text and images” before you can drag and drop a document into the app for editing.
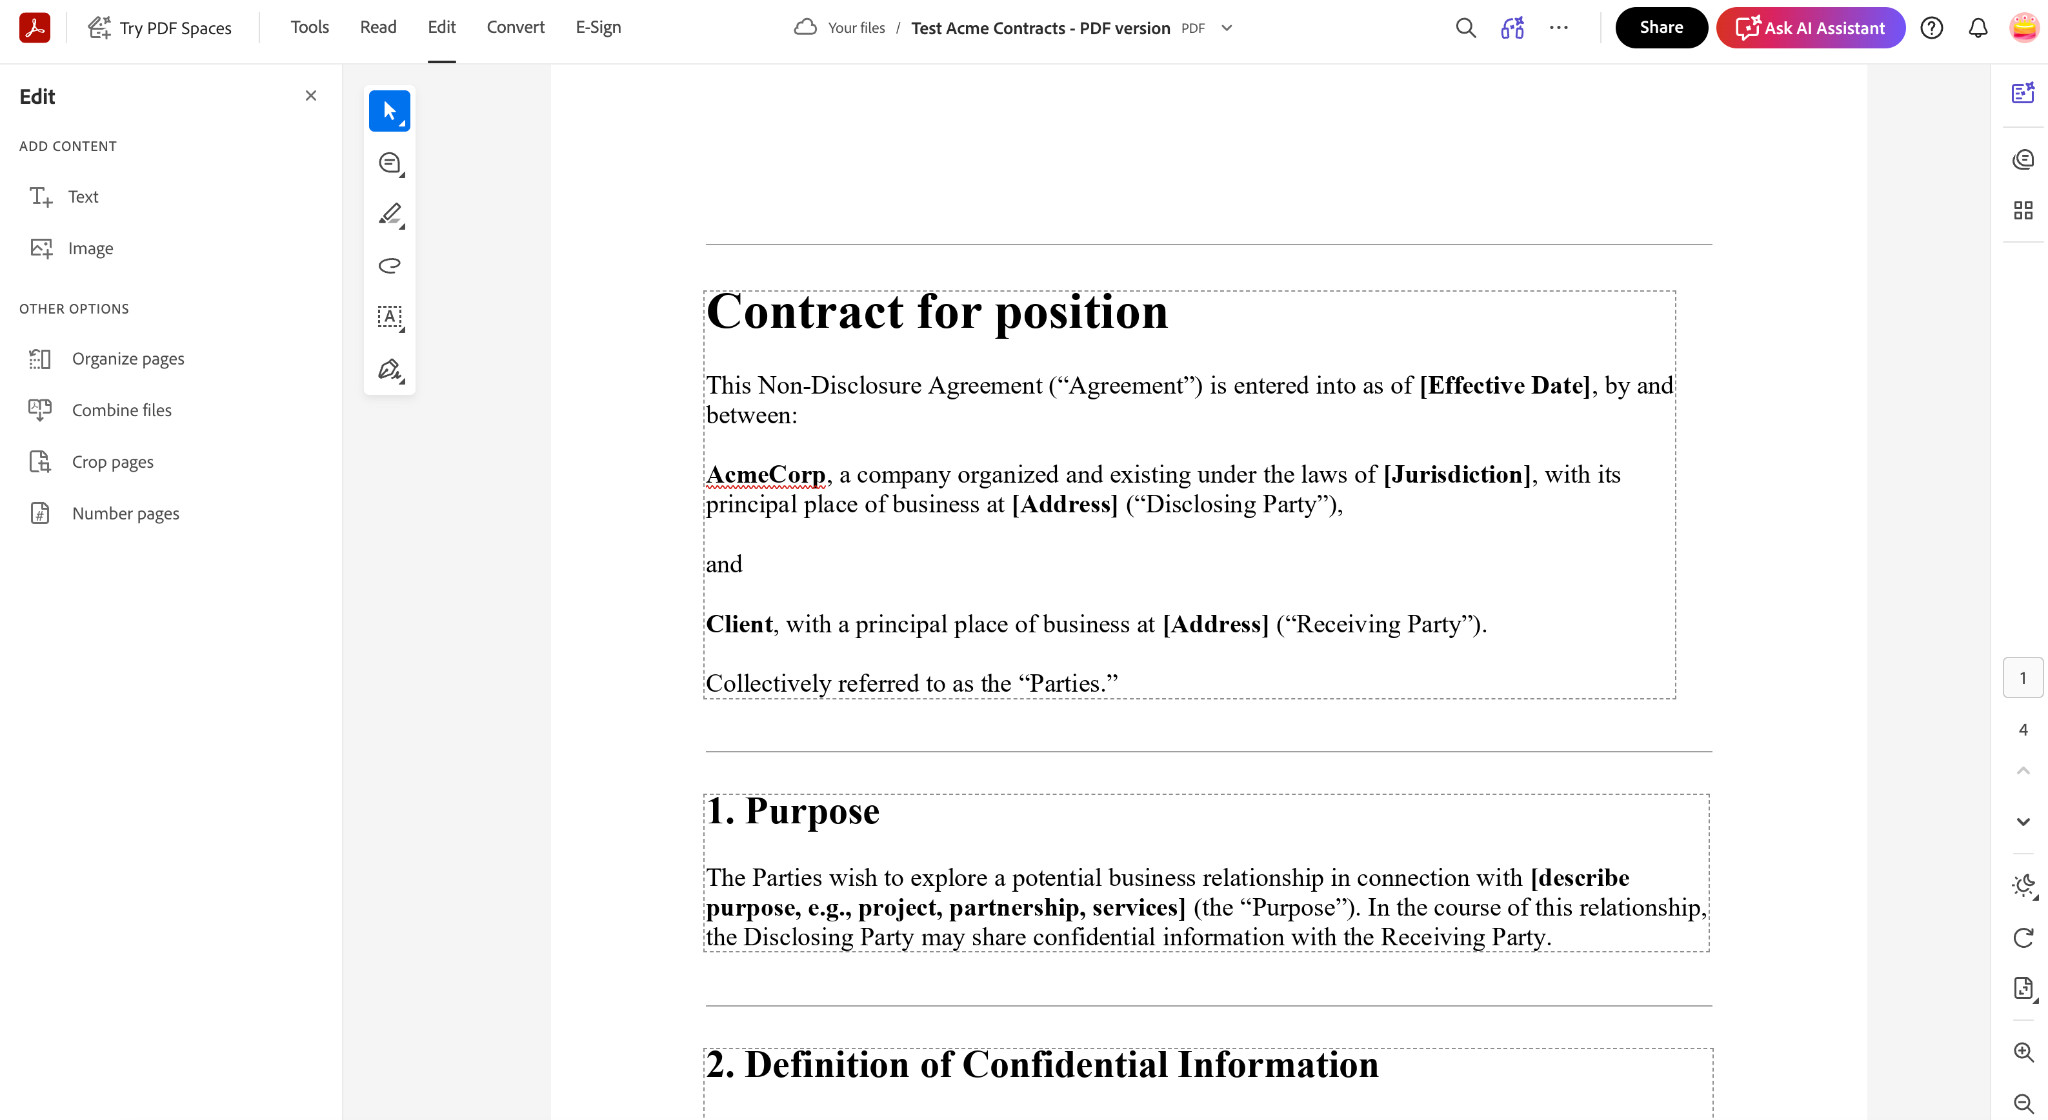
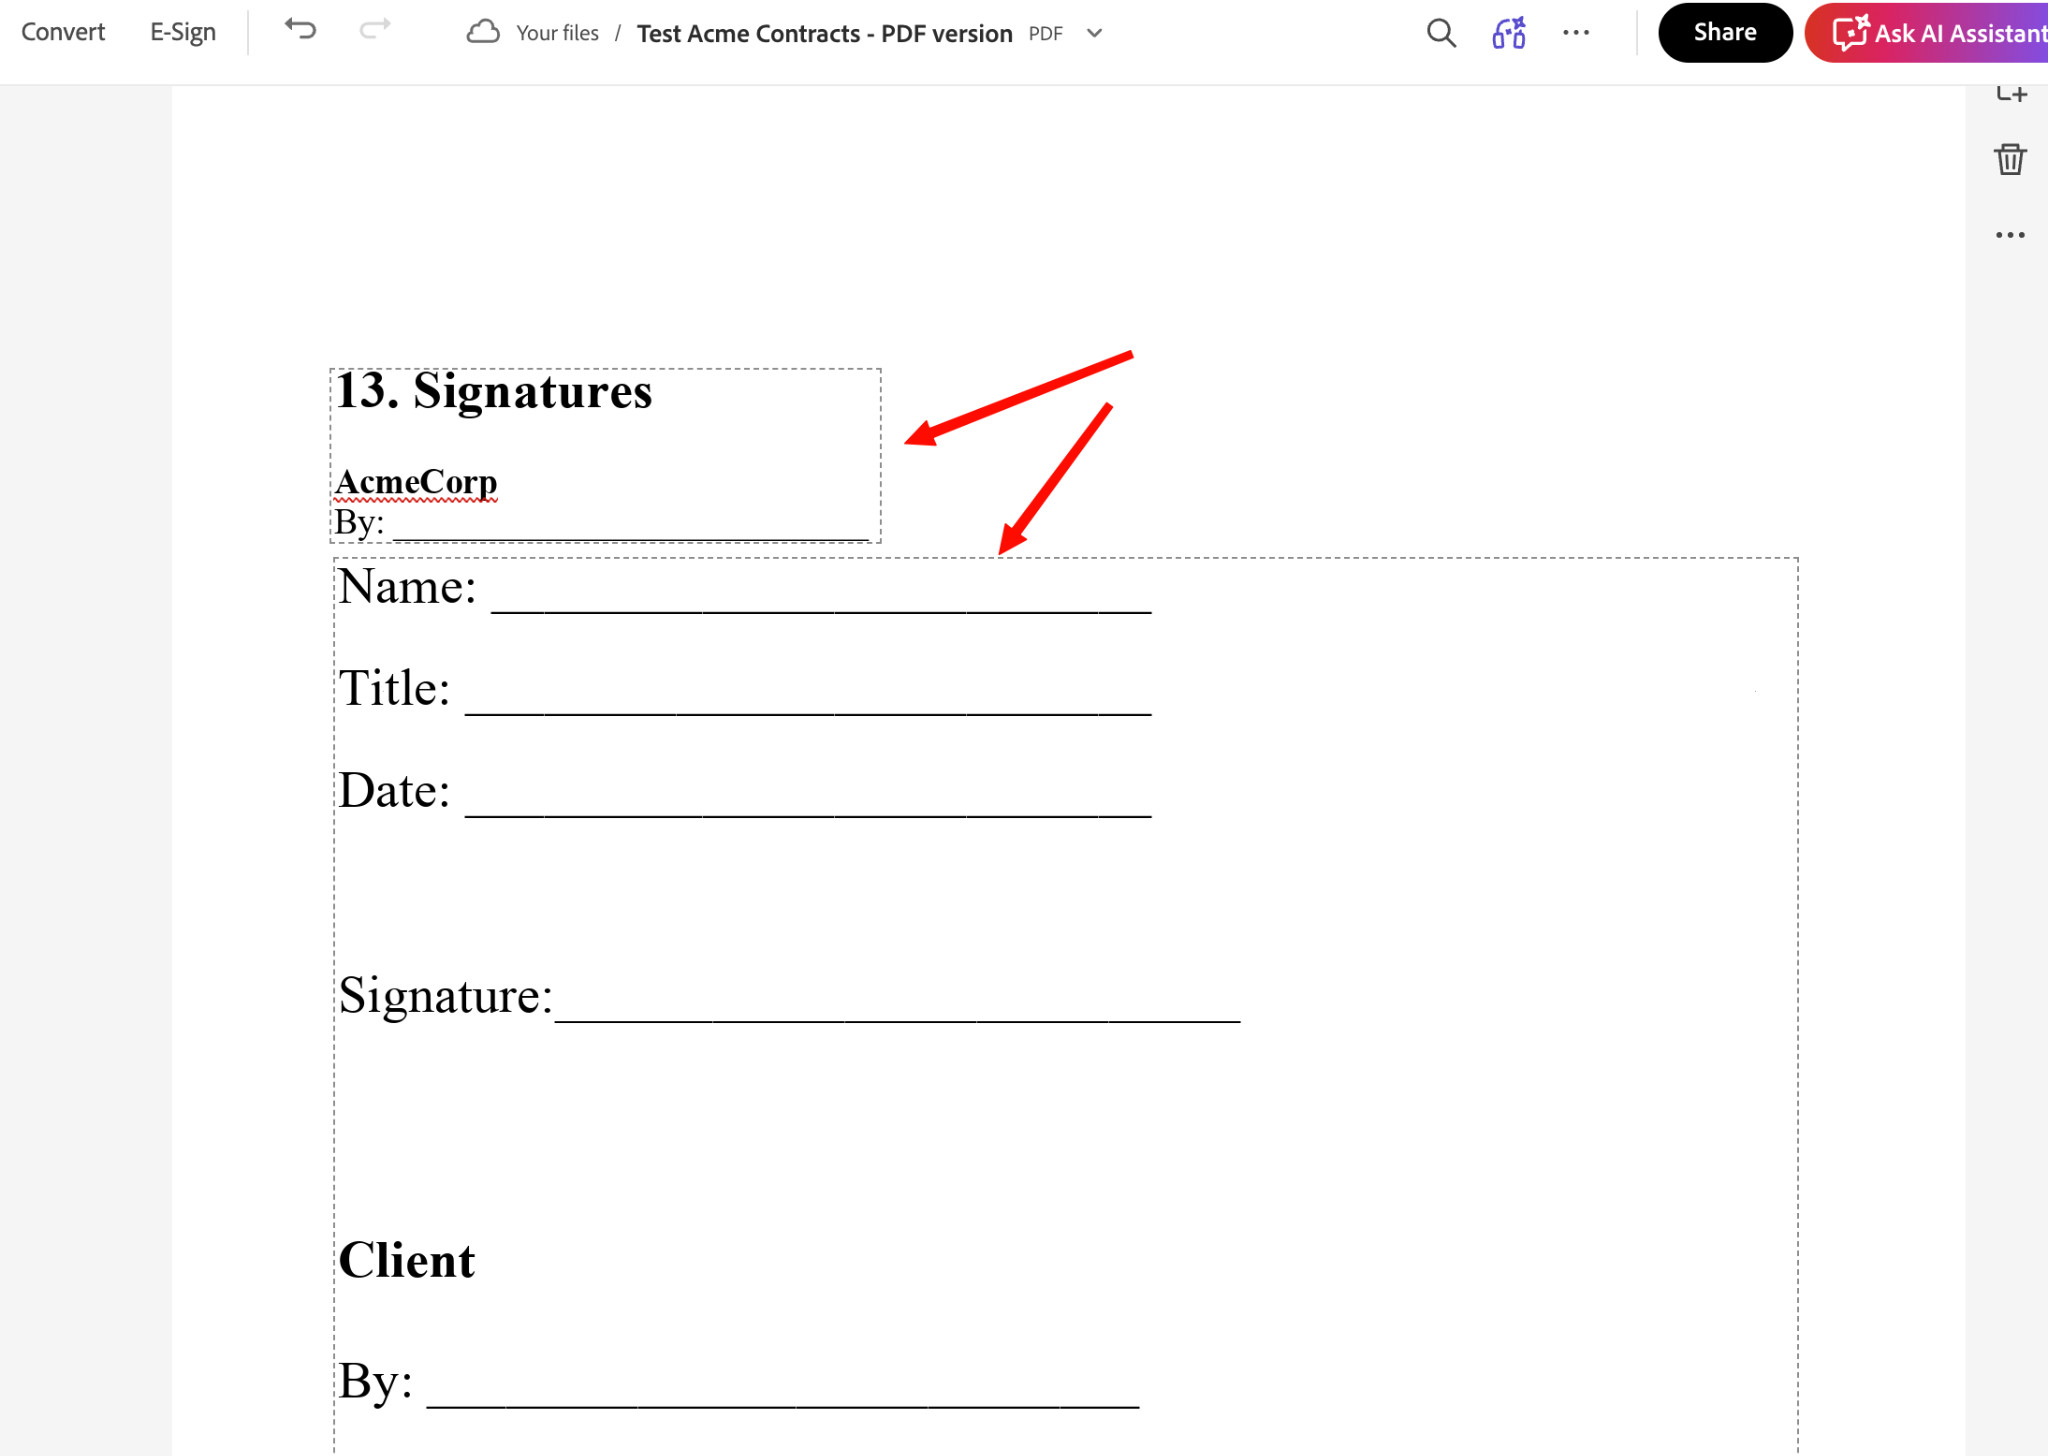
Strangely, the document pages shifted upon upload, splitting the signature page across two pages, unlike with PDFfiler.
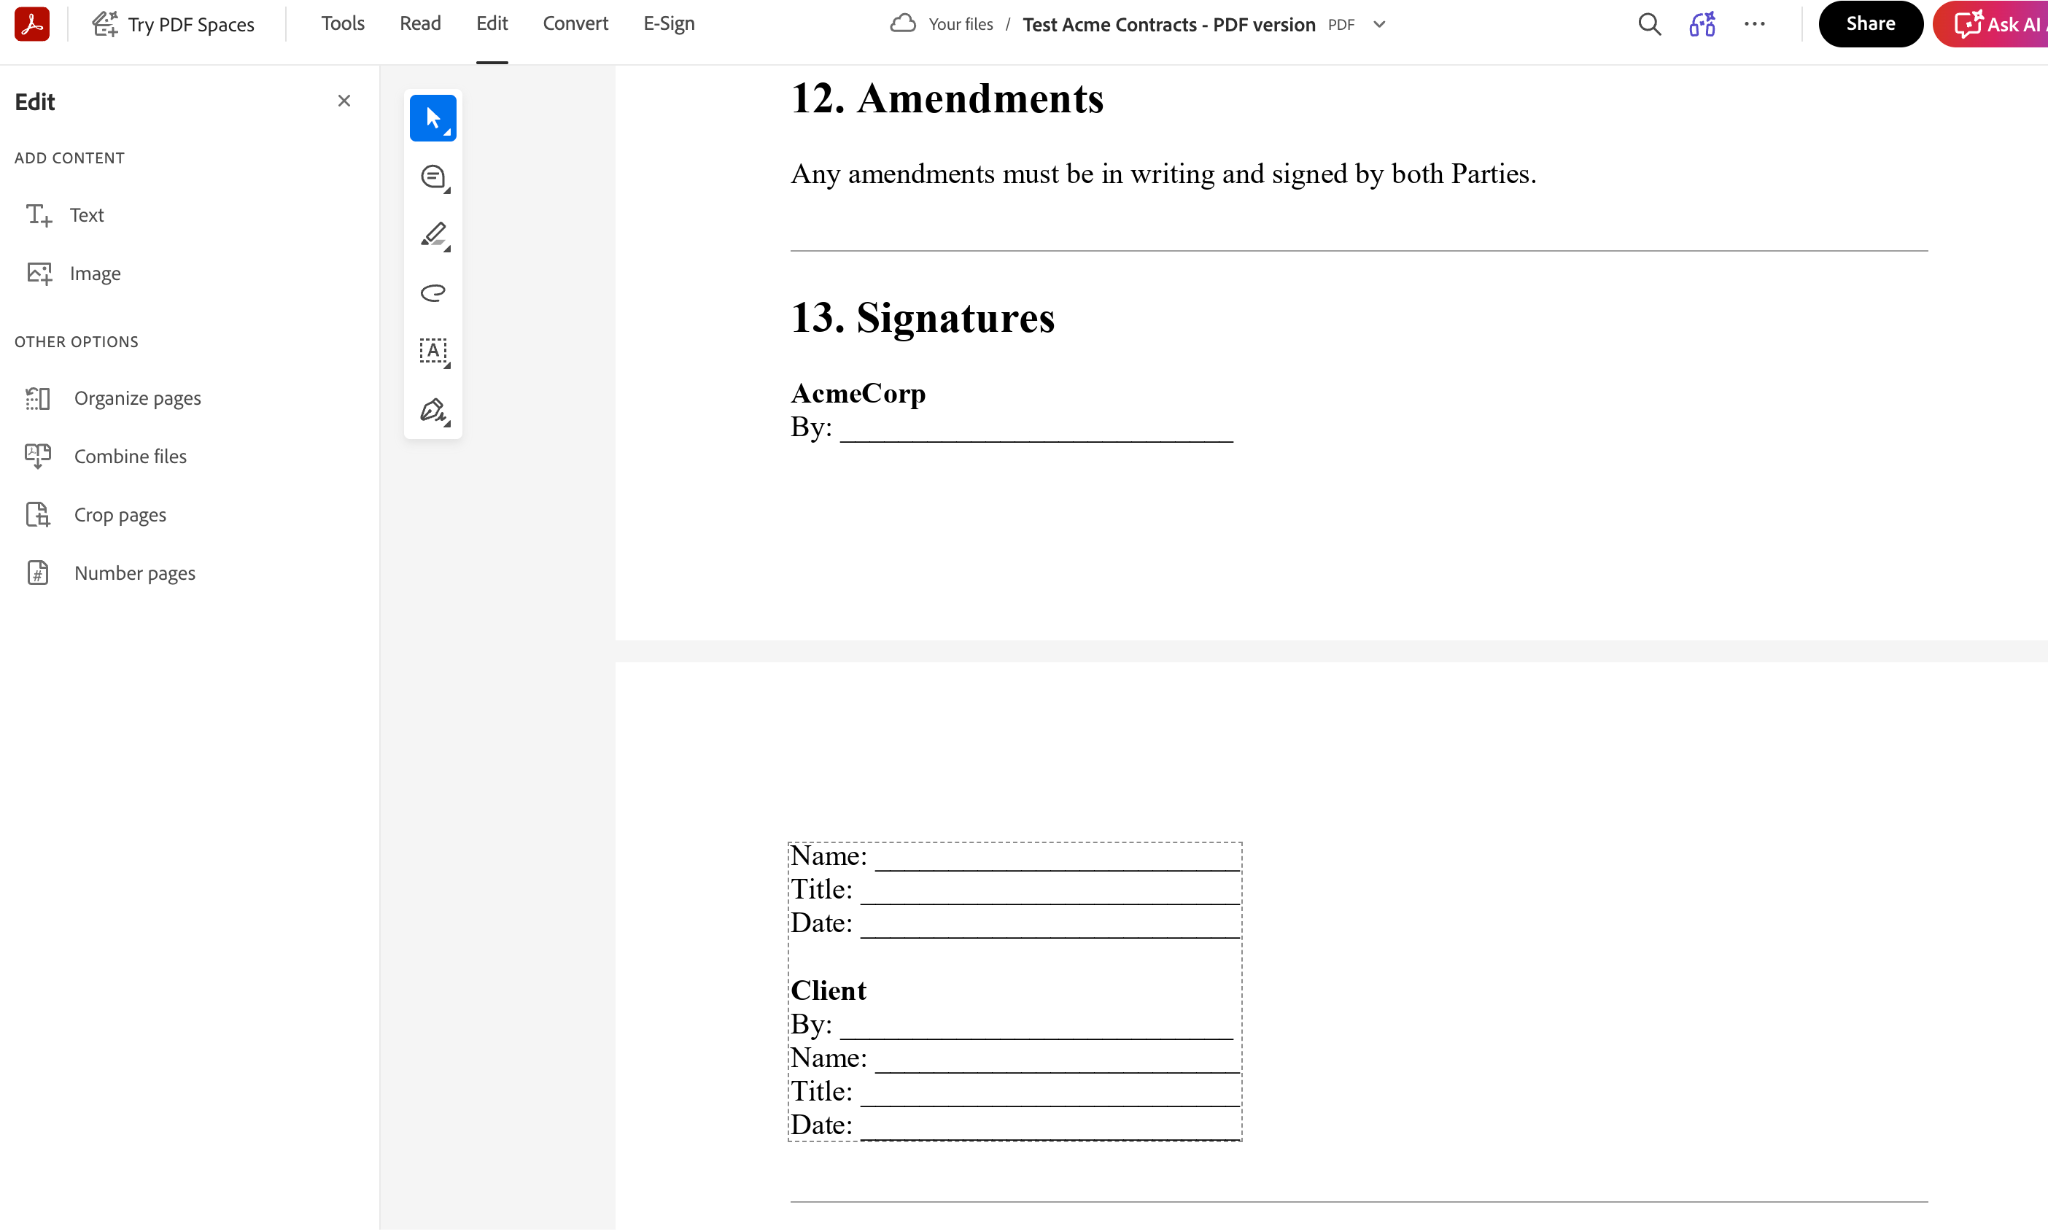
When editing the spacing and alignment, it tends to be a little trickier with Adobe because of the split pages. I ended up with split text blocks, which are far harder to edit. You’ll need to edit the text directly rather than adjust the sizing, for example, within the text box.
3. Features:
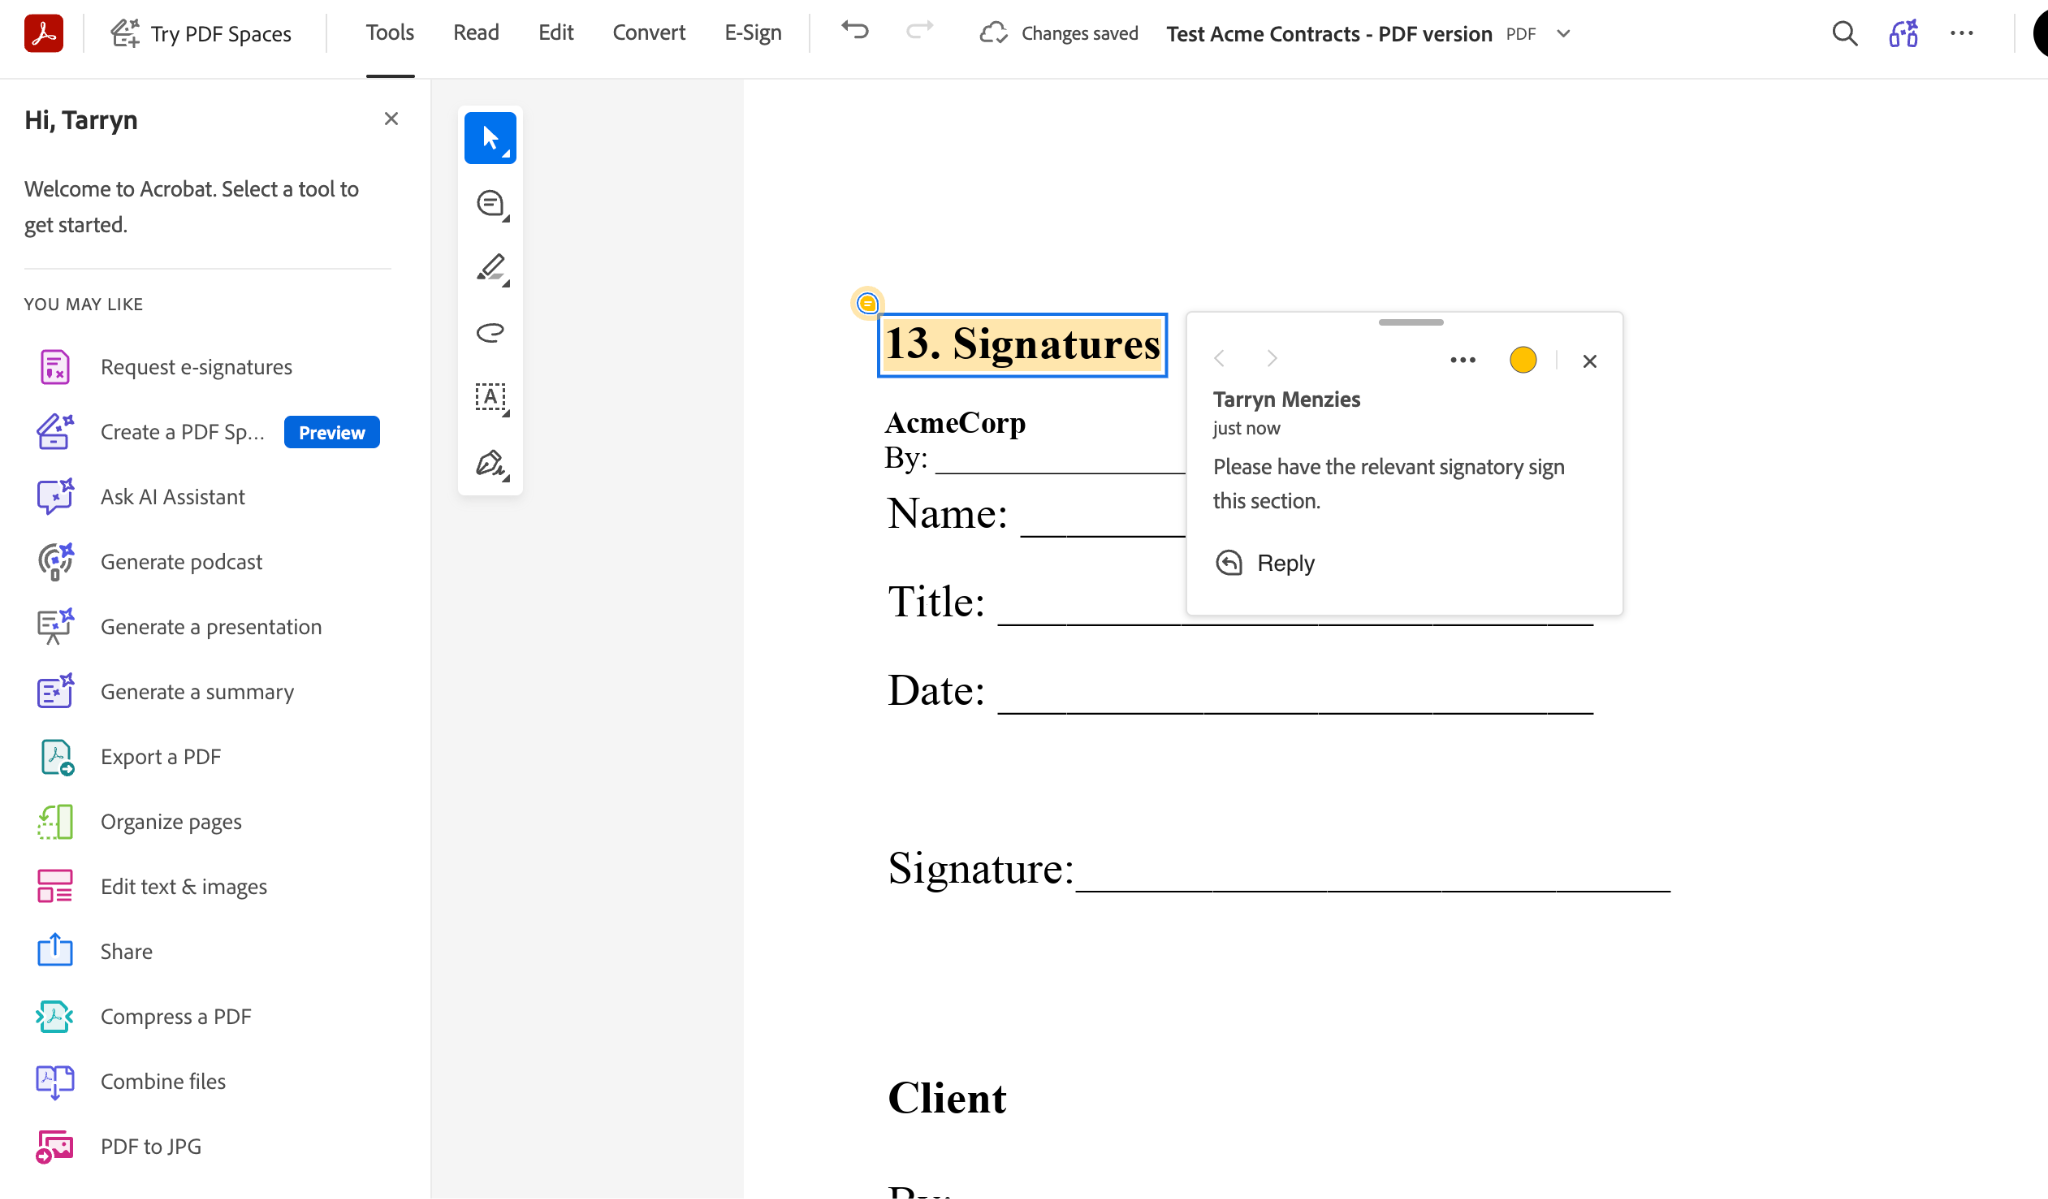
Similar to PDFfiller, Adobe lets you redact text, highlight sections, add comments for attention, and make other amendments as needed.
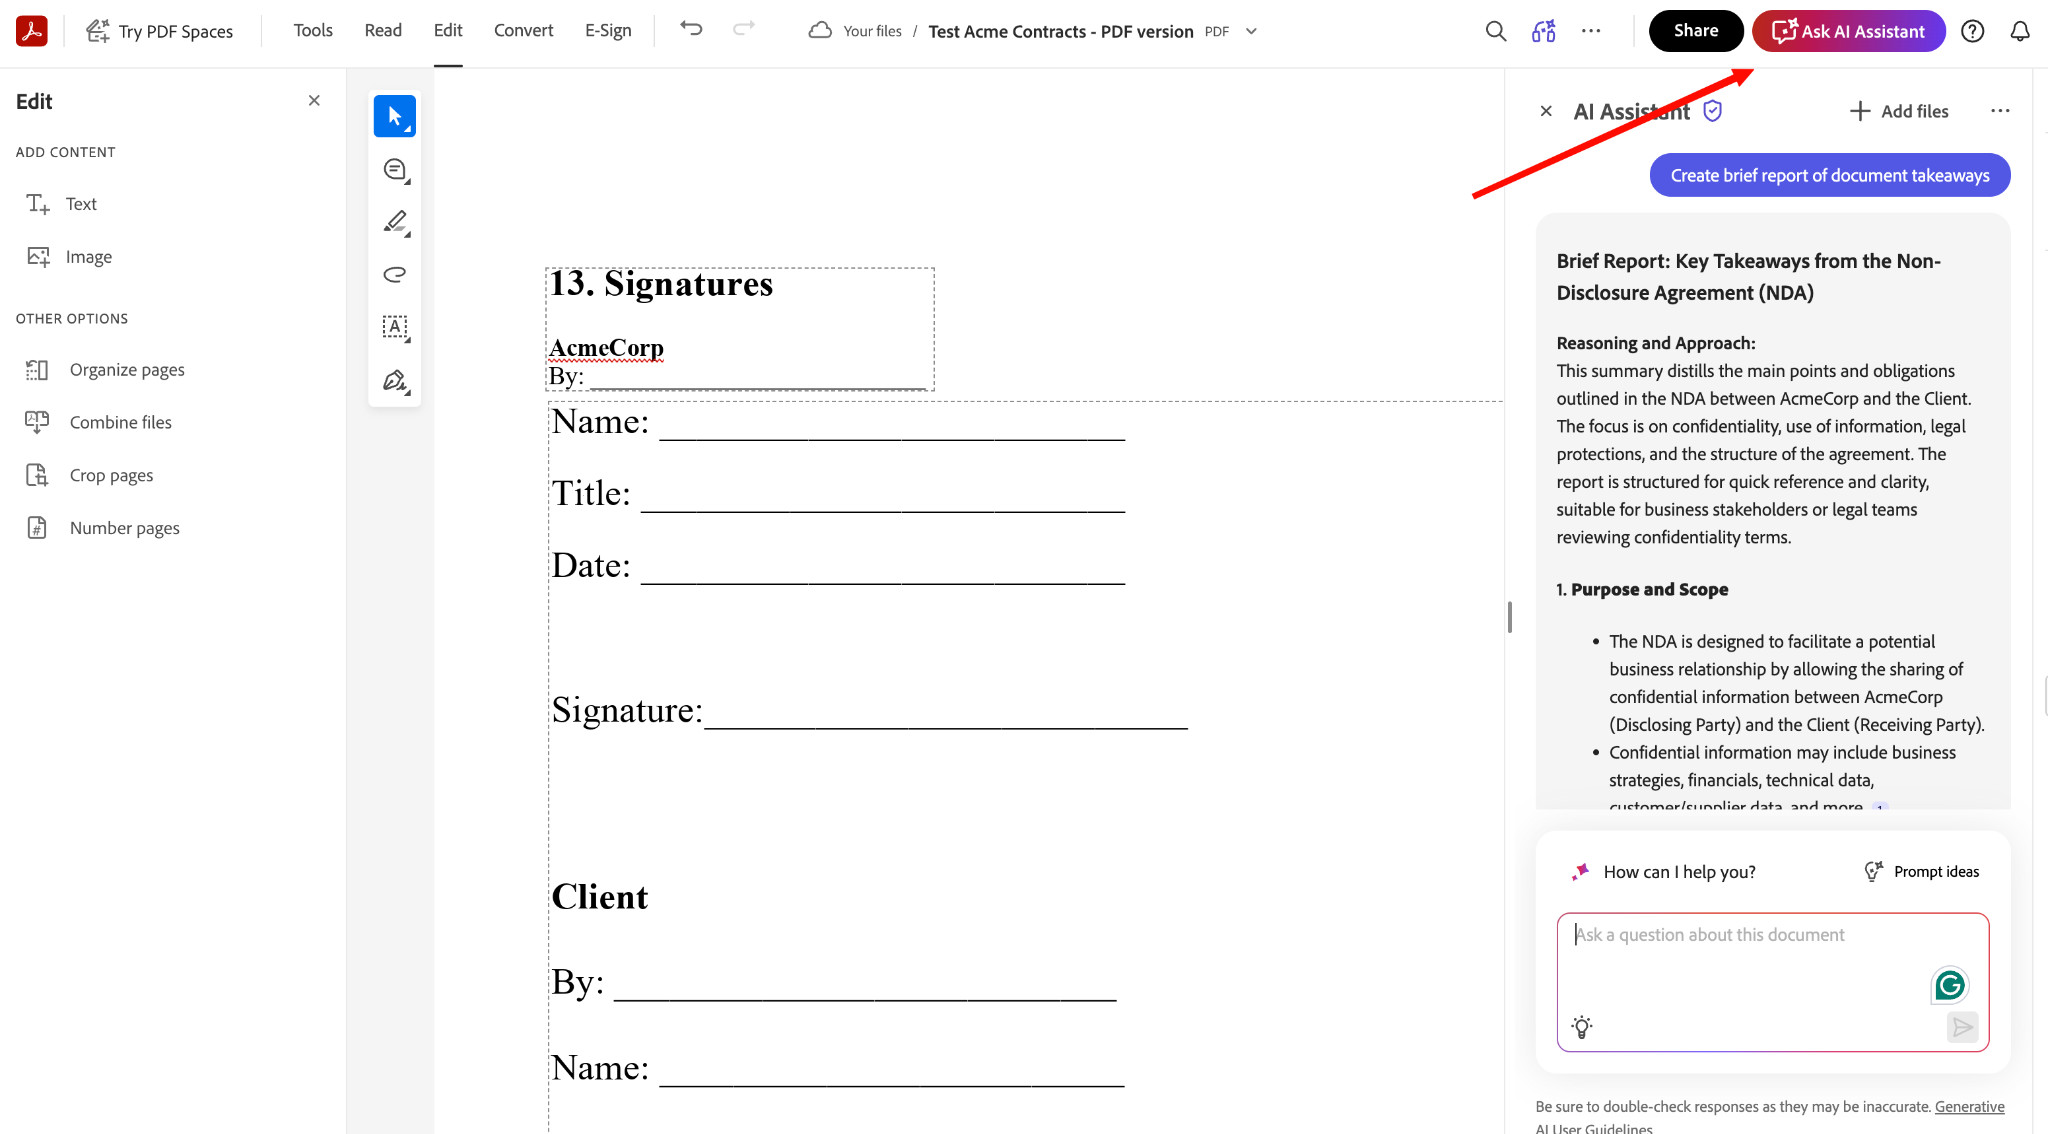
One notable feature here is the AI assistant, which can help summarize the document or offer other value-adds, such as creating a presentation or even a podcast directly from the document!
4. Download and Save:
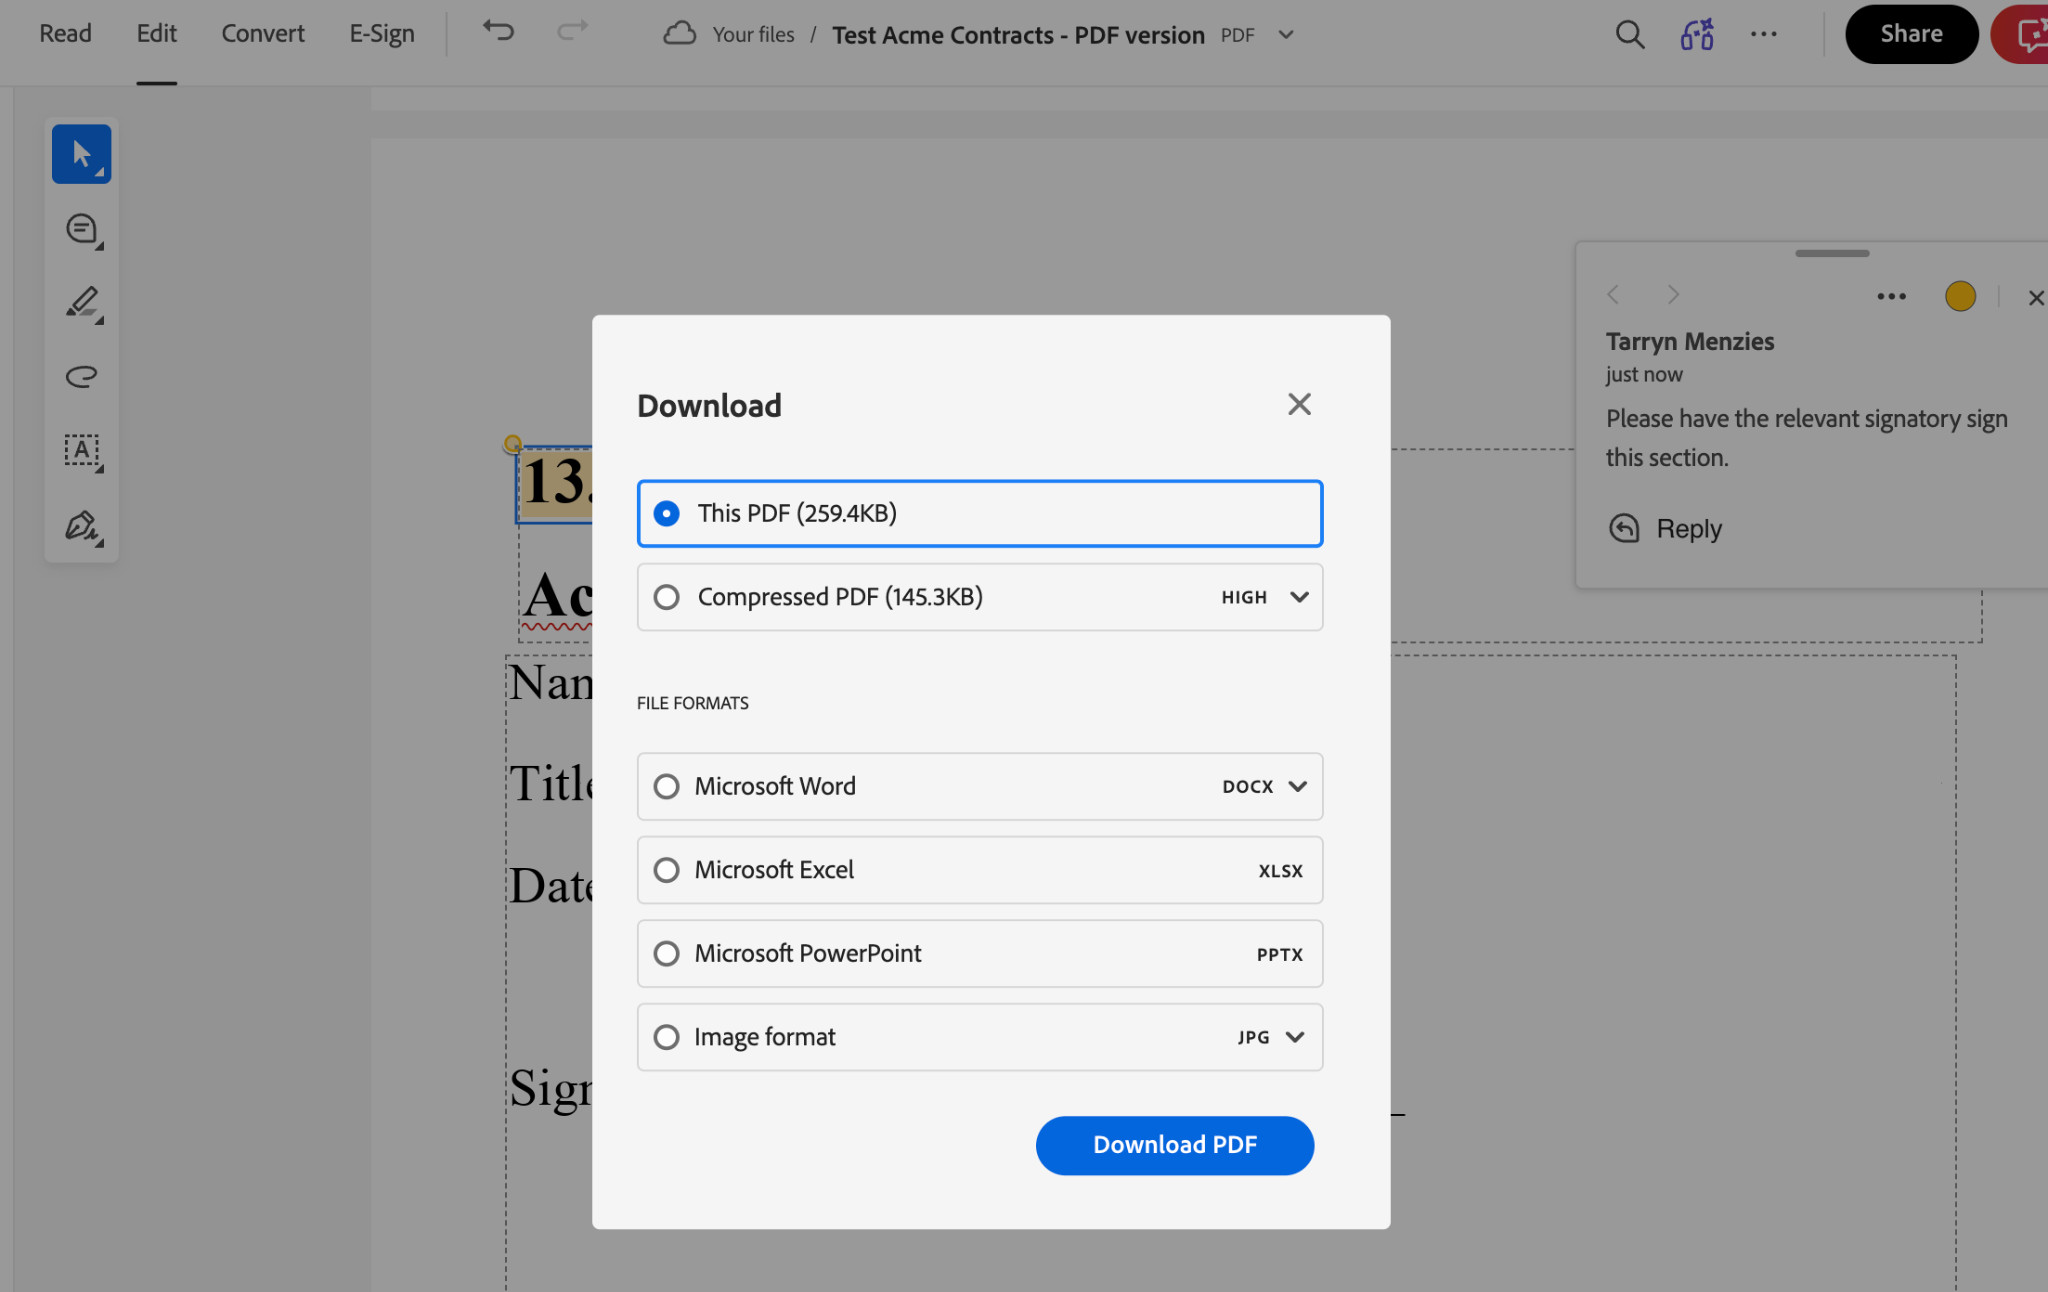
Again, this is a pretty straightforward step. You can download it in several formats. Including a compressed PDF is handy if you need smaller files created in the same step.
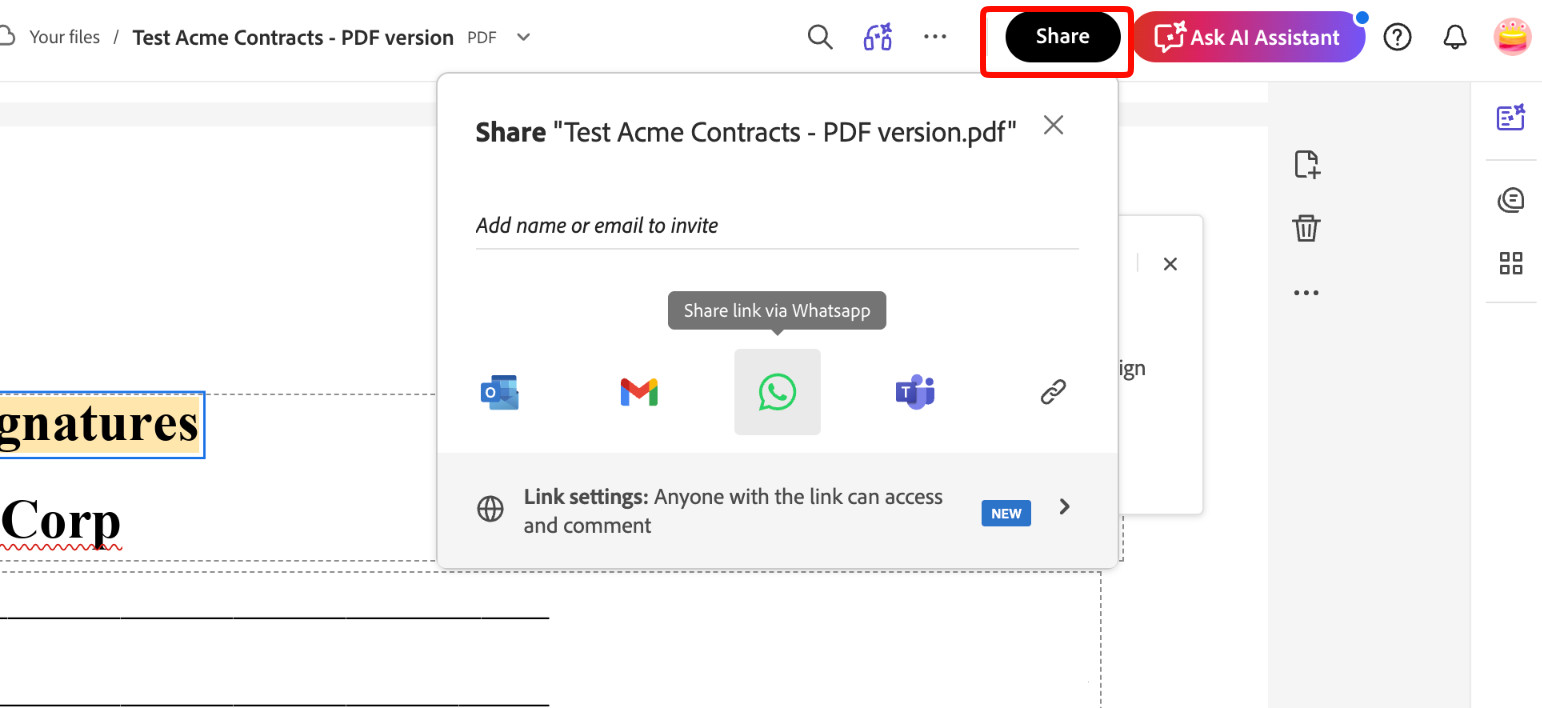
Adobe also lets you share via email or a secure link, which can be directly shared via channels like Gmail, Outlook, Teams, or even WhatsApp, which is handy.
5. Final Output:
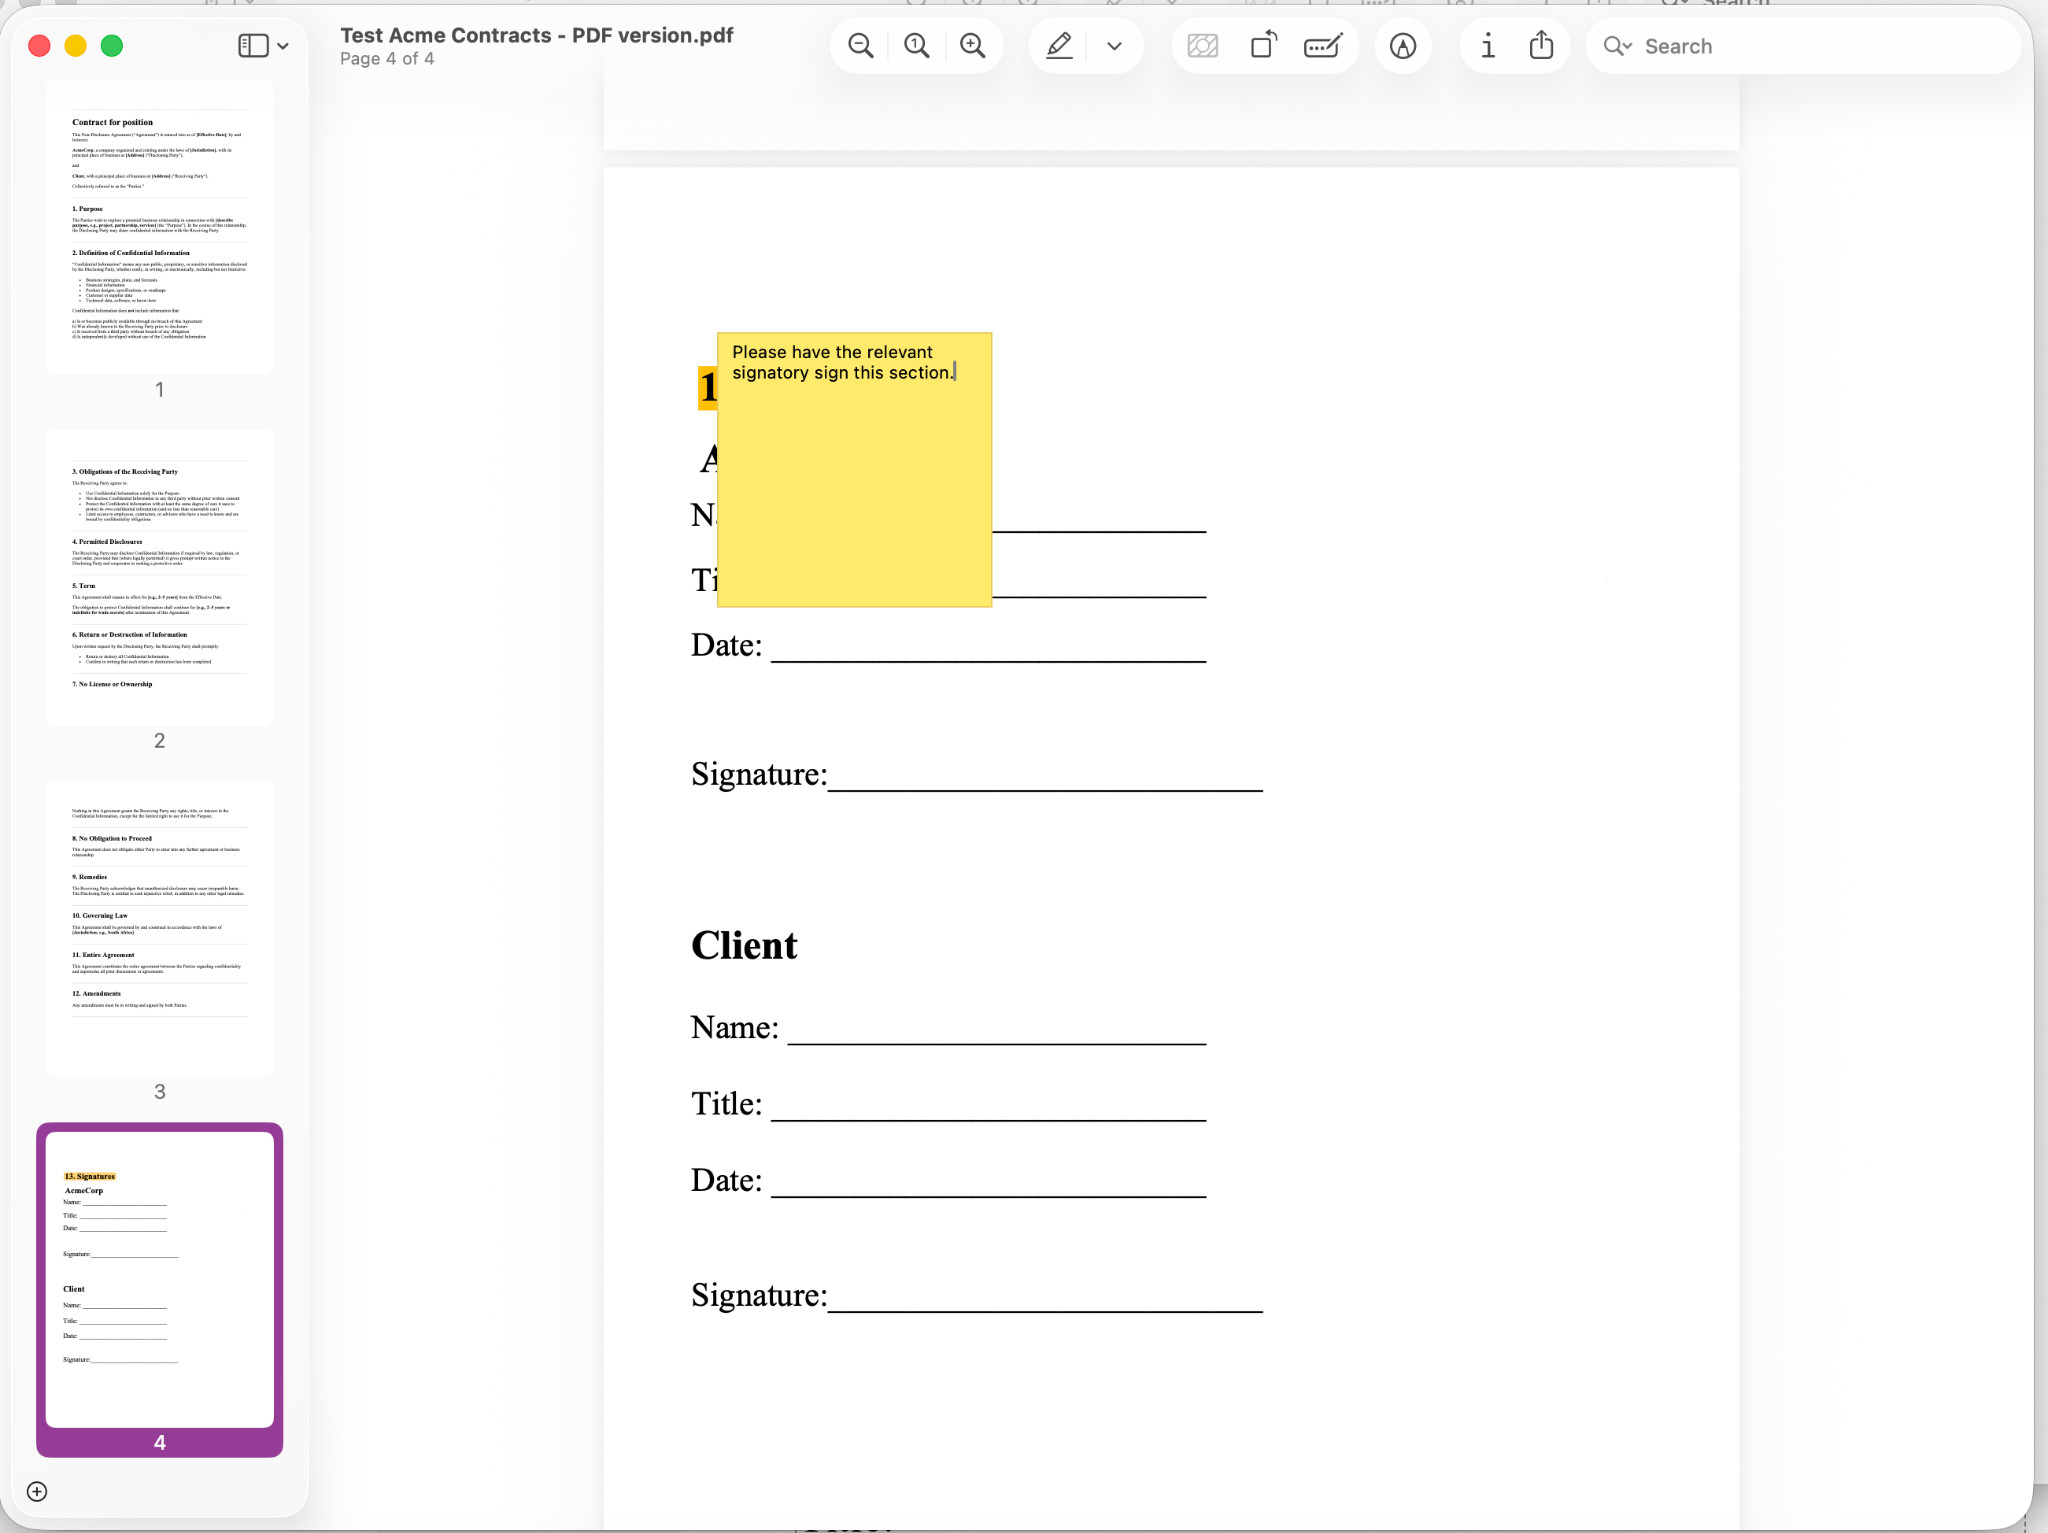
The final Adobe saved and downloaded document retains the edits and spacing. I do find the comment placement a little less user-friendly, and it hides important information.
Document Upload, Edit, and Creation Comparison:
Overall, the tools were more dissimilar than I anticipated, and there tends to be quite a disparity in the user experience.
- PDFfiller – easier to set up, quicker, and more intuitive and user-friendly edits.
- Adobe – more friction points, slower to set up with additional clicks for every step, and more advanced features.
My take is that if you need to edit a quick document in Word or PDF format and want minimal fuss, choose PDFfiller. However, if you need more control, granular formatting, and additional features such as automated presentation creation, rather choose Adobe.
Step 2 – E-Signature & Fillable Field Workflows
Of course, one of the most important functionalities for any PDF tool is the ability to sign and send for signature easily. I’d say this is likely one of the main reasons I’ve used PDF tools before.
I used my newly saved PDF documents and tested this workflow on both tools to see how they each performed against the same criteria.
PDFfiller Demo:
You may recall that the next logical tab is “invite to sign” on the PDFfiller interface, which makes it easy to just send a signature without needing to complete additional steps.
1. Signature Request
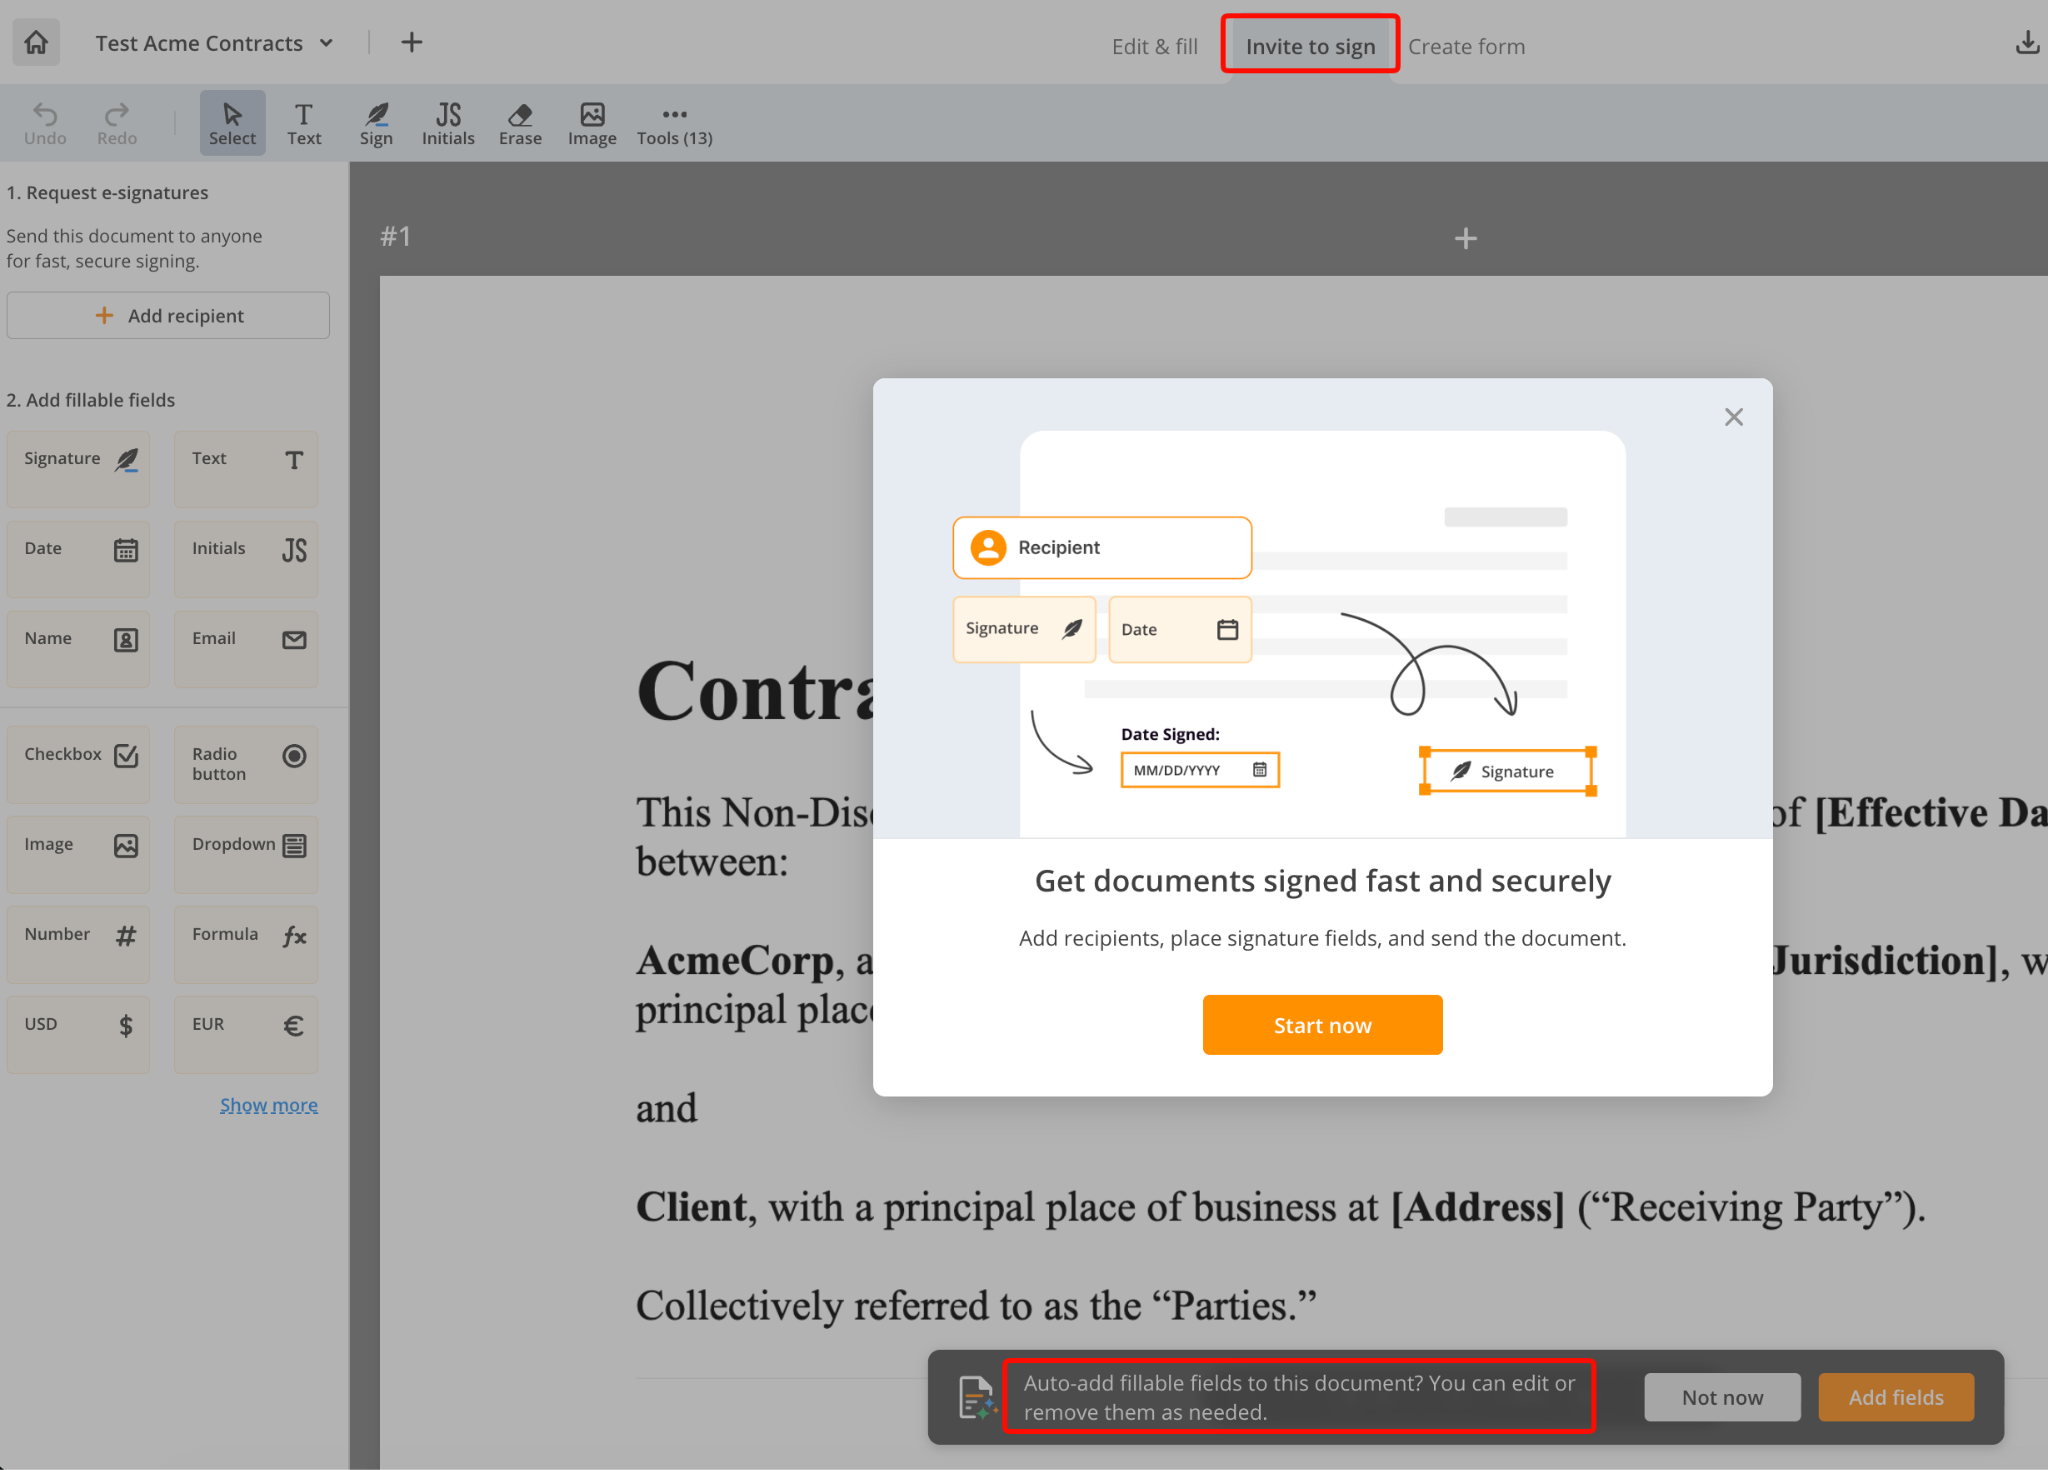
Once you click on “invite to sign”, PDFfiller automatically prompts you to add fillable fields for easier signature, which I liked, but I feel is not always a requirement if you have simple documents or contracts.
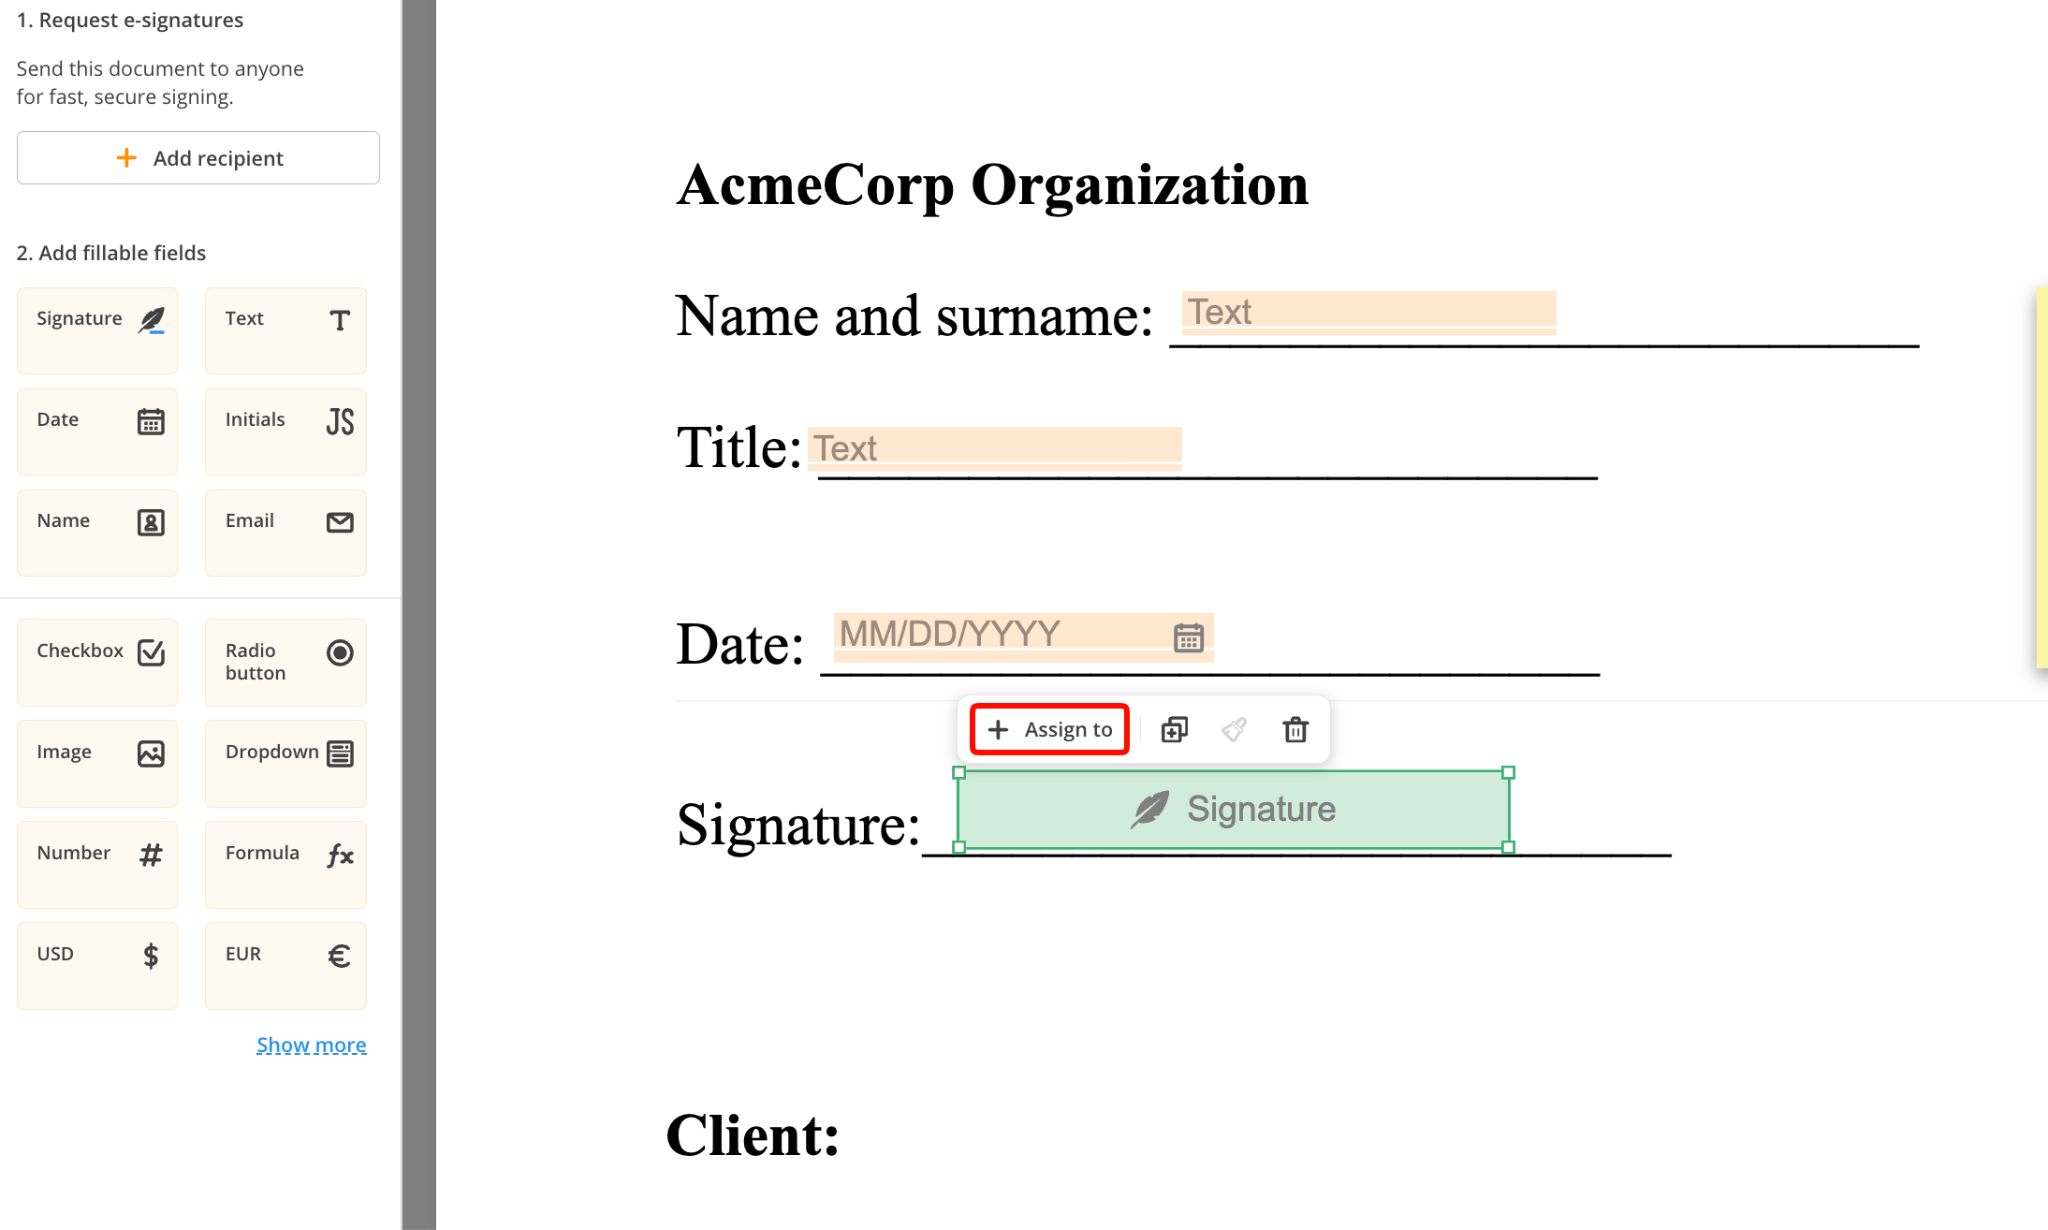
2. Adding Fillable Fields
PDFfiller offers a good range of fillable fields that you can select or drag and drop into specified document sections. It’s smooth and feels intuitive without needing to resize or adjust based on the
3. Assigning Recipients
I prefer the functionality that lets me assign signatures to specific sections of my document. This is especially useful when you’ll need the same person assigned to the same sections across multiple pages, such as in the case of witnessed documents.
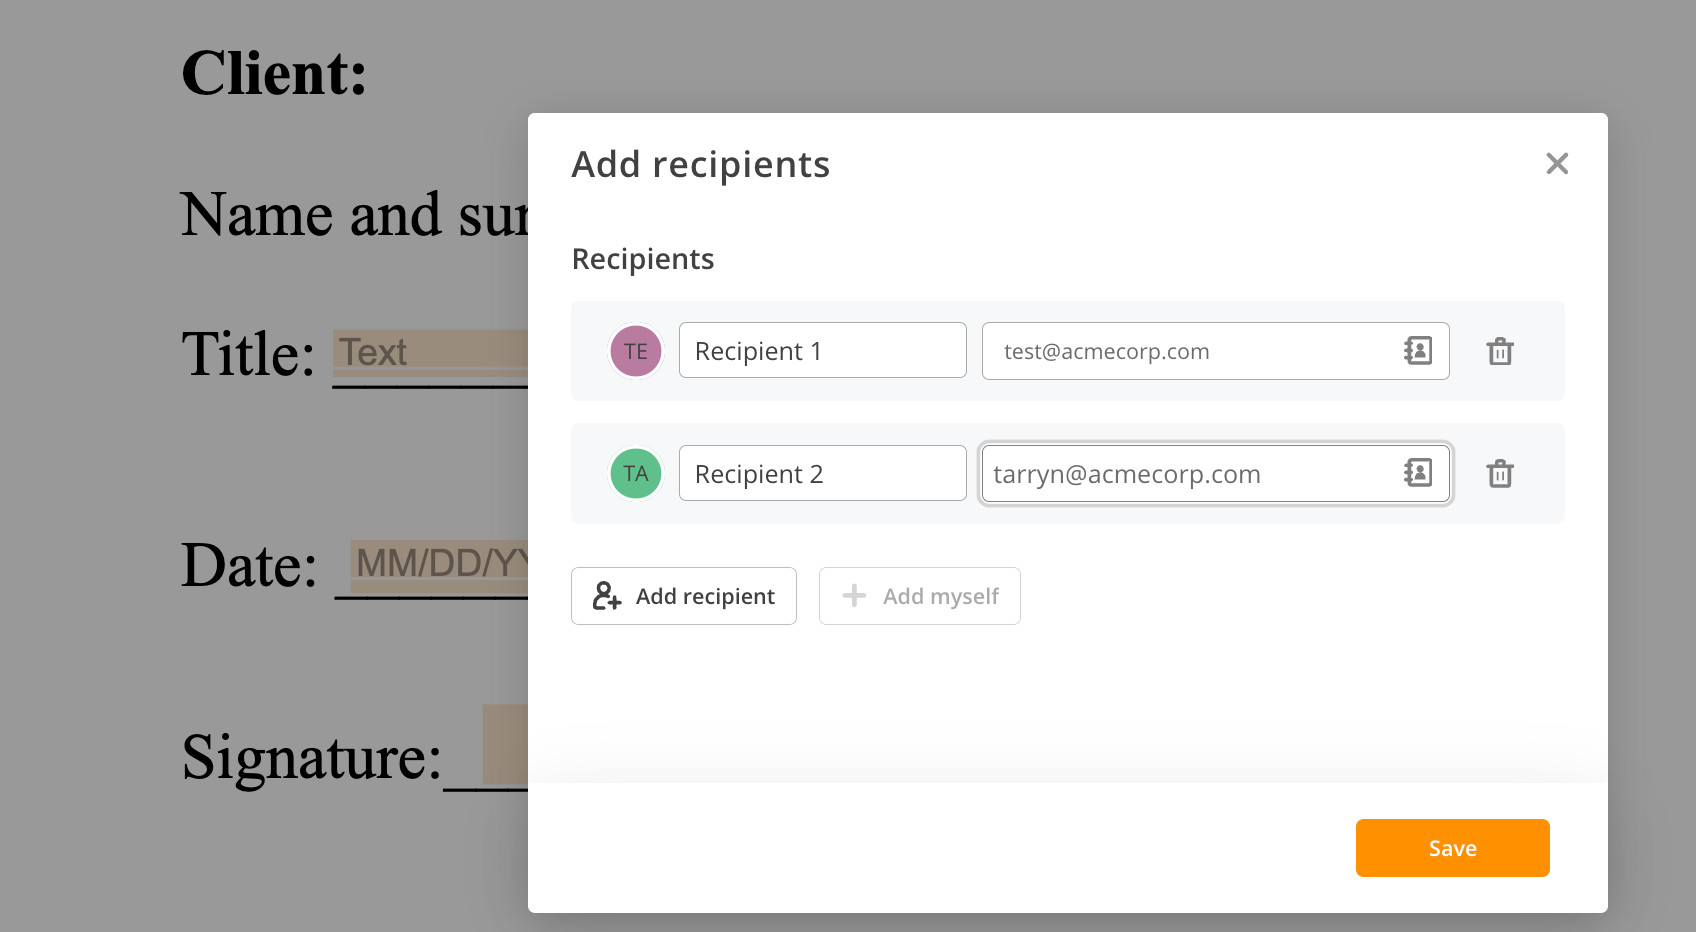
You can select the recipient section and color-code it for easier identification across documents. This makes it easier to check at a glance.
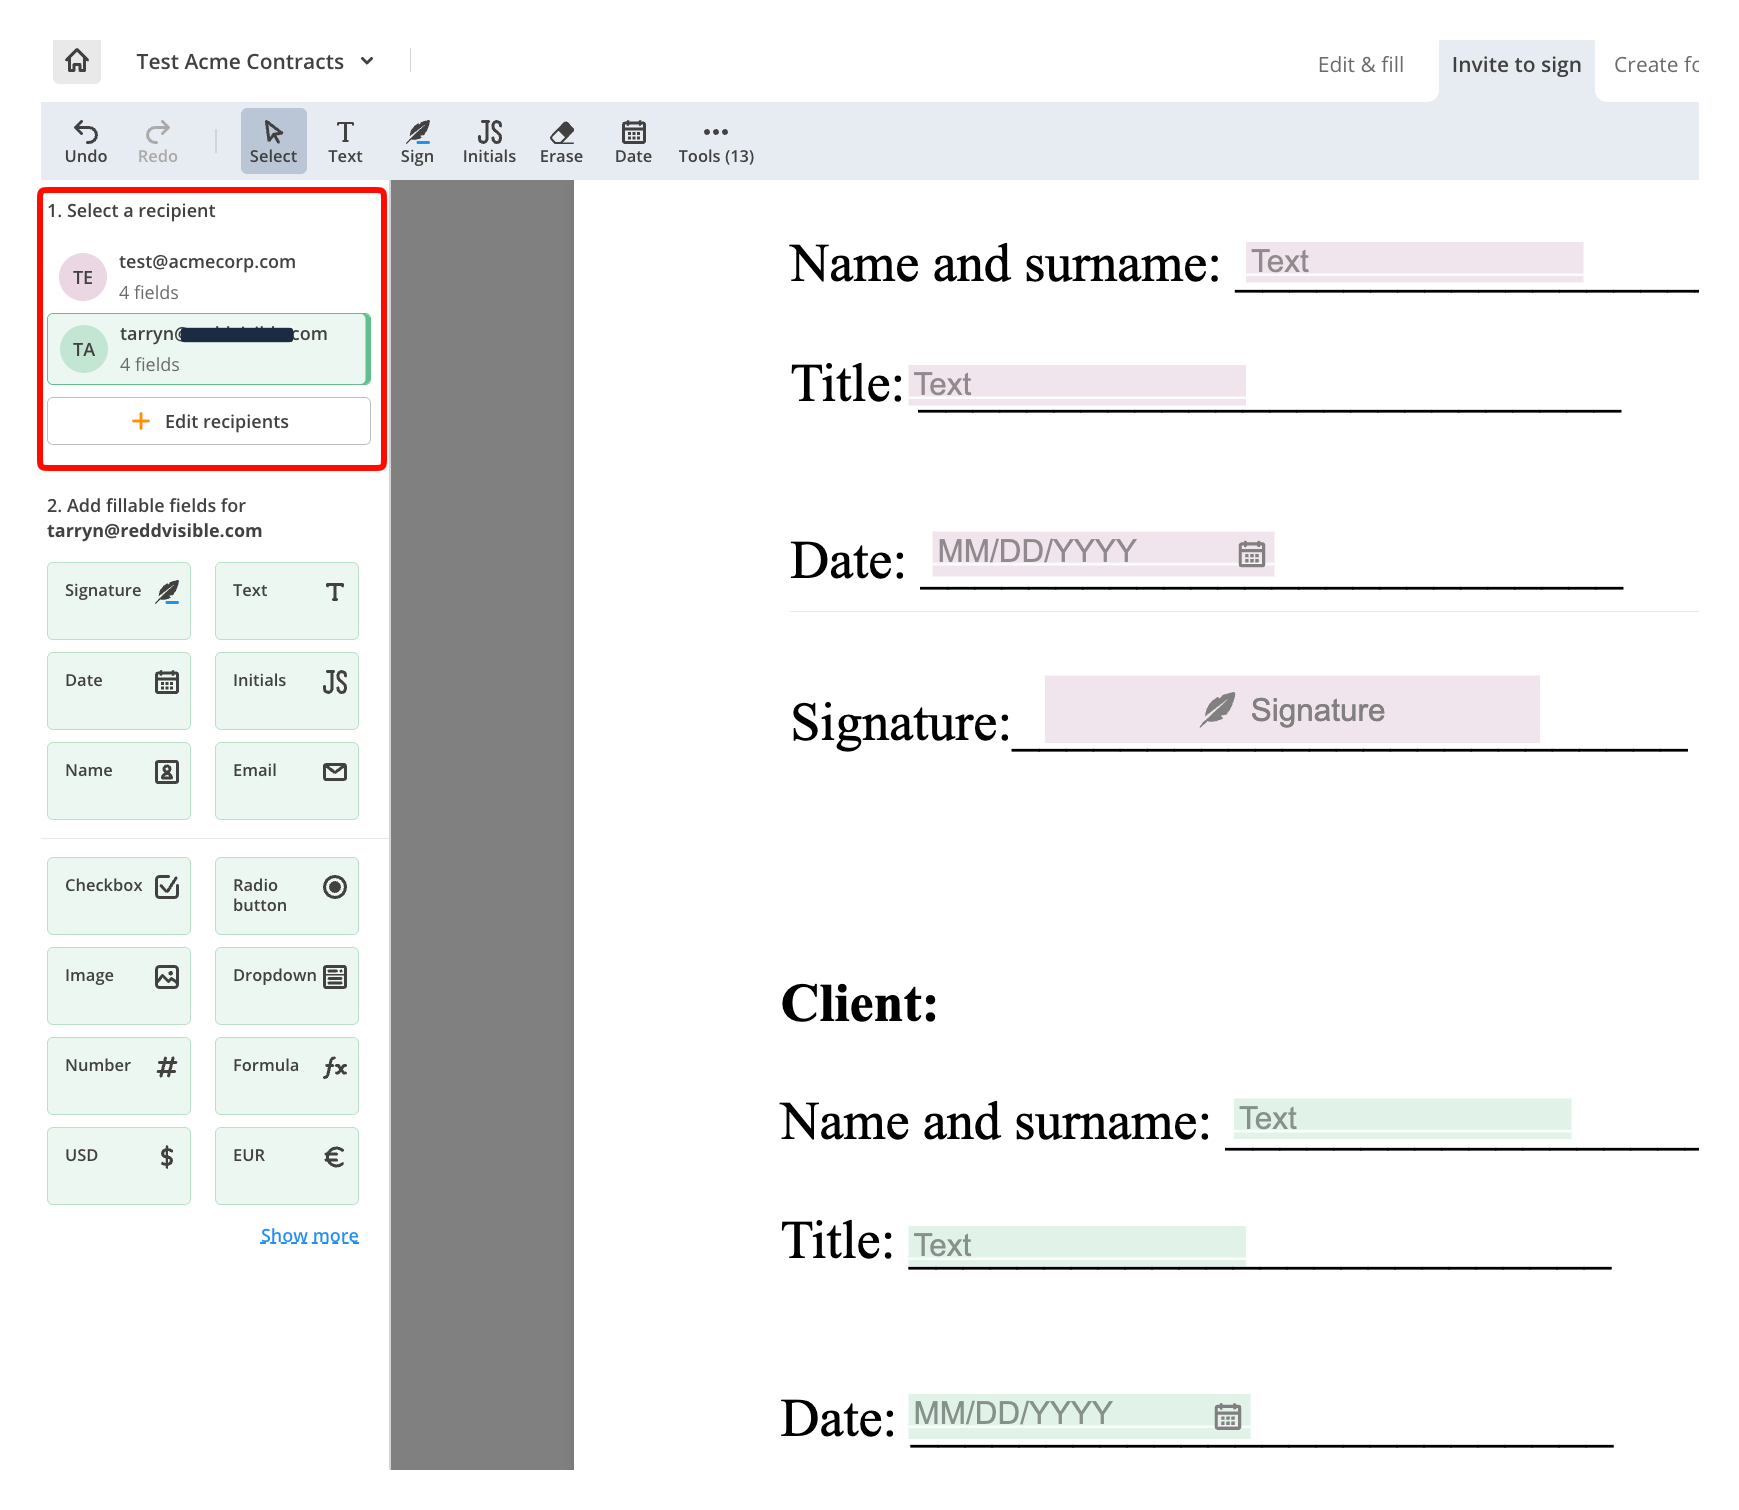
4. Review and Send
Once ready to send, you can review and confirm that all fields are correctly allocated. Adding additional details, such as help text, or making specified fields required, is a great way to ensure nothing gets missed.
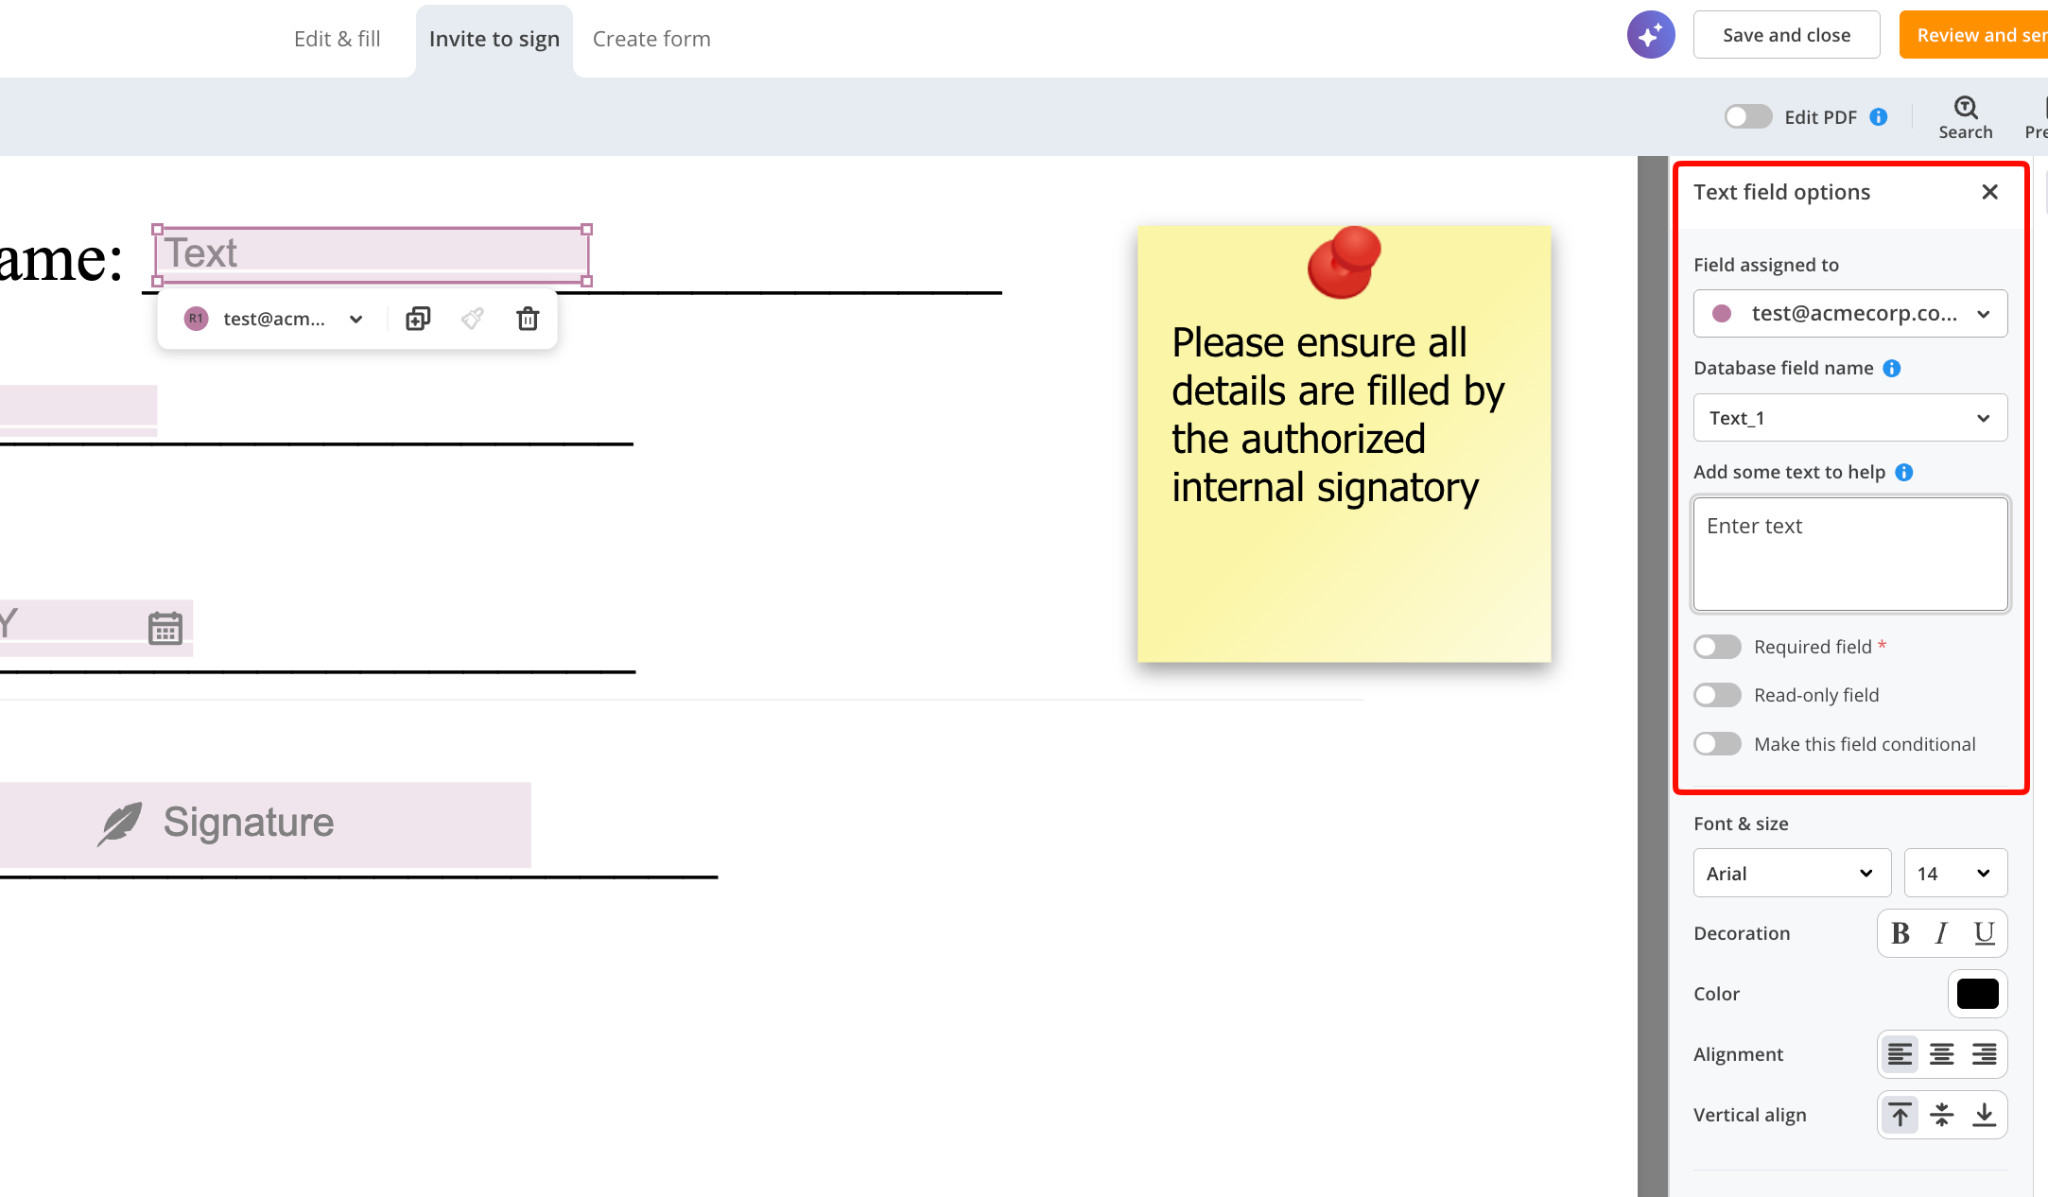
Additional Features:
At this stage, you can also go further by creating conditional fields or changing field types. You can also set reminders for signing and set up your email subject line and text so that recipients receive complete information.
Setting up cc’d email addresses or other actions for completed signatures.
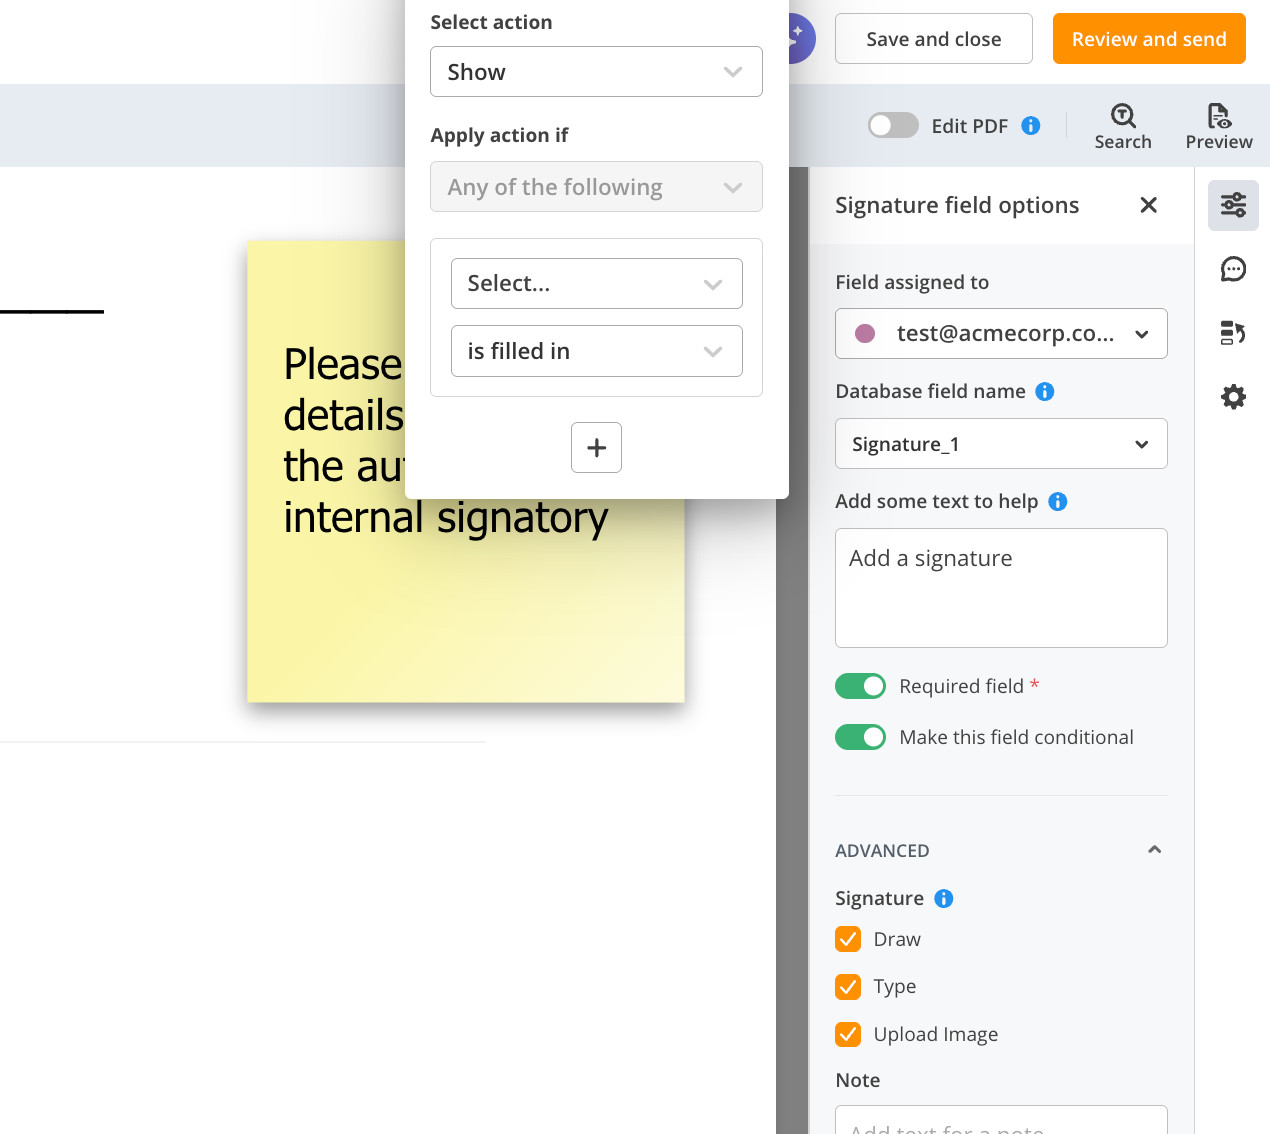
5. Signature Process
I received the notification almost immediately after sending. I noticed the dashboard updates with both actions I need to take and those where I am waiting on a signature from other recipients, making it easy to see outstanding information at a glance.
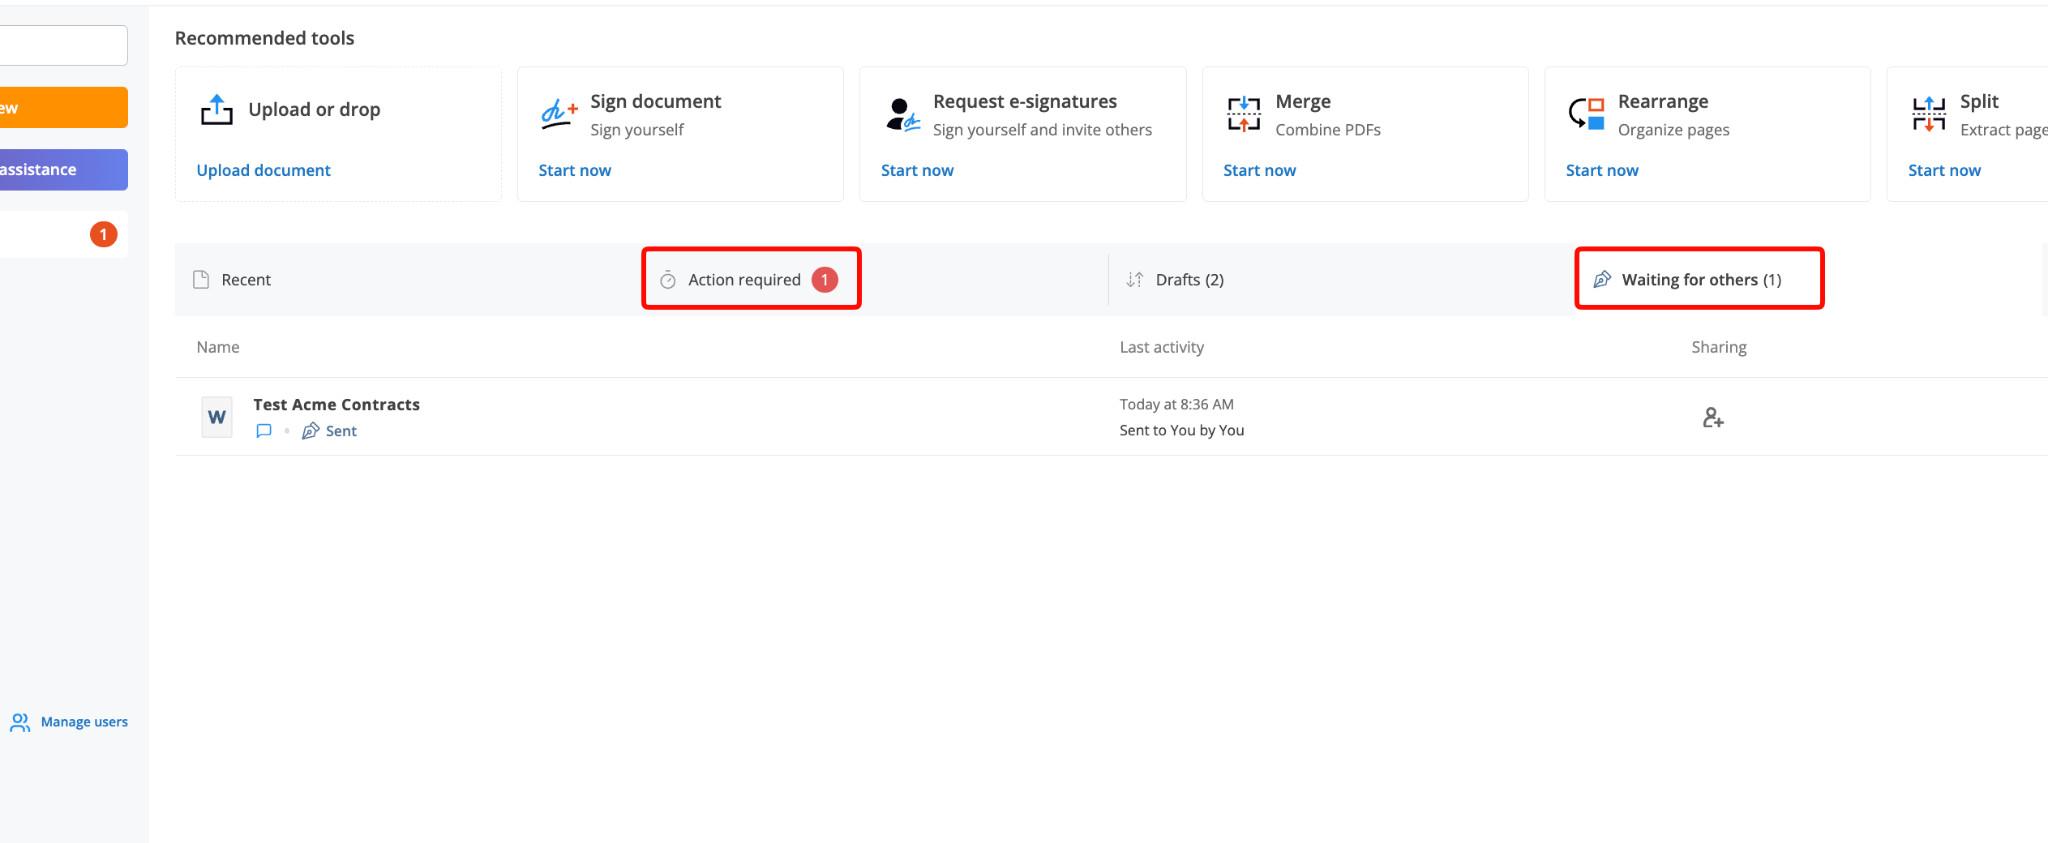
6. Final Output and Email Notifications
The output is clear, the formats are correct, and fillable forms, such as date selectors and other sections, all appear and populate easily.
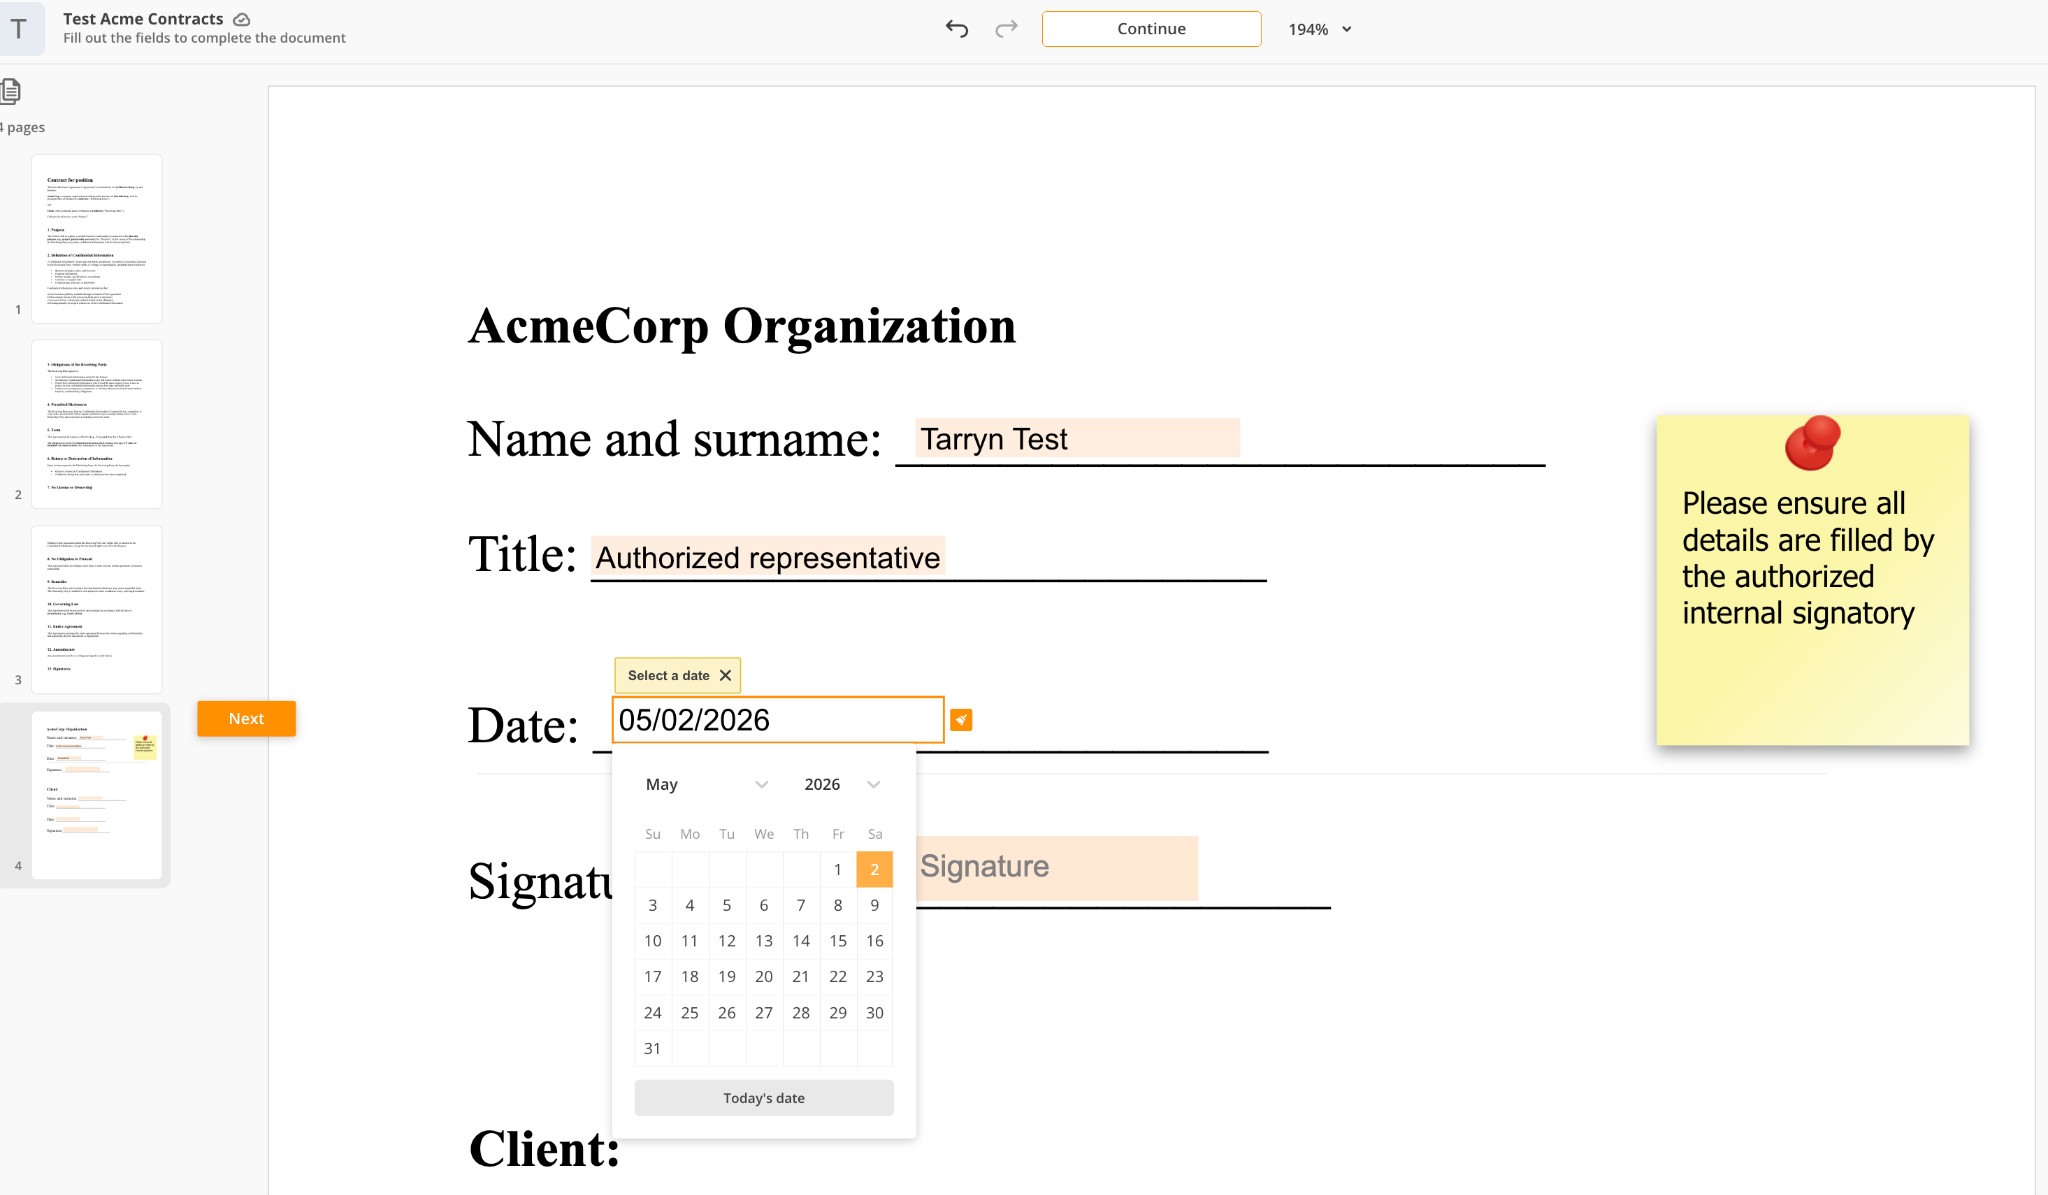
The email notifications are generated instantly, and the full document copy comes through as a finalized, signed PDF.
Adobe Demo:
The navigation was a little different from what was expected on Adobe, but once you’ve gotten used to the tool, it tends to feel more intuitive.
1. Signature Request
The E-sign panel is already on the same page, which I liked, so you can easily sign or request signatures.
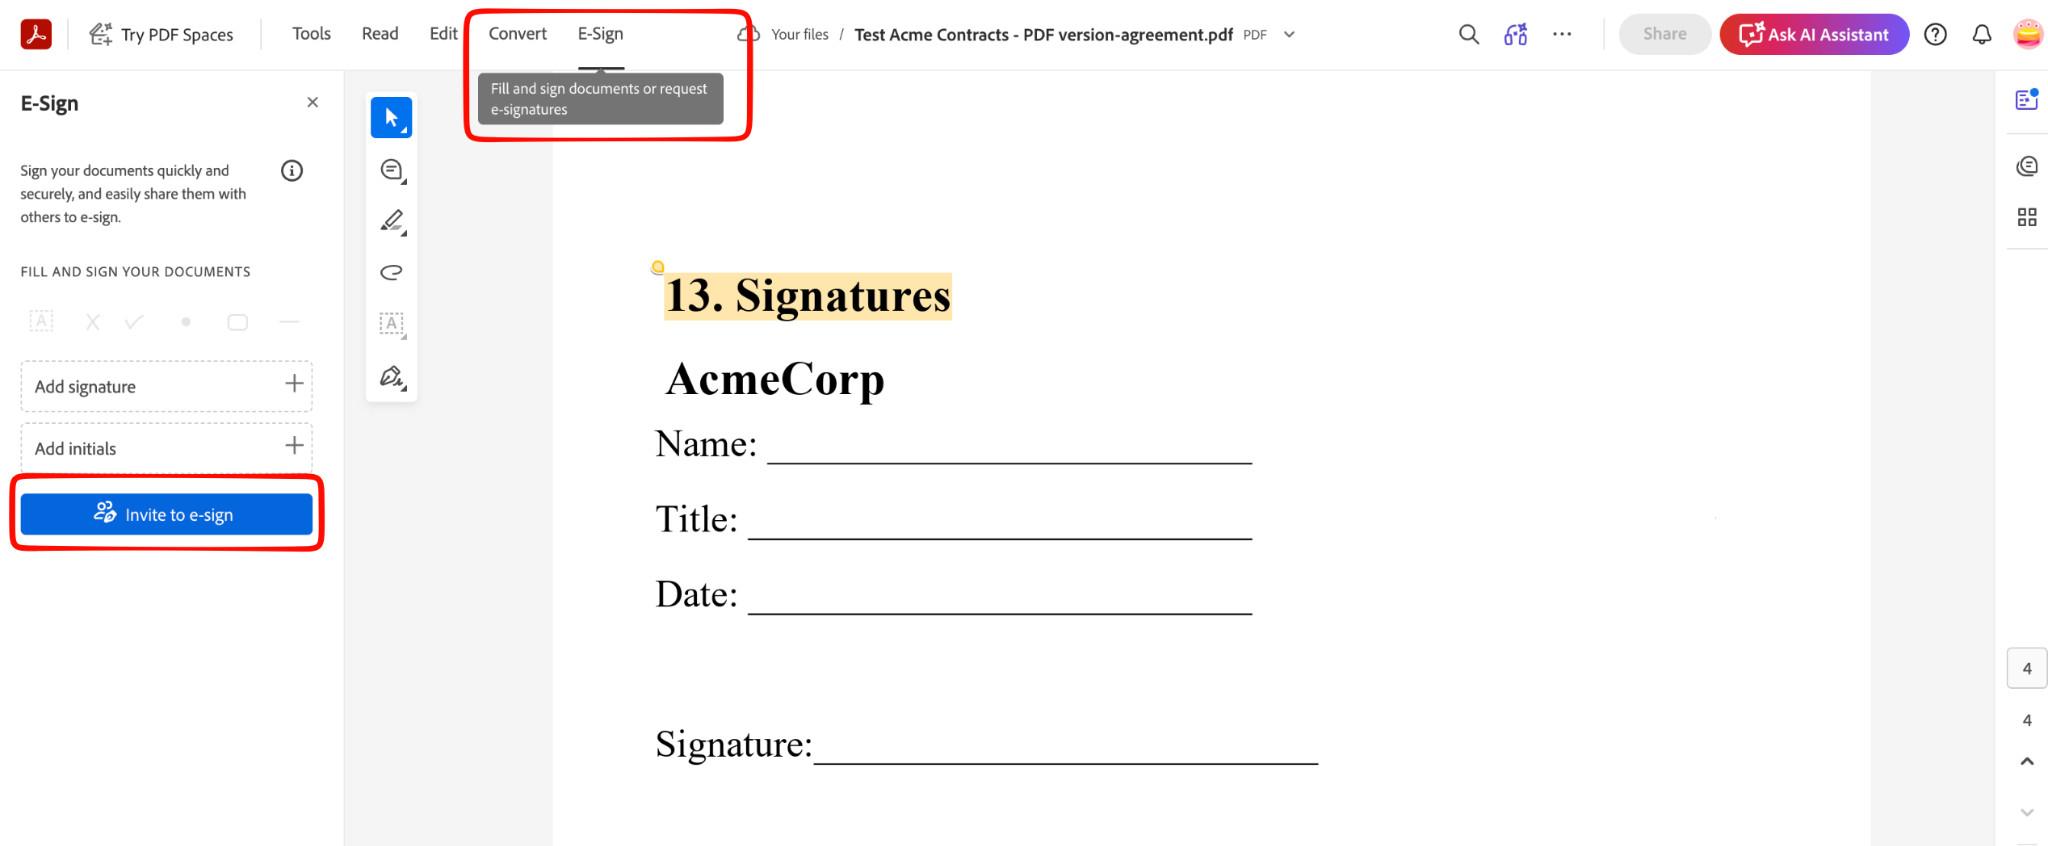
2. Adding Fillable Fields
The fillable fields on Adobe included similar types to PDFfiller, such as date, radio buttons, signatures, and more. But one of the outstanding features here was the built-in AI assistance that helps fill out fillable fields easily.
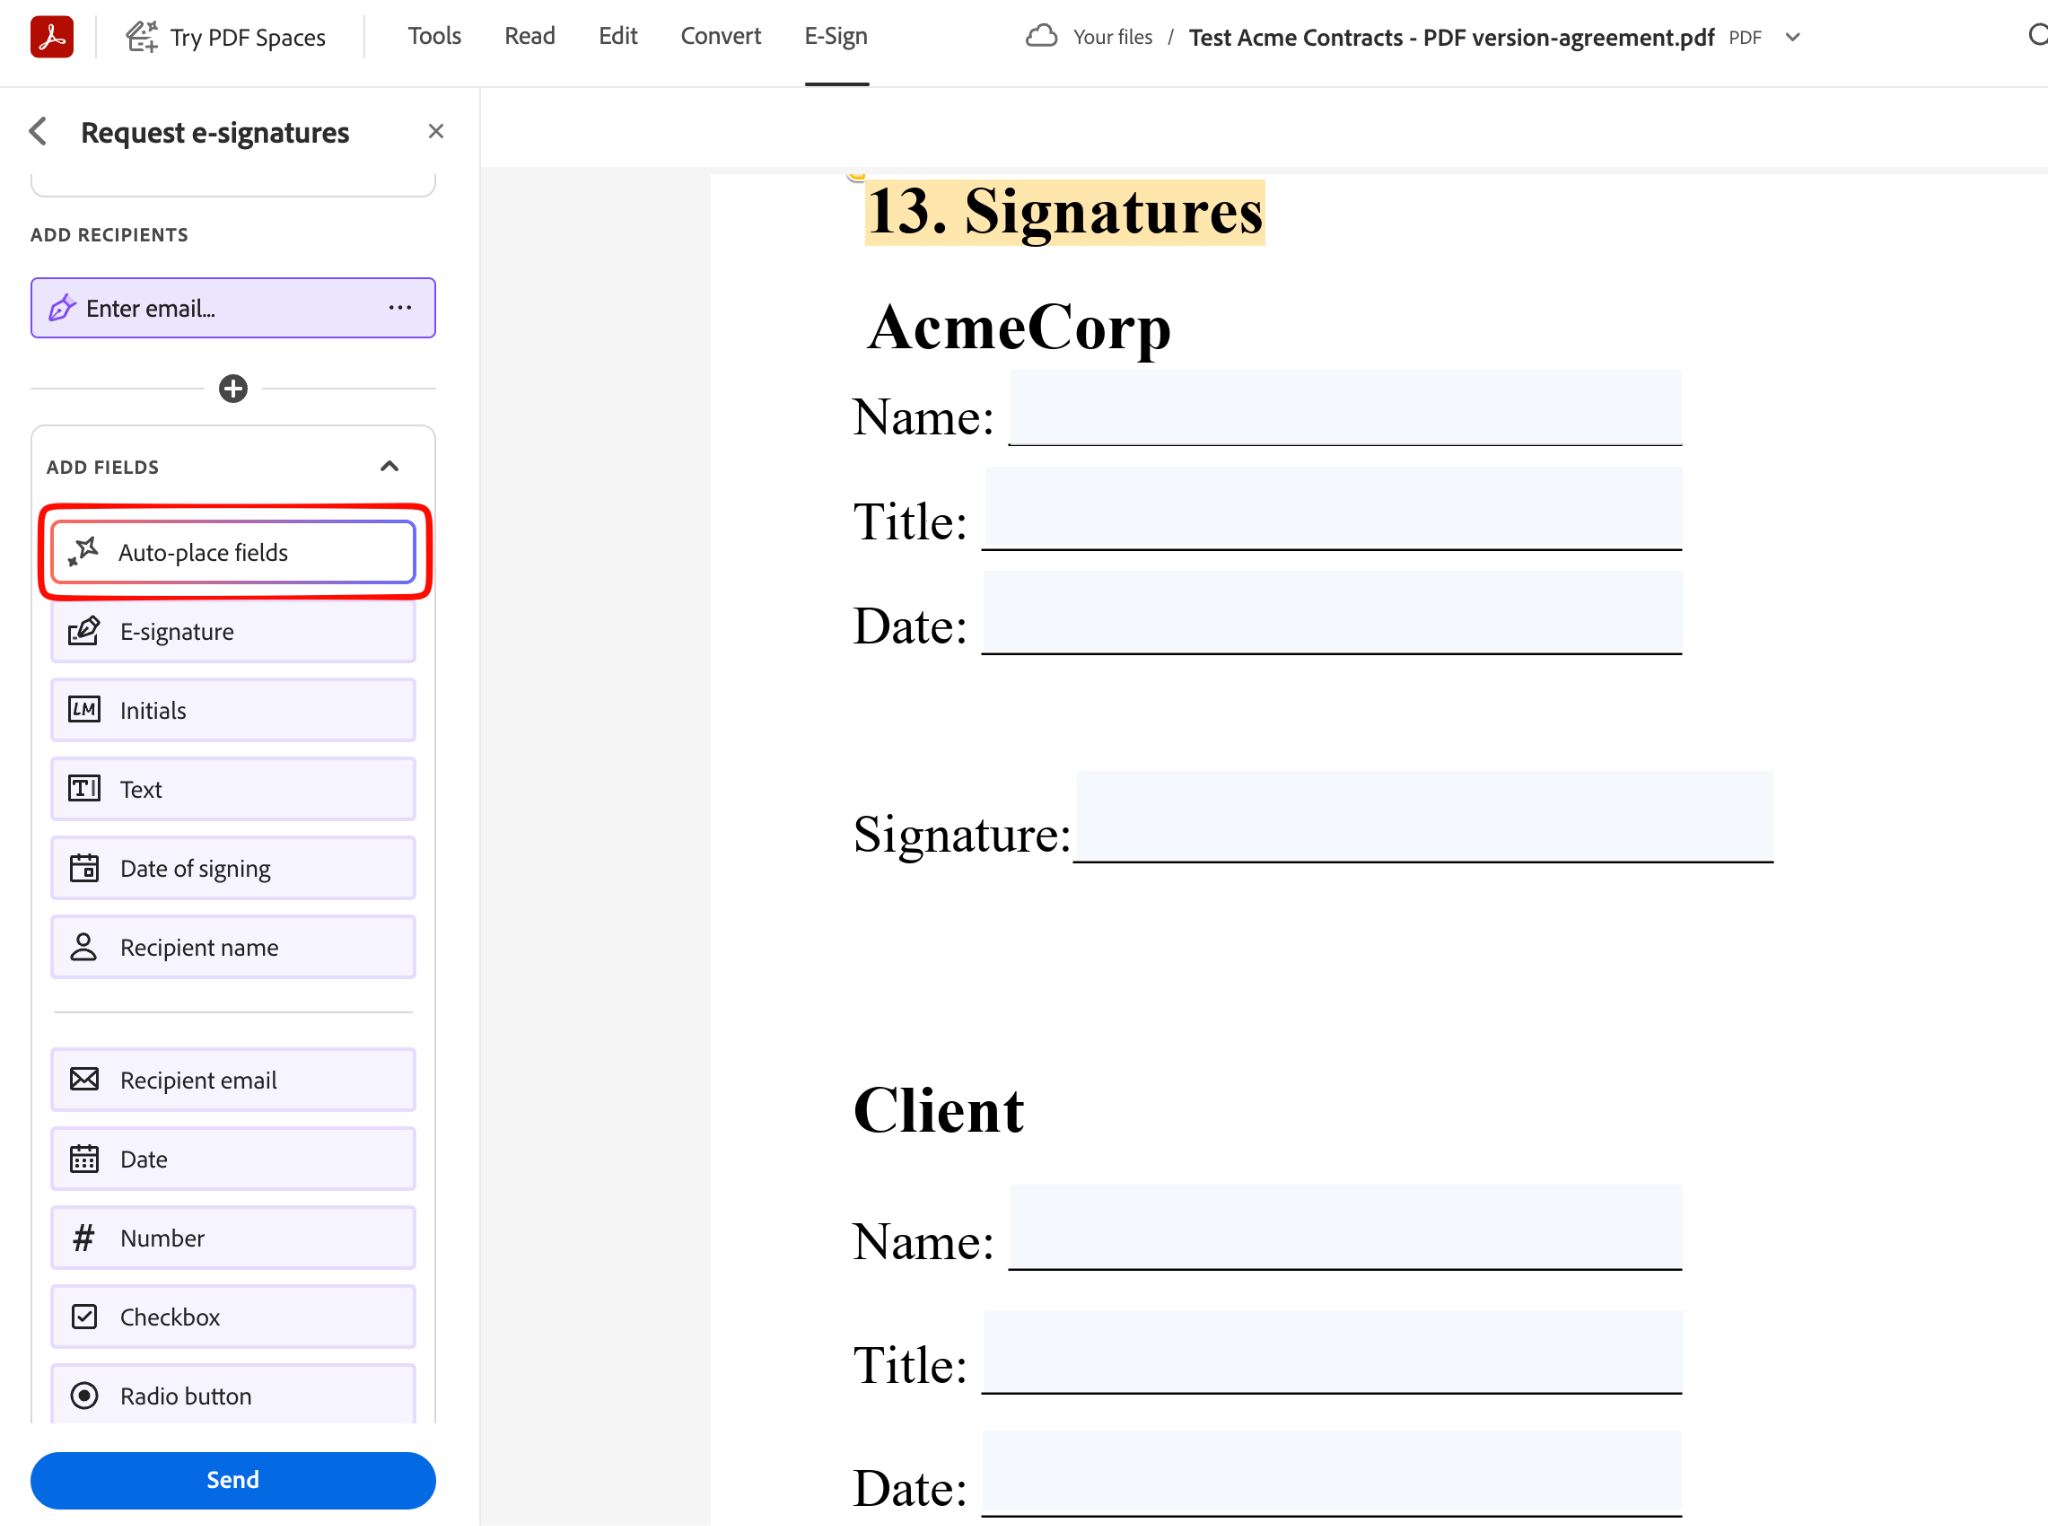
I tested this and was impressed by both the speed and accuracy. I would still sense-check this, though, if you have unique fillable fields, like checkboxes or radio buttons.
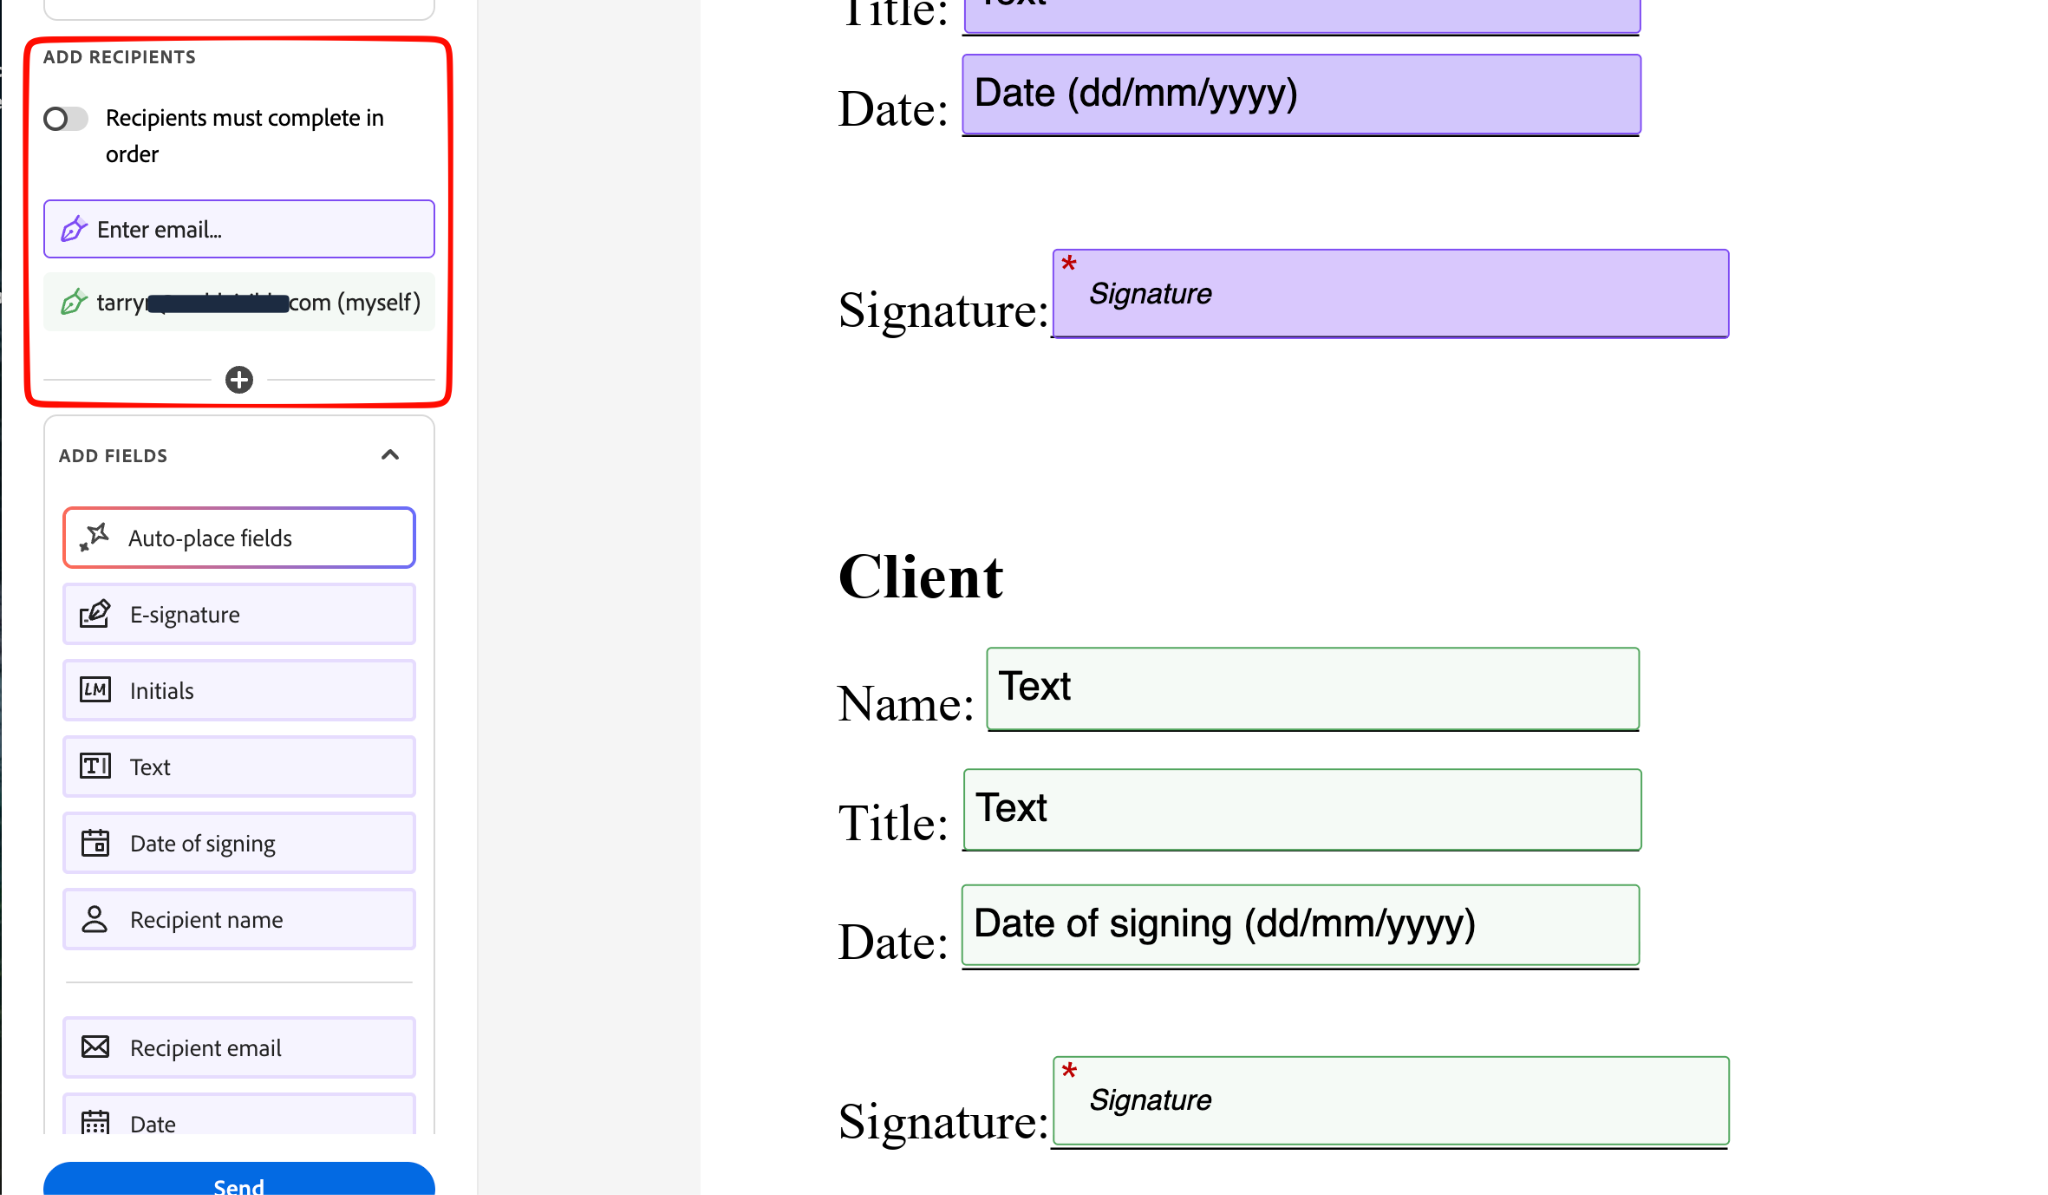
3. Assigning Recipients
I found the addition of recipients to specific fields a lot more finicky and harder to update than PDFfiller.
Some areas allow you to change recipients, whereas others don’t, which felt like a hurdle I would find frustrating in a rush.
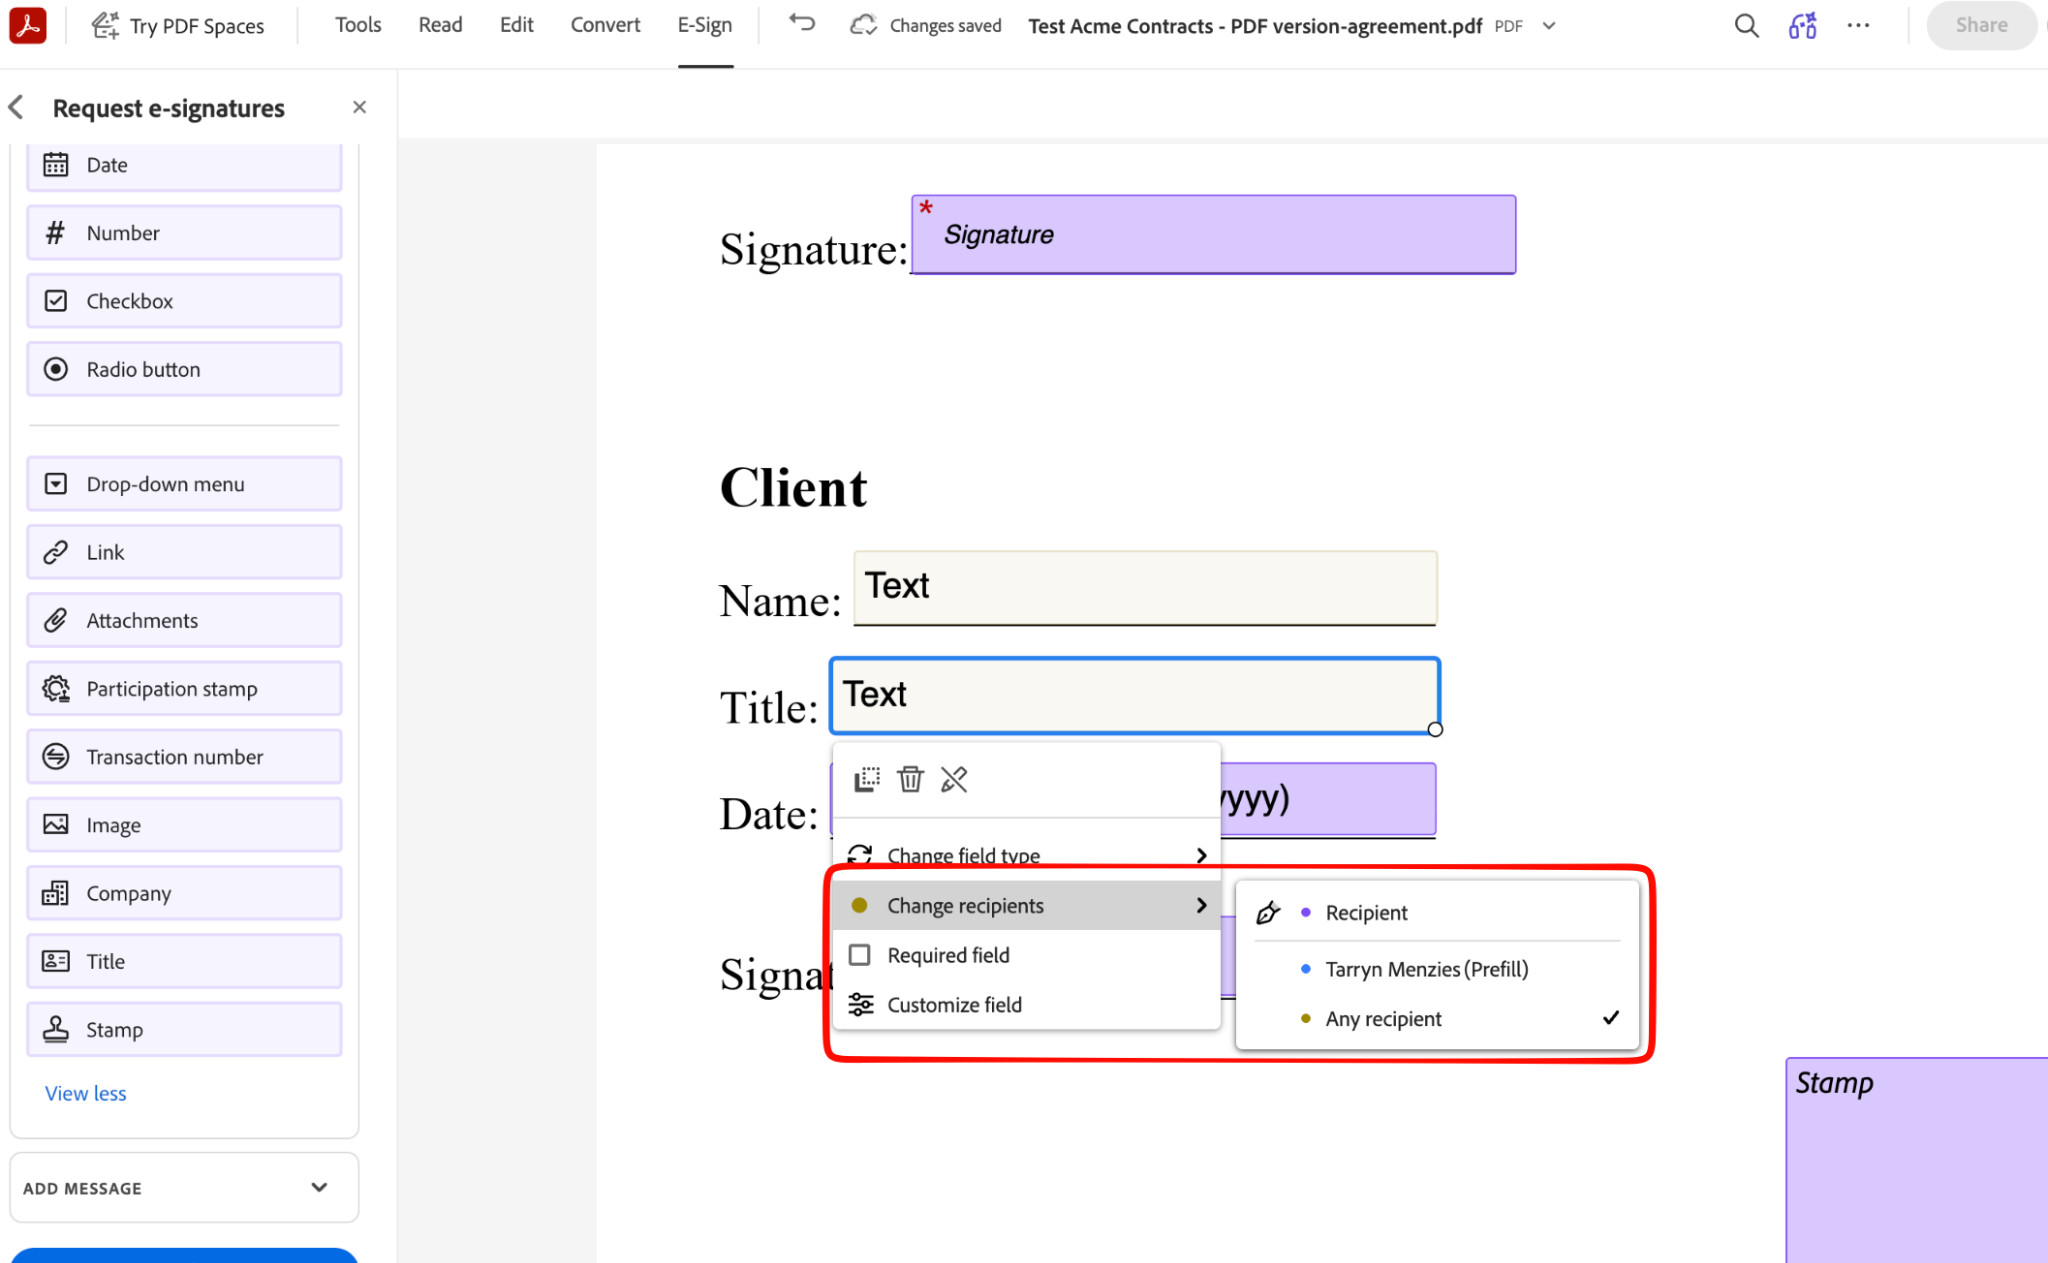
It seemed the recipient option didn’t exist in the specified section, which was a bit frustrating.
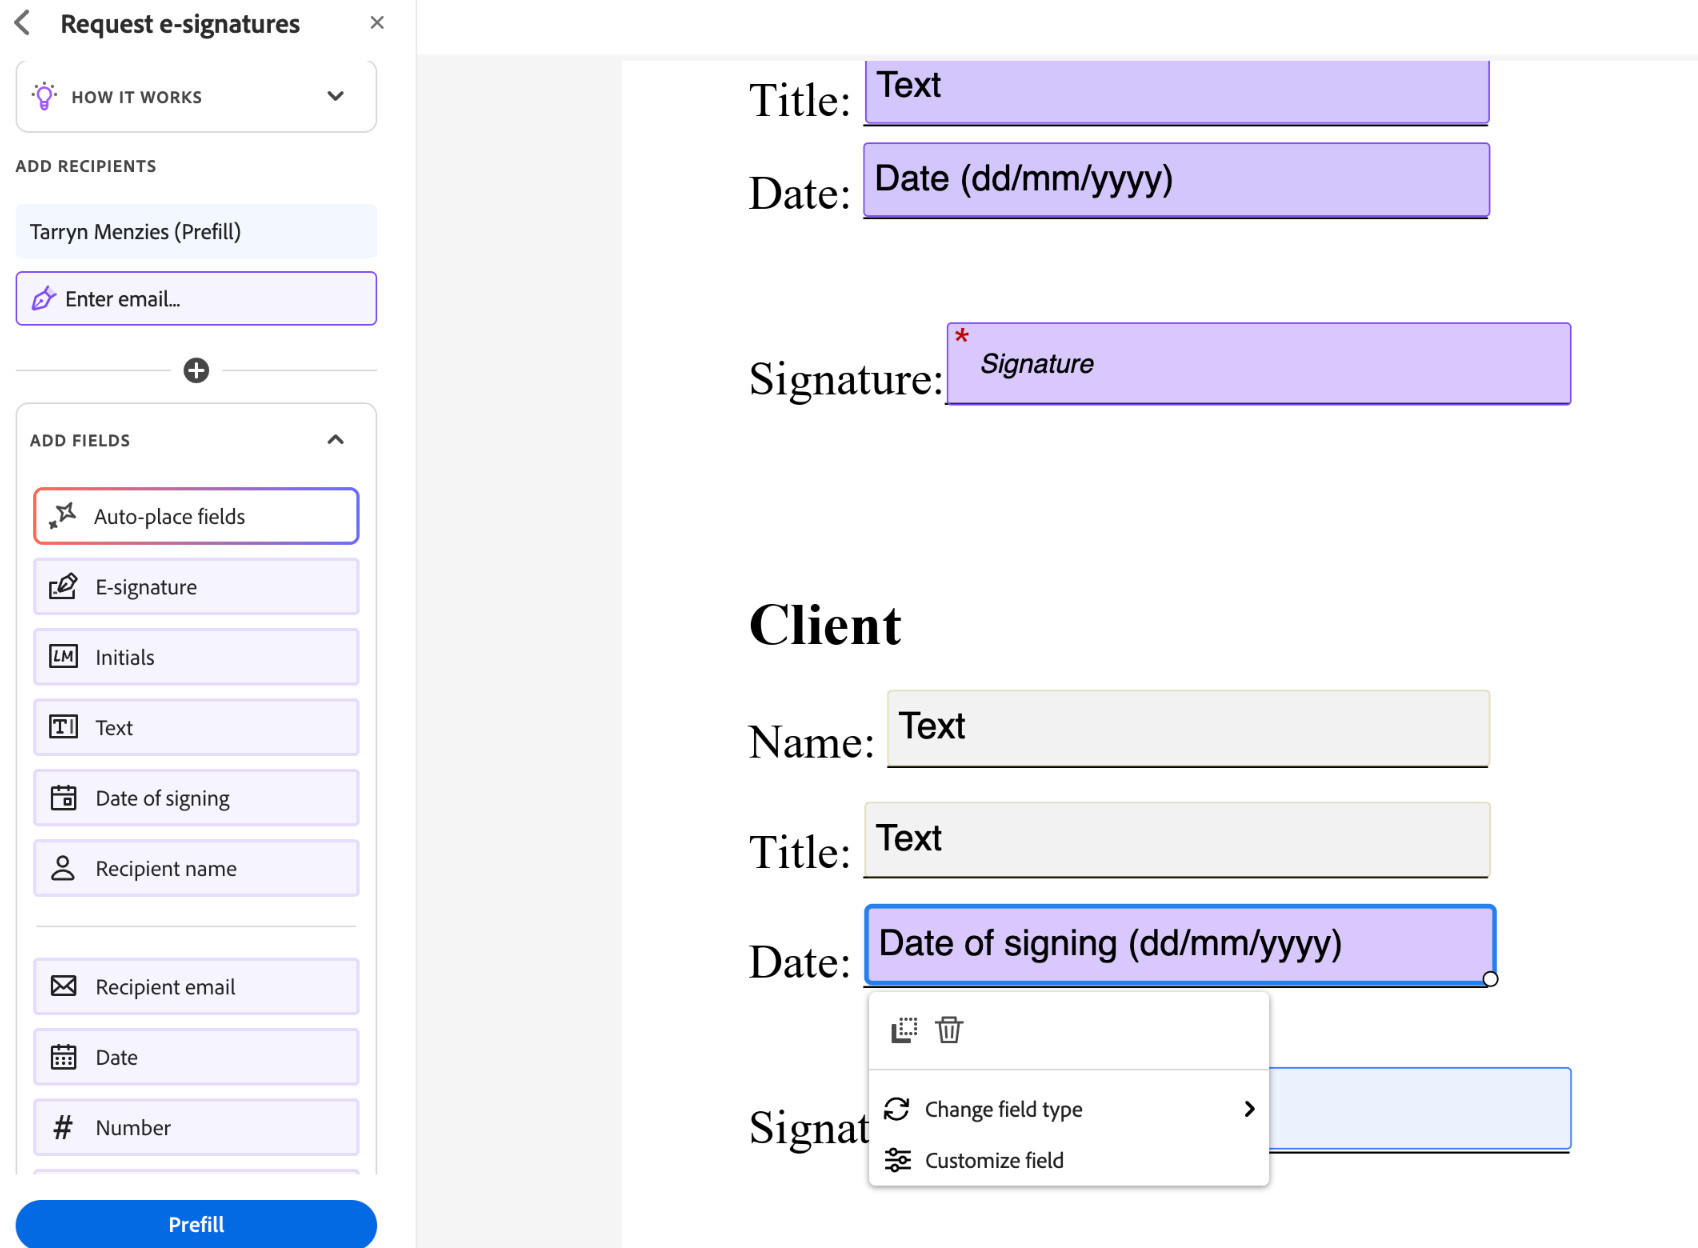
After a few minutes of clicking around, I found the correct section and needed to add the recipients for these sections.
4. Review and Send
Once recipients are added, it’s quick to send, confirm the document was sent, and receive the signature request via email.
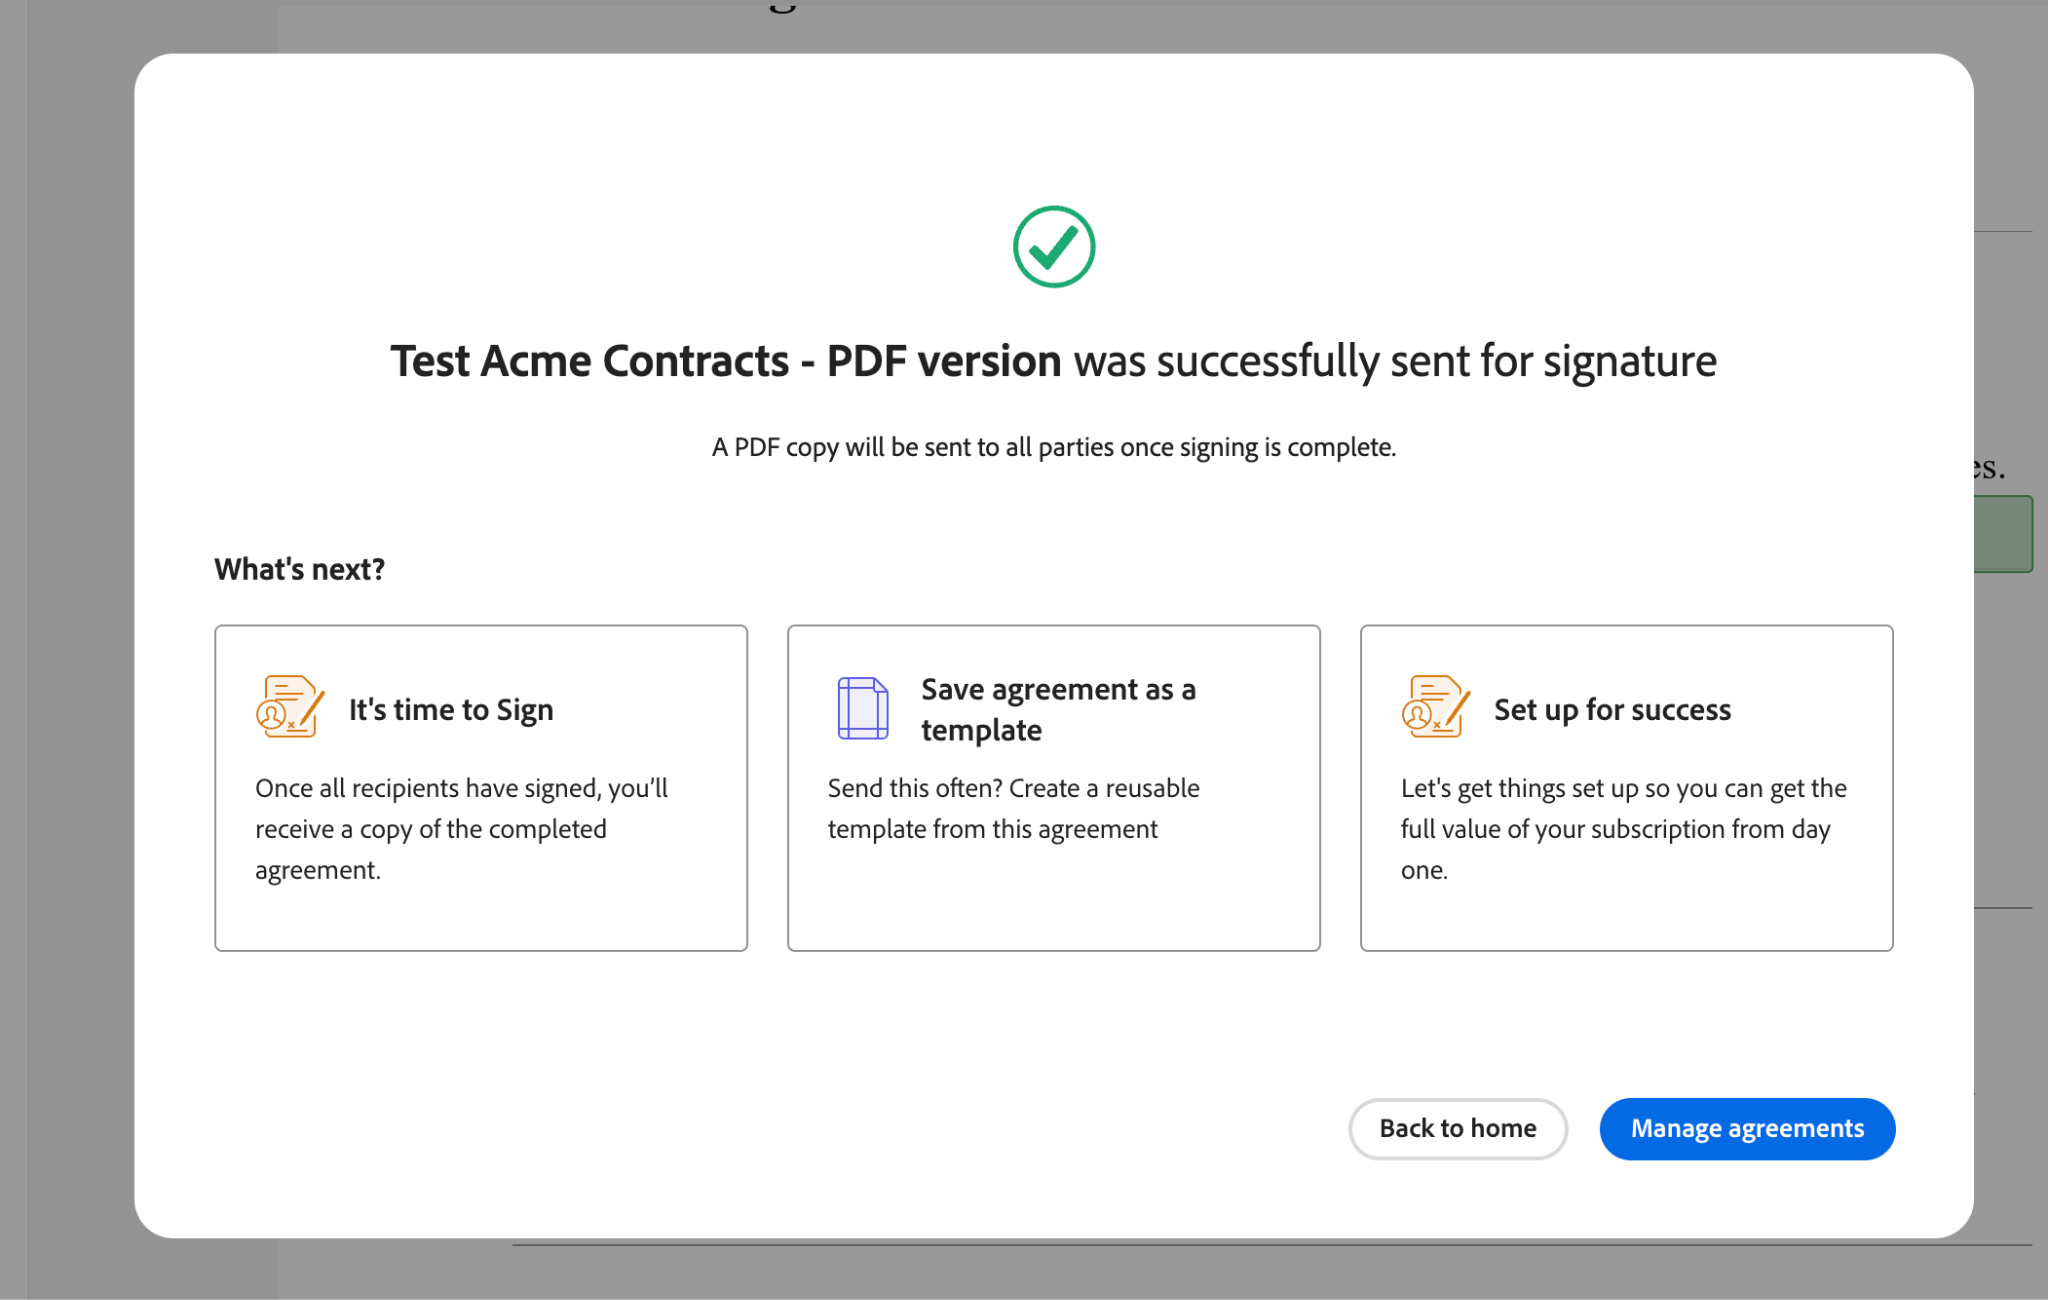
Additional Features:
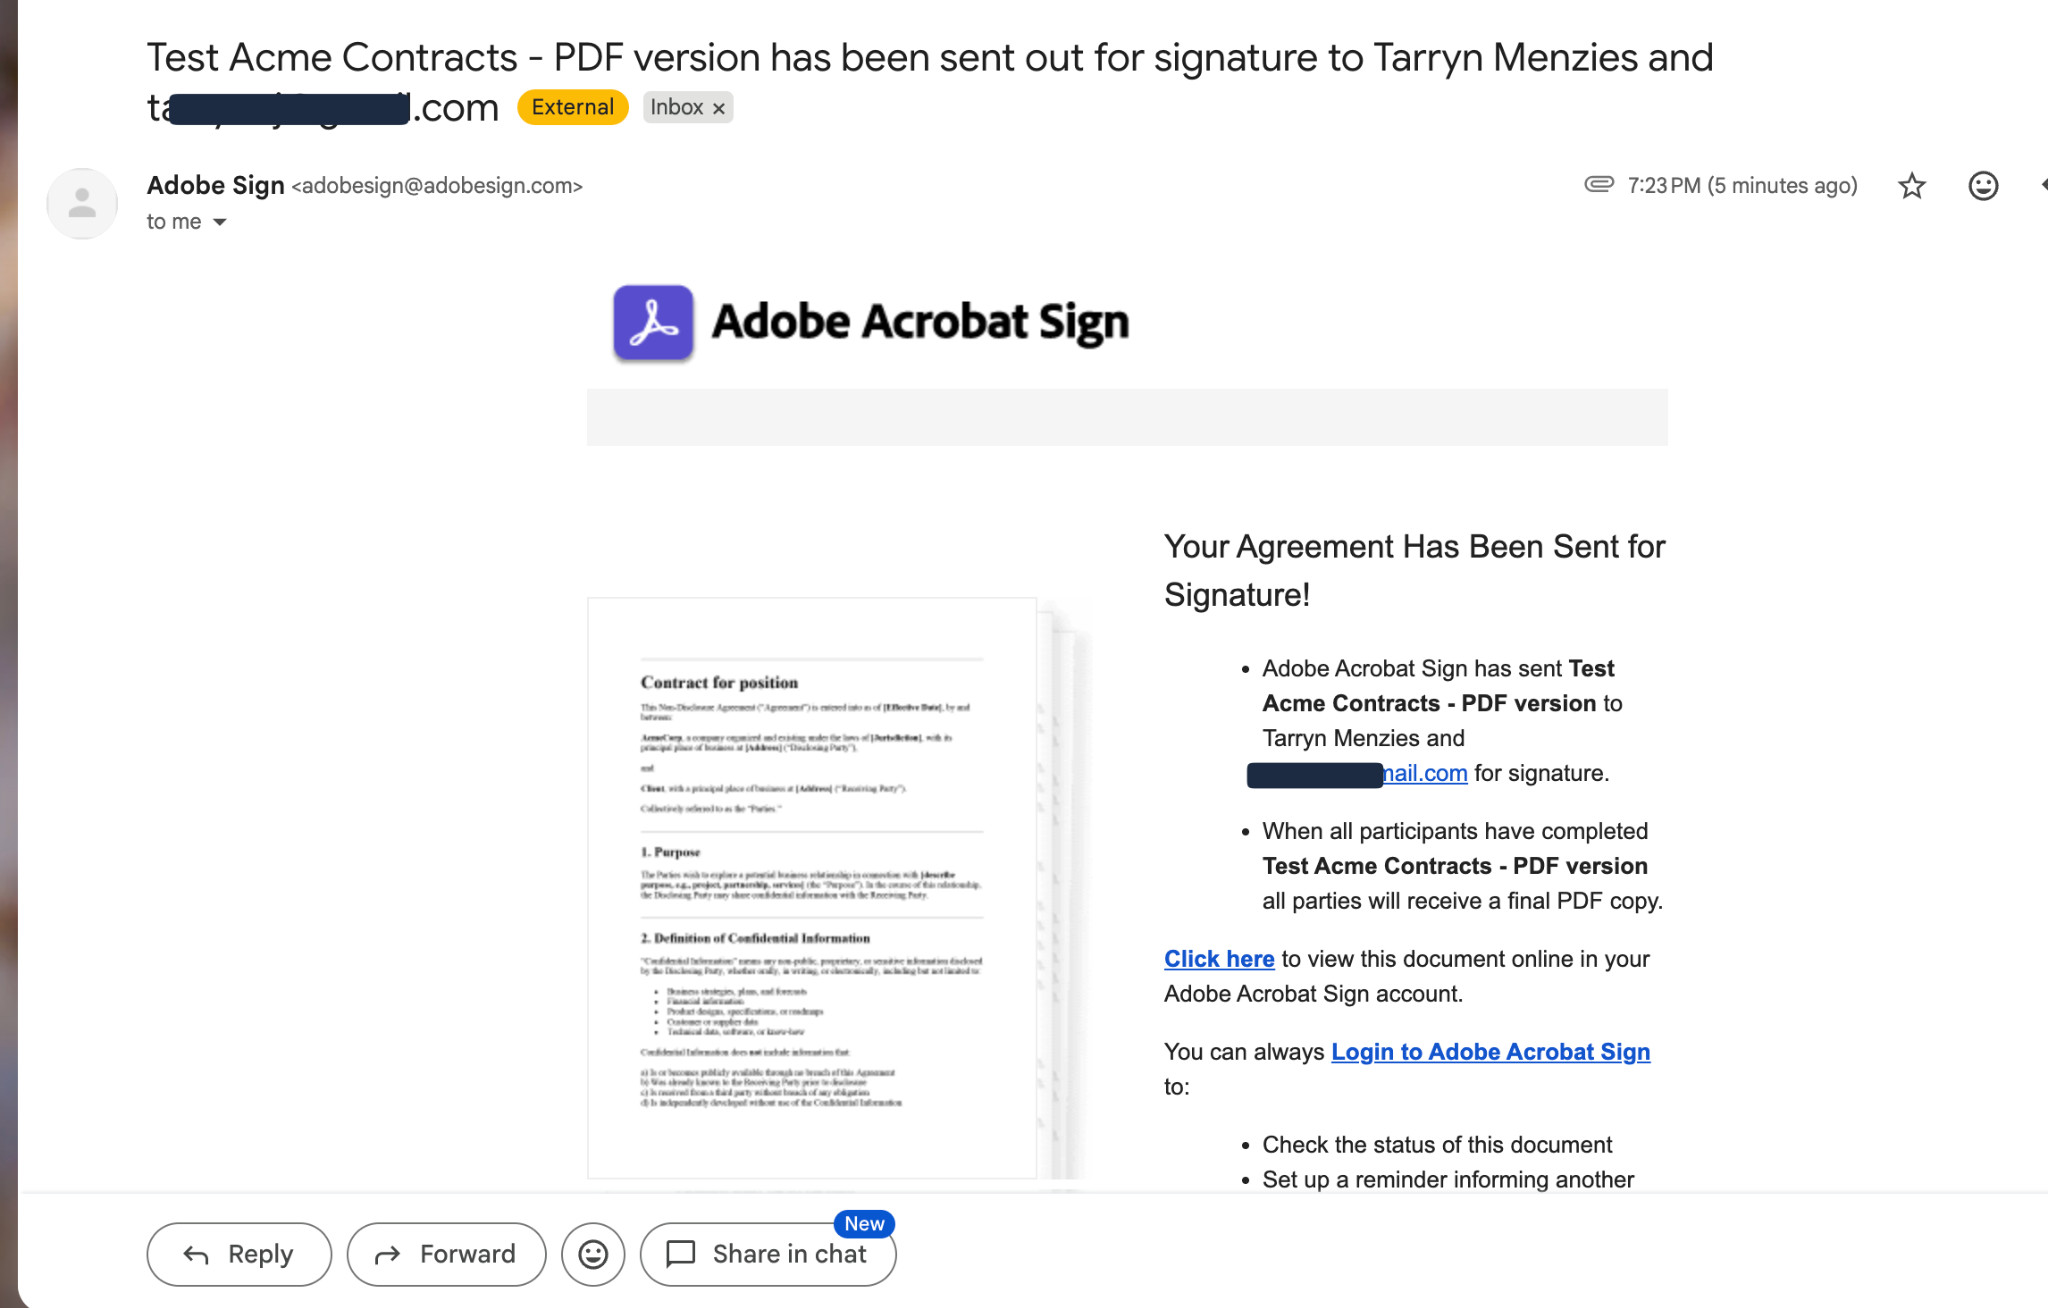
Similar to PDFfiller, you can create custom email subject lines and text, set up conditional signature panels, and more.
You’ll also receive the email notifications once your document has been sent.
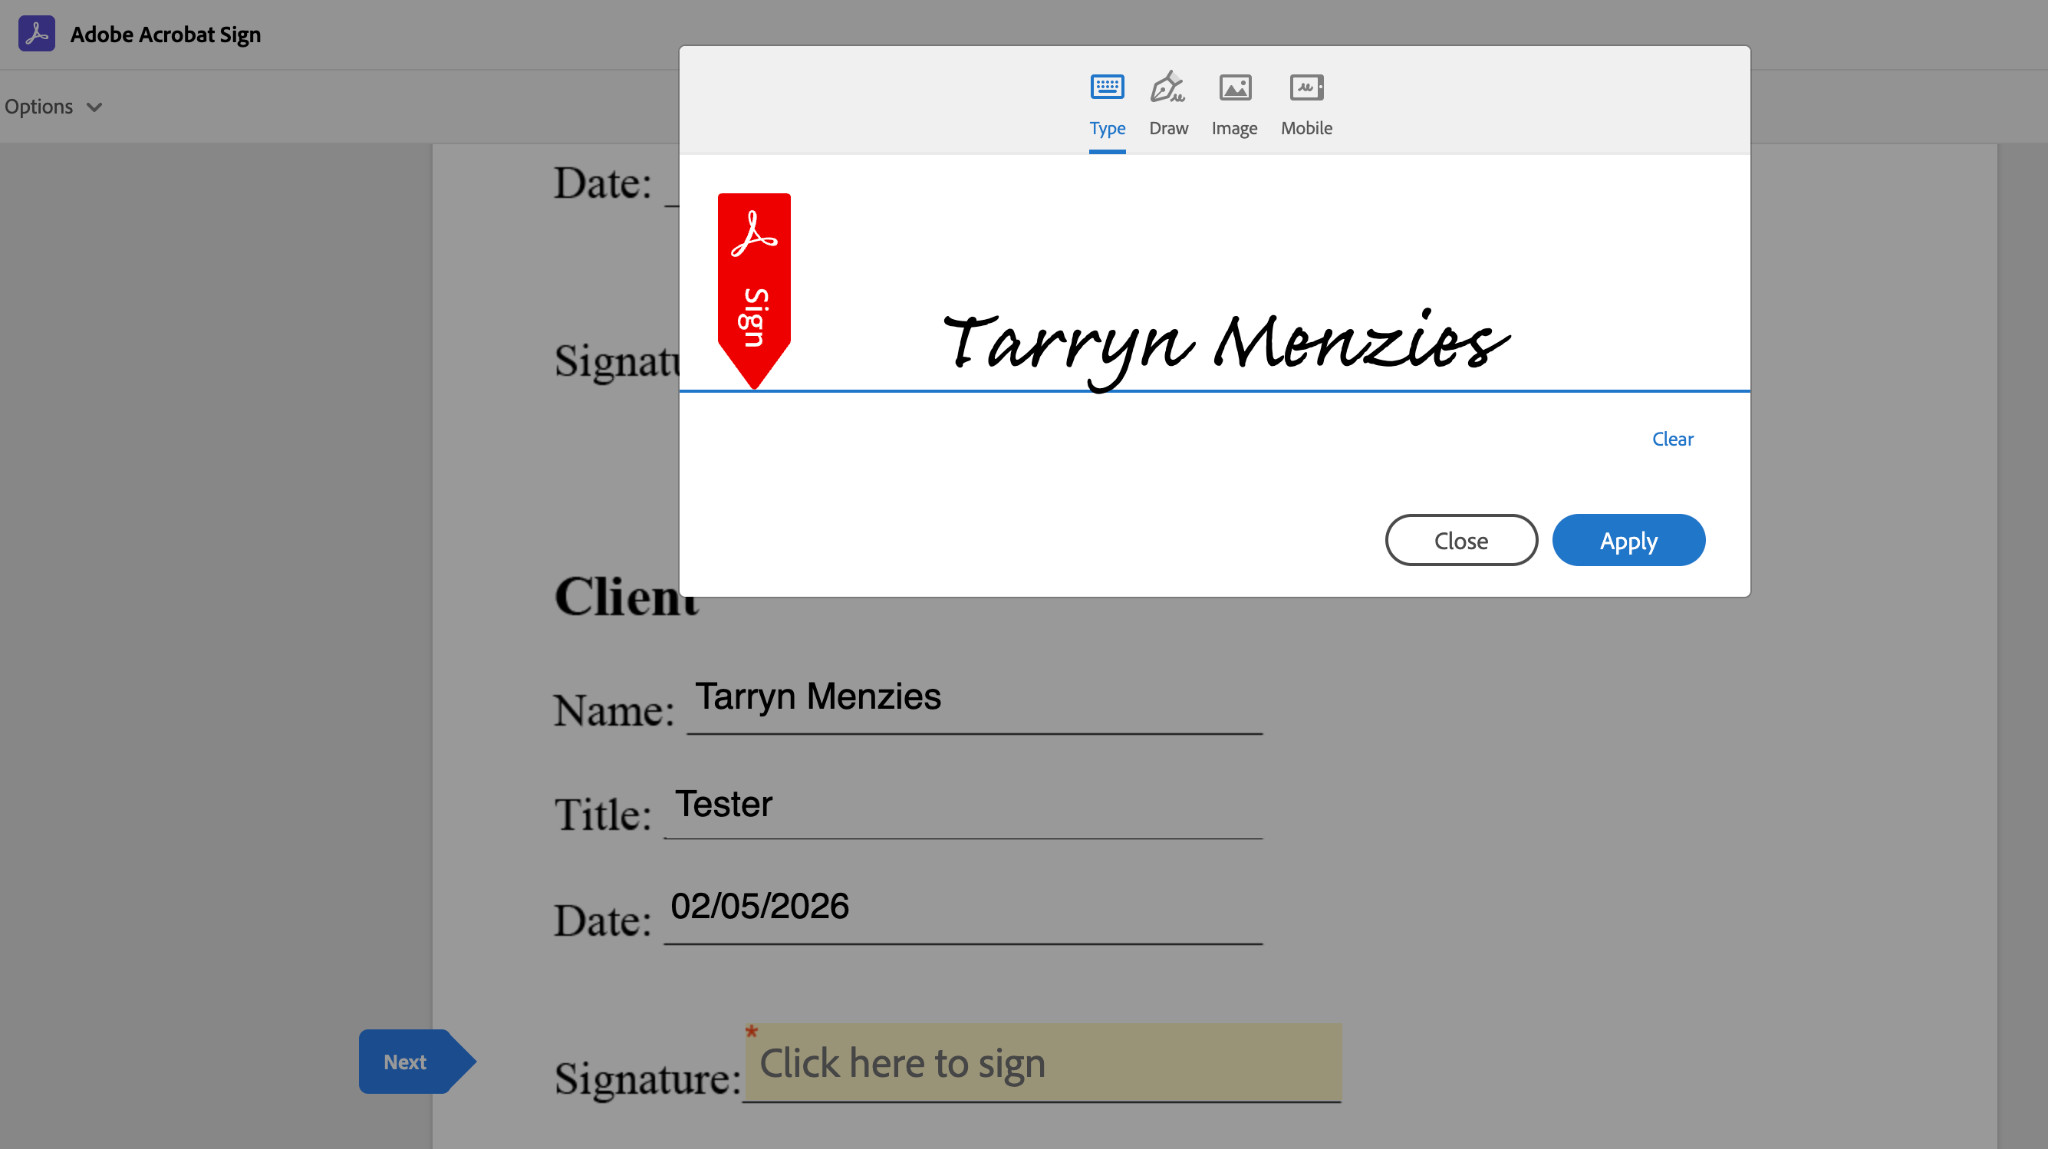
5. Signature Process
The actual signature process is probably the most frictionless. I like that Adobe has an indicator so you can easily see where to sign, and the option to use your name, initials, or draw your signature. Auto-filled fields, such as date, also help save time when completing the document.
6. Final Output and Email Notifications
I received the notification within a minute, and I received confirmations at each step, which I prefer.
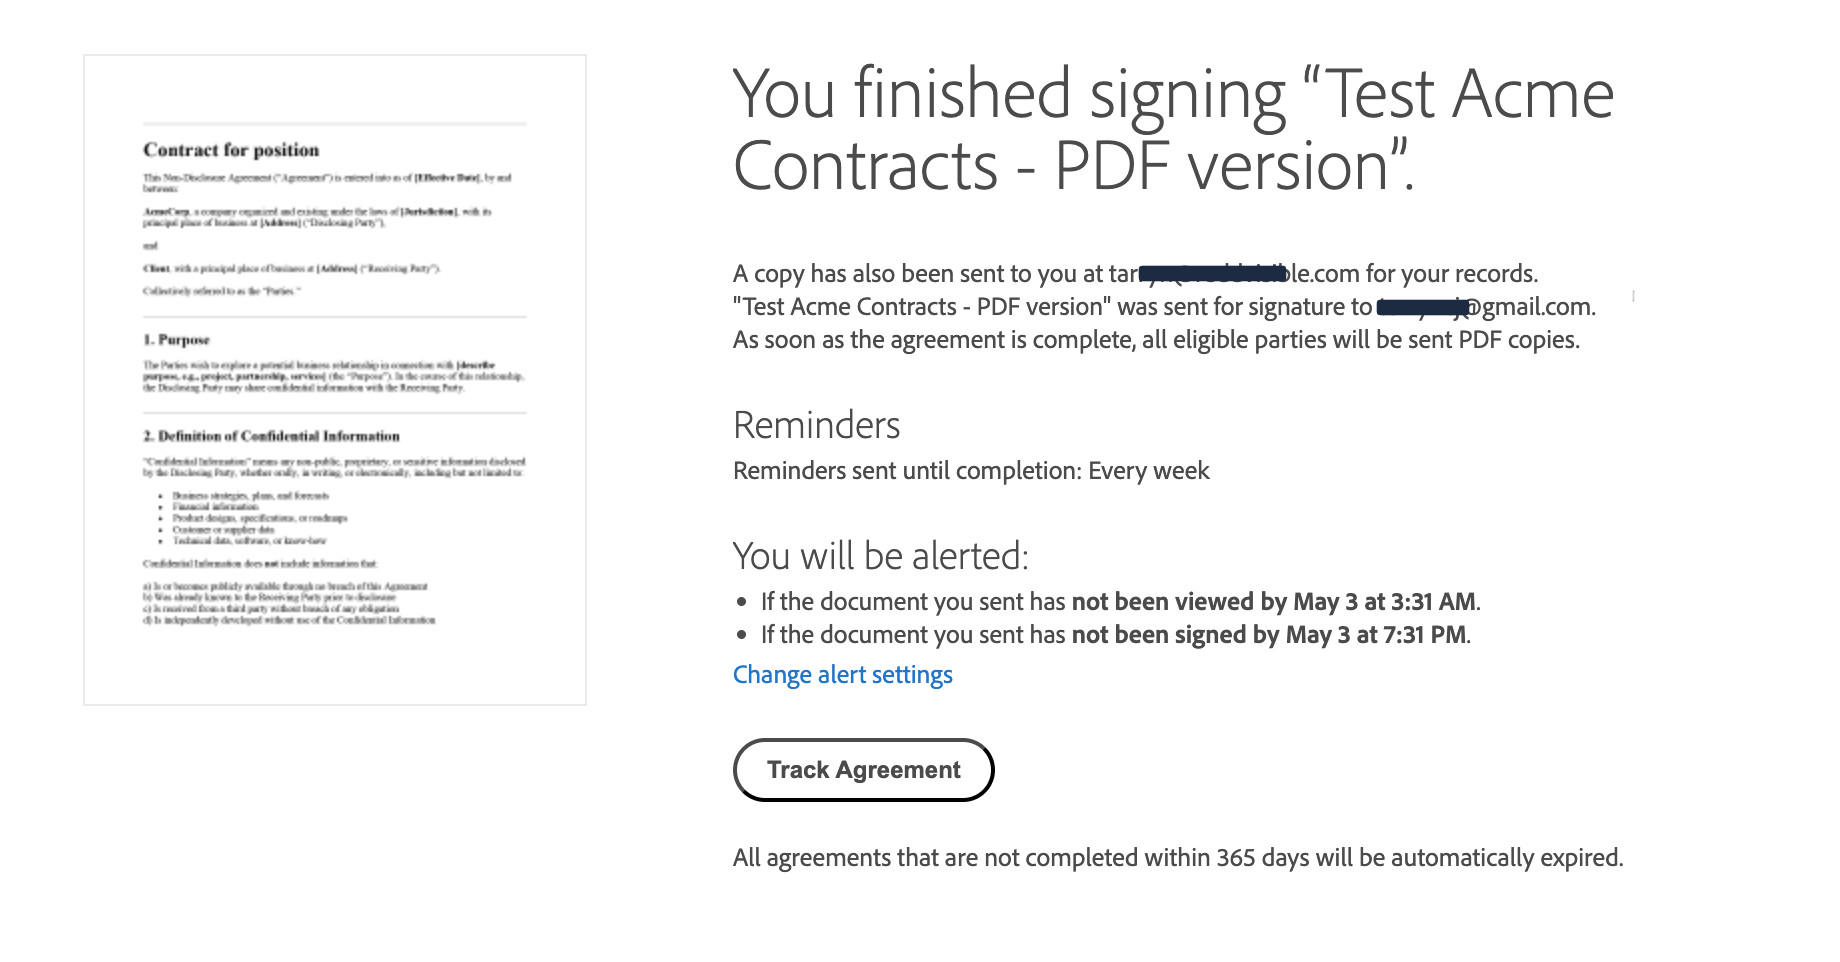
The final document copy is neat, automatically electronically signed, and includes a full audit report (by default), which is a great value-add for compliance-focused organizations.
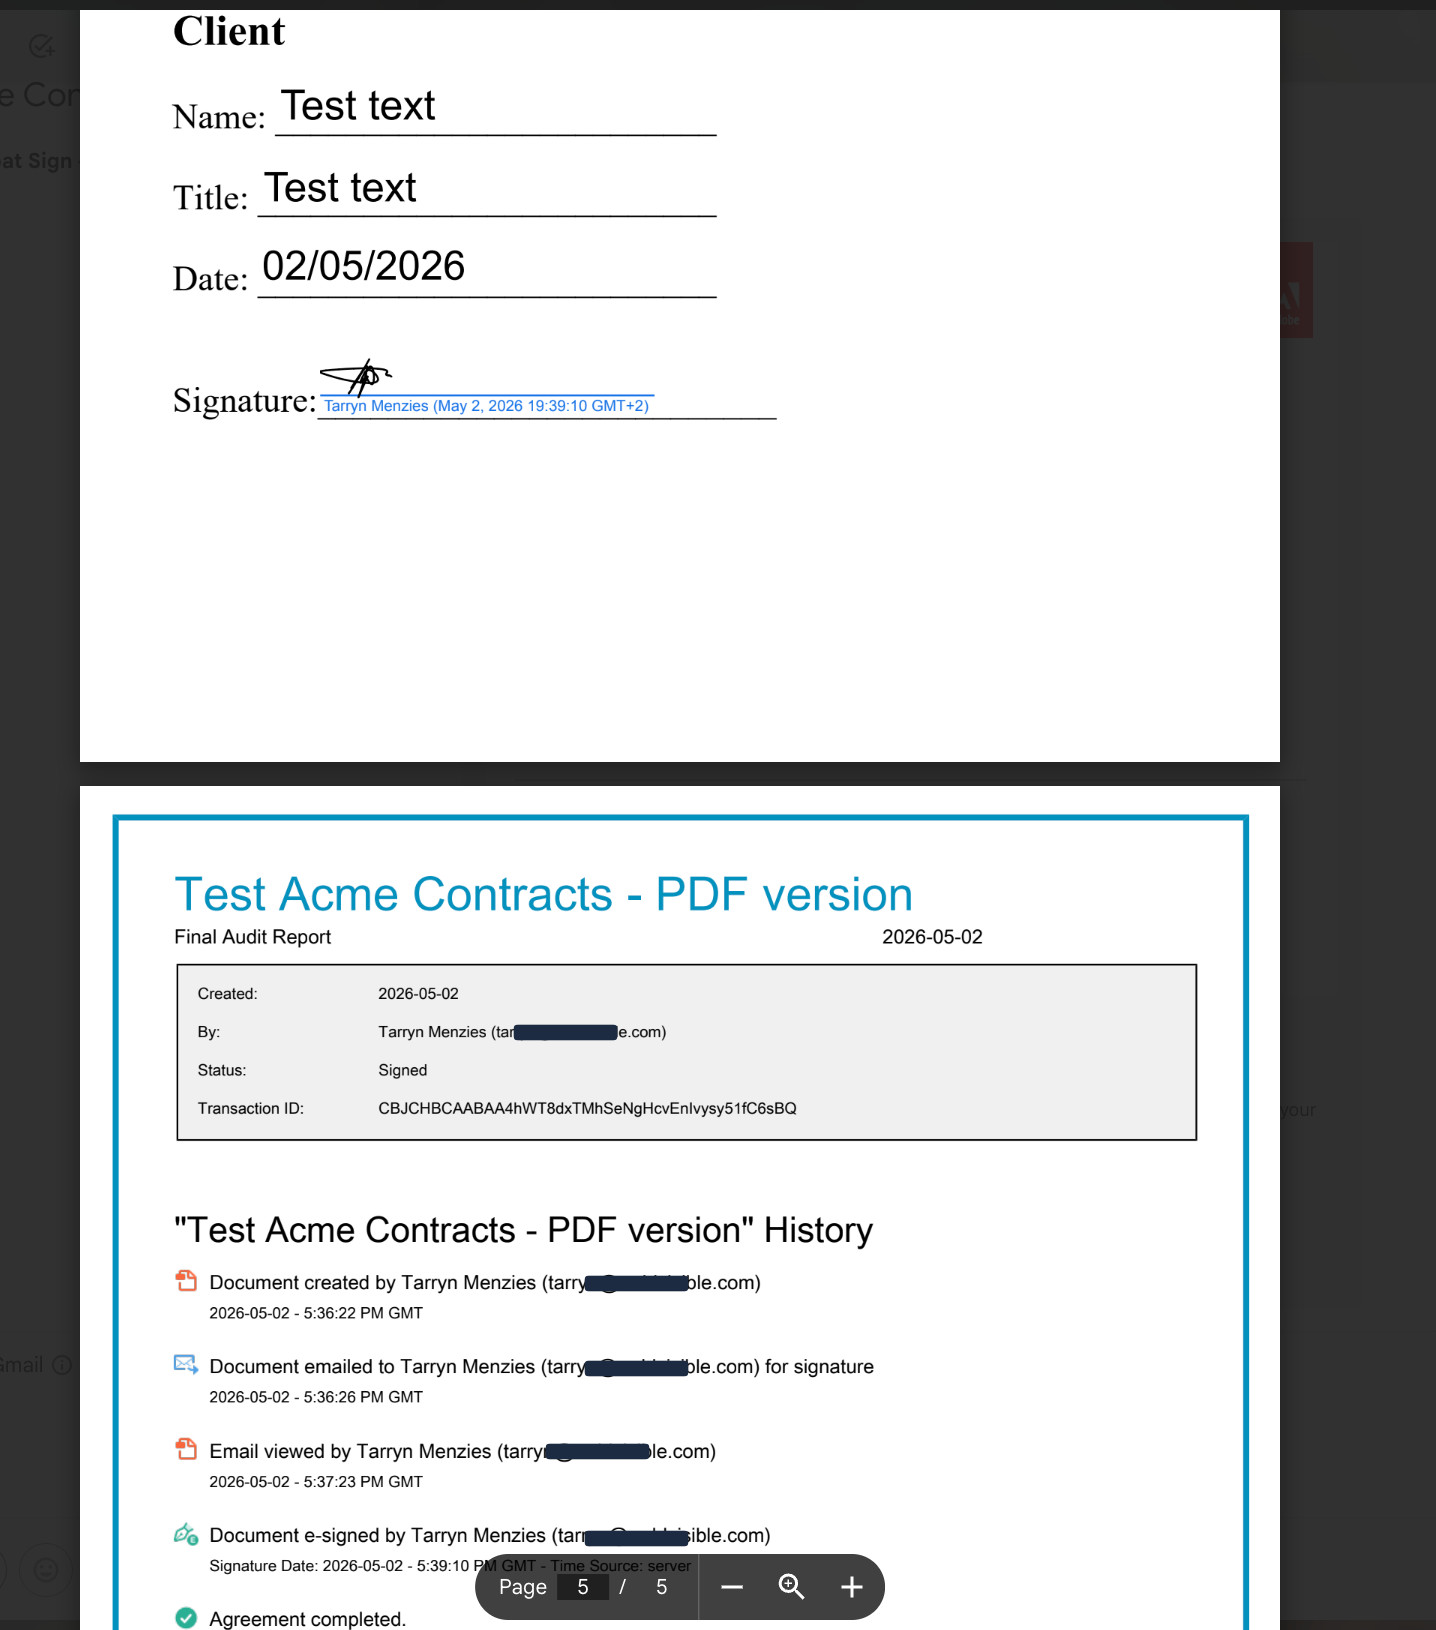
E-signing Comparison: PDFfiller vs Adobe
Both tools handle the e-signature process well and have similar features.
I would say that Adobe does have additional features that can take a little longer to navigate, but they allow for a deeper automated tracking and audit process.
PDFfiller is far more intuitive, quick, and hassle-free, which is ideal if you need signatures in a hurry.
Tool Use Cases
Each tool has its merits, but first consider what you need most from a tool.
Use case | Best fit |
Fast, intuitive interface for quick signatures | PDFfiller |
Advanced PDF editing and customization | Adobe |
Budget-conscious teams | PDFfiller |
Enterprise and compliance-focused teams | Adobe |
My Final Takeaway: PDFfiller vs Adobe
While both are excellent tools, the best fit should be based on unique user or business requirements. While some users will prioritize speed and good user experience over advanced editing capabilities, larger organizations may require more complex formatting and editing features. In these cases, there may be a better fit, especially if you have budget constraints or user learning and skill level to consider.
- If you value speed and efficiency – Choose PDFfiller
- If you need complex editing features – Choose Adobe