

- Before You Start with Shippo
- Part 1: Set Up Shipping Inside Shopify first
- Part 2: Connect Shippo to Your Store
- Part 3: Buy and Print Your First Label
- Once You are Shipping Regularly, Follow These Steps:
- Troubleshooting: When Fulfillment or Tracking Will Not Sync
- Now You’re Ready for Orders to Flow in
Last Updated on July 22, 2026 by Ewen Finser
FTC Disclaimer: We do make money from this blog and may receive compensation for this work in the form of commissions, fees and complimentary product access. Review our full FTC disclosure here.
In our guide to the best Shopify shipping apps, we called out Shippo as one of the strongest options for sellers looking to save money and ship efficiently. This guide picks up from there and walks through exactly how to get it running.
If you’ve decided to use Shippo with your Shopify store, your next step is going to be making sure that you set it up correctly. While the process isn’t difficult, the order in which you set everything up does actually matter.
Configuring Shopify’s shipping settings before connecting Shippo helps prevent common issues like orders not syncing correctly, fulfillment errors, or tracking numbers failing to update in Shopify.
Our ‘How to Set Up Shipping for a New Shopify Store With Shippo’ guide walks through the setup from start to finish in the right order. By the end, you’ll have Shopify and Shippo working together so you can import orders, purchase shipping labels, and automatically send tracking information to your customers without having to troubleshoot your workflow later.
Before You Start with Shippo
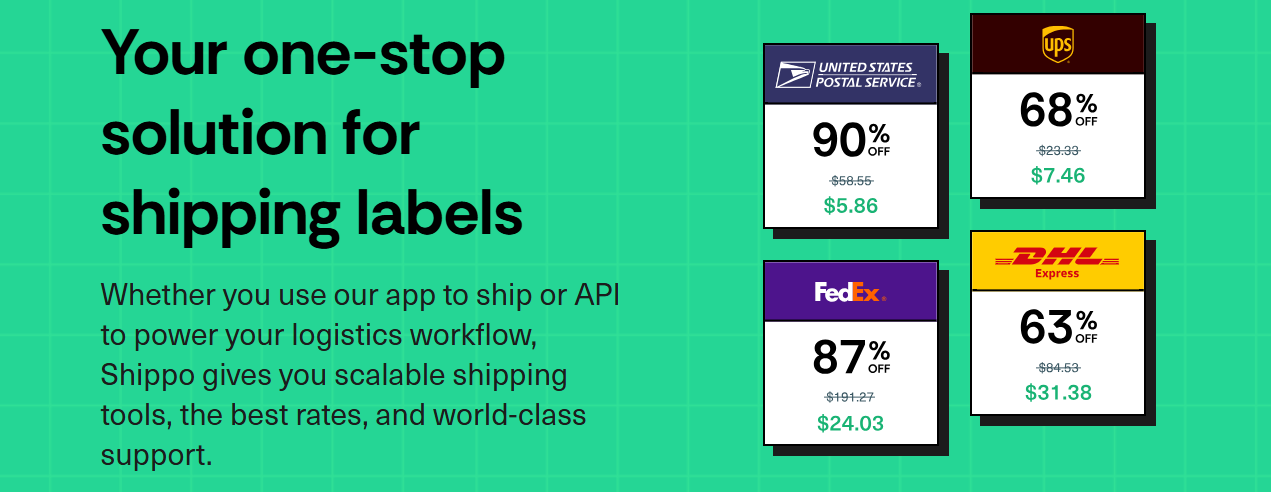
You’ll need a Shopify store on any plan and a free Shippo account.
You do not need a paid Shippo plan to begin, and the free plan allows unlimited store connections, so you can add other sales channels later without changing plans.
Also, decide on your packaging first, the boxes and mailers you actually use, and keep a postal scale within reach. Accurate weights and dimensions are what keep your quoted rates honest and your post-delivery surcharges down, so it is worth getting them right from the first label.
Part 1: Set Up Shipping Inside Shopify first
Get Shopify’s own settings right before you connect anything, so the Shippo sync has clean data to work with.
Set Your Shipping Origin
In your Shopify admin, go to Settings, then Locations. This is the address you ship from, and it imports into Shippo as your sender address, so it needs to be correct before anything connects.
If you ship from more than one place, add each location here, because Shippo can only use a Shopify Location as a valid sender. Then open Settings, then Shipping and delivery, and confirm the same location is listed as the place that orders will ship from.
It is also worth deciding now where returns should go, since you will set a return address in Shippo later and it is easiest if it matches a real location.
Select and Authorize Your Shipping Carriers and Services.
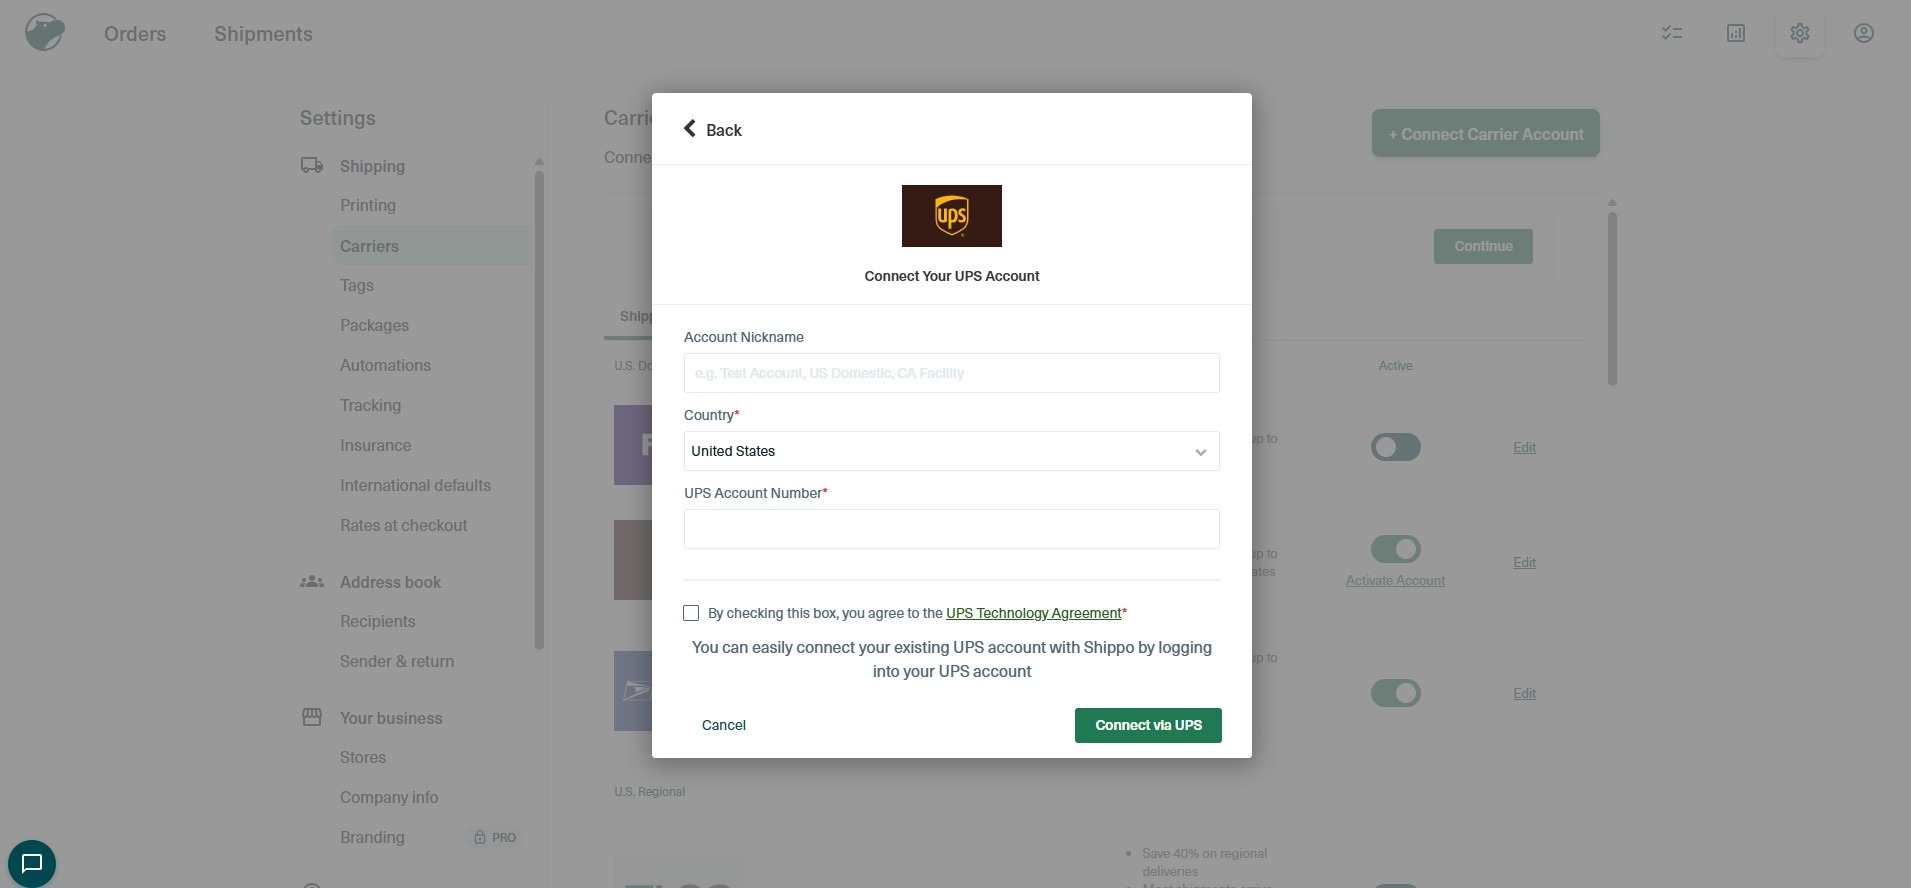
The first step for shipping a package is determining your carrier and services. In this section you’ll determine whether you want to use Shippo native rates; which are substantially discounted and likely better than any negotiated rate you’ll receive. The toggle feature allows you to set which carriers you want to shop and display live rates from for each zone; domestic, domestic abroad, international and so on. Toggle on or off or edit services to eliminate a carrier as a whole or reduce the services provided.
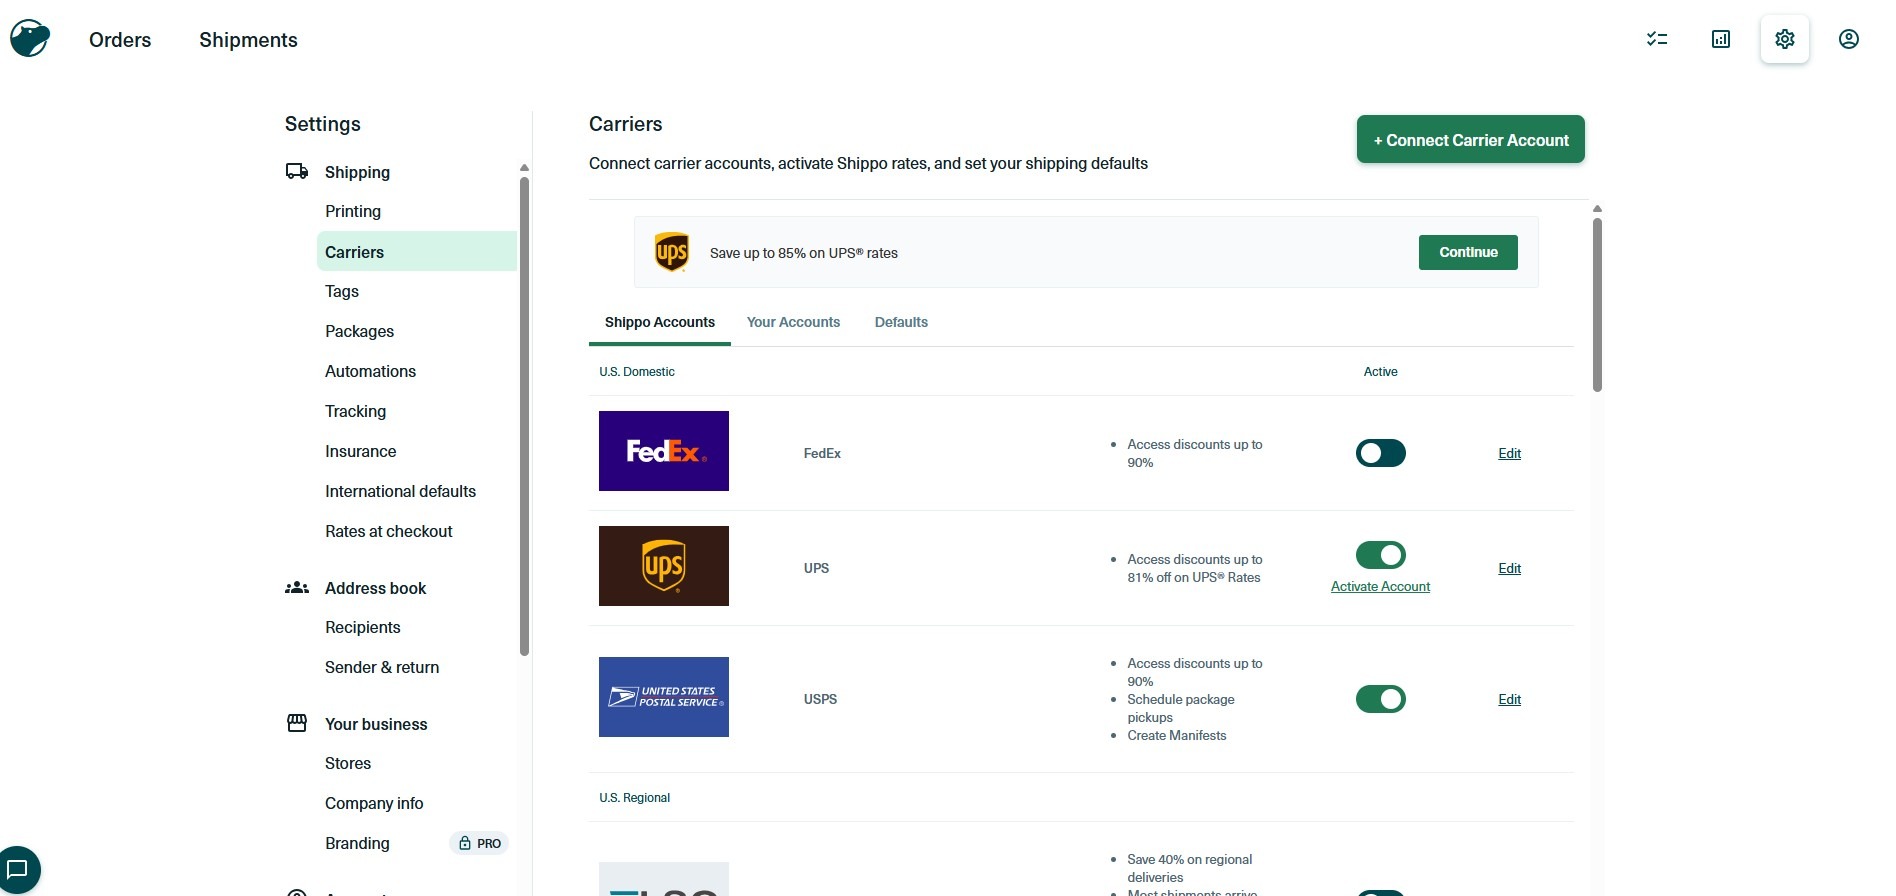
If you’re opting for the most seamless and easiest set up, you’ll want to active and authorize UPS services; this step takes less than 3 minutes and you’ll be shipping in no time!
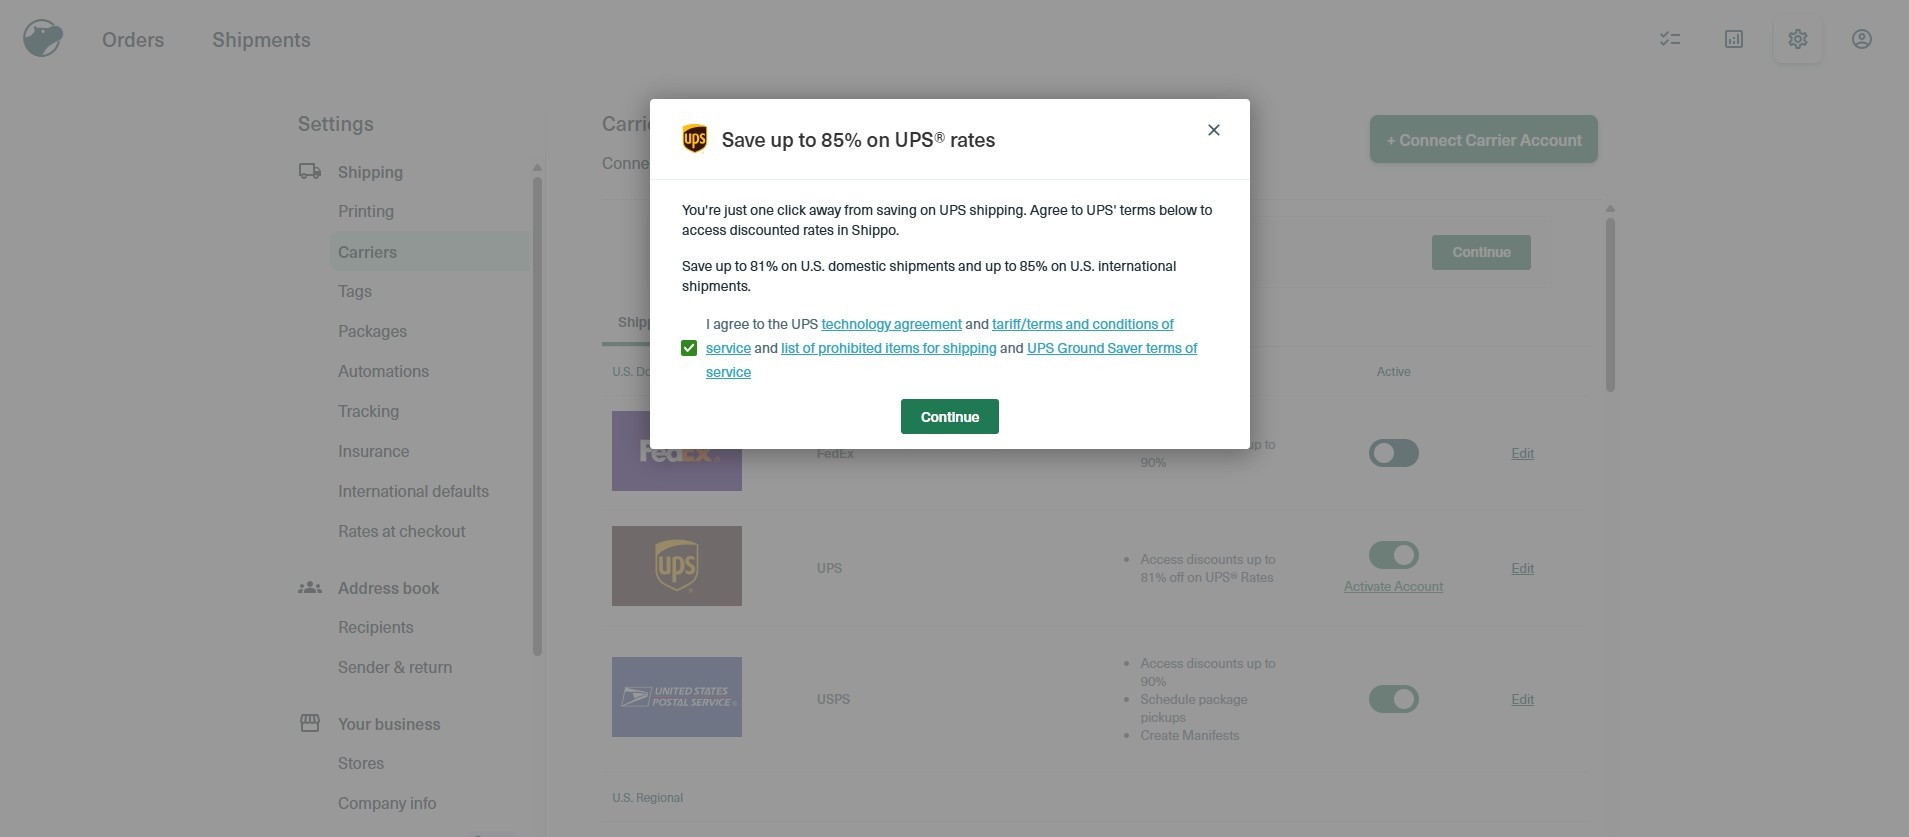
If you would like to bring your own carrier, you have that choice as well- the steps are similar but you’ll be authorizing and integrating your negotiated rates and you can compare and shop them against the Shippo negotiated rates. This is a WIN-WIN for most as you’ll be able to see if Shippo rates are better and use that to either negotiate better rates with your existing account or simply ship with the Shippo rates and use them as you would normally.
Create Your Shipping Zones and Rates
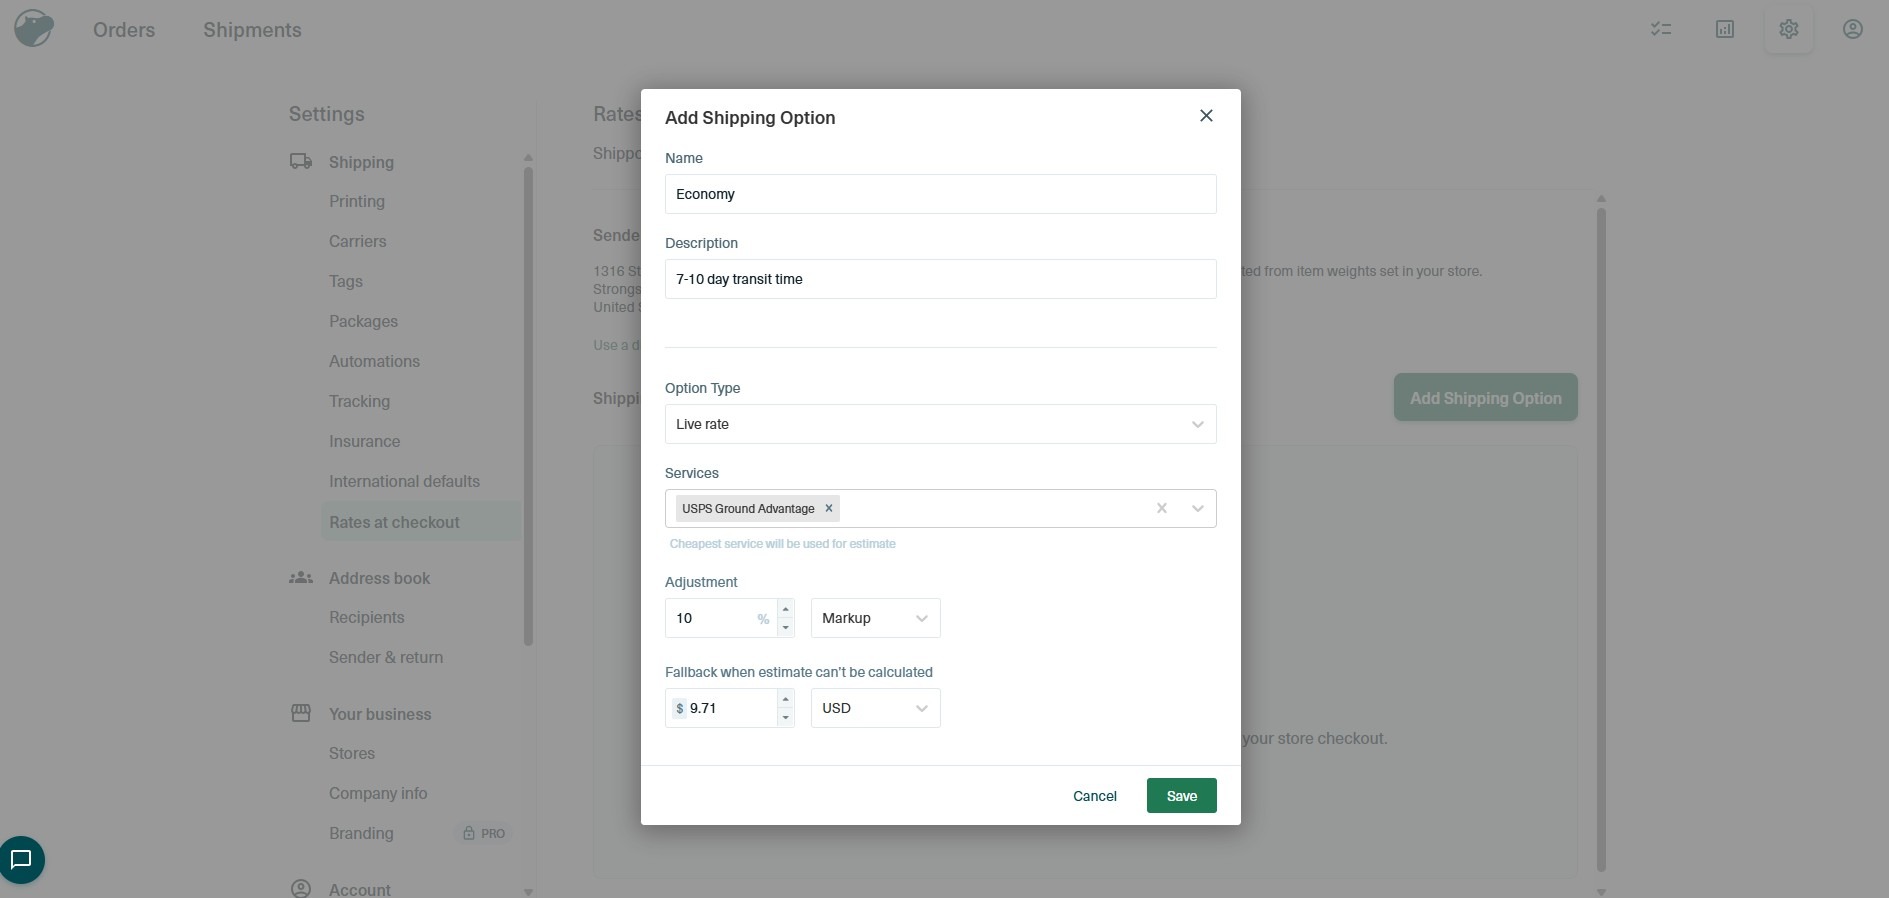
Go to Settings, then Shipping and delivery, then Manage rates. Add a domestic zone first, and an international zone if you ship abroad. Then decide how you charge customers, which usually comes down to three approaches.
A flat rate charges the same amount on every order, which is simple but can lose money on heavy or distant shipments. A free-shipping threshold gives free shipping above a set cart value, which can lift your average order size while you absorb the cost.
Carrier-calculated rates show the live carrier price at checkout, so what you charge tracks what you pay. In a new store, carrier-calculated rates are the safest way to avoid undercharging before you know your real shipping costs.
Products and Order Fulfillment
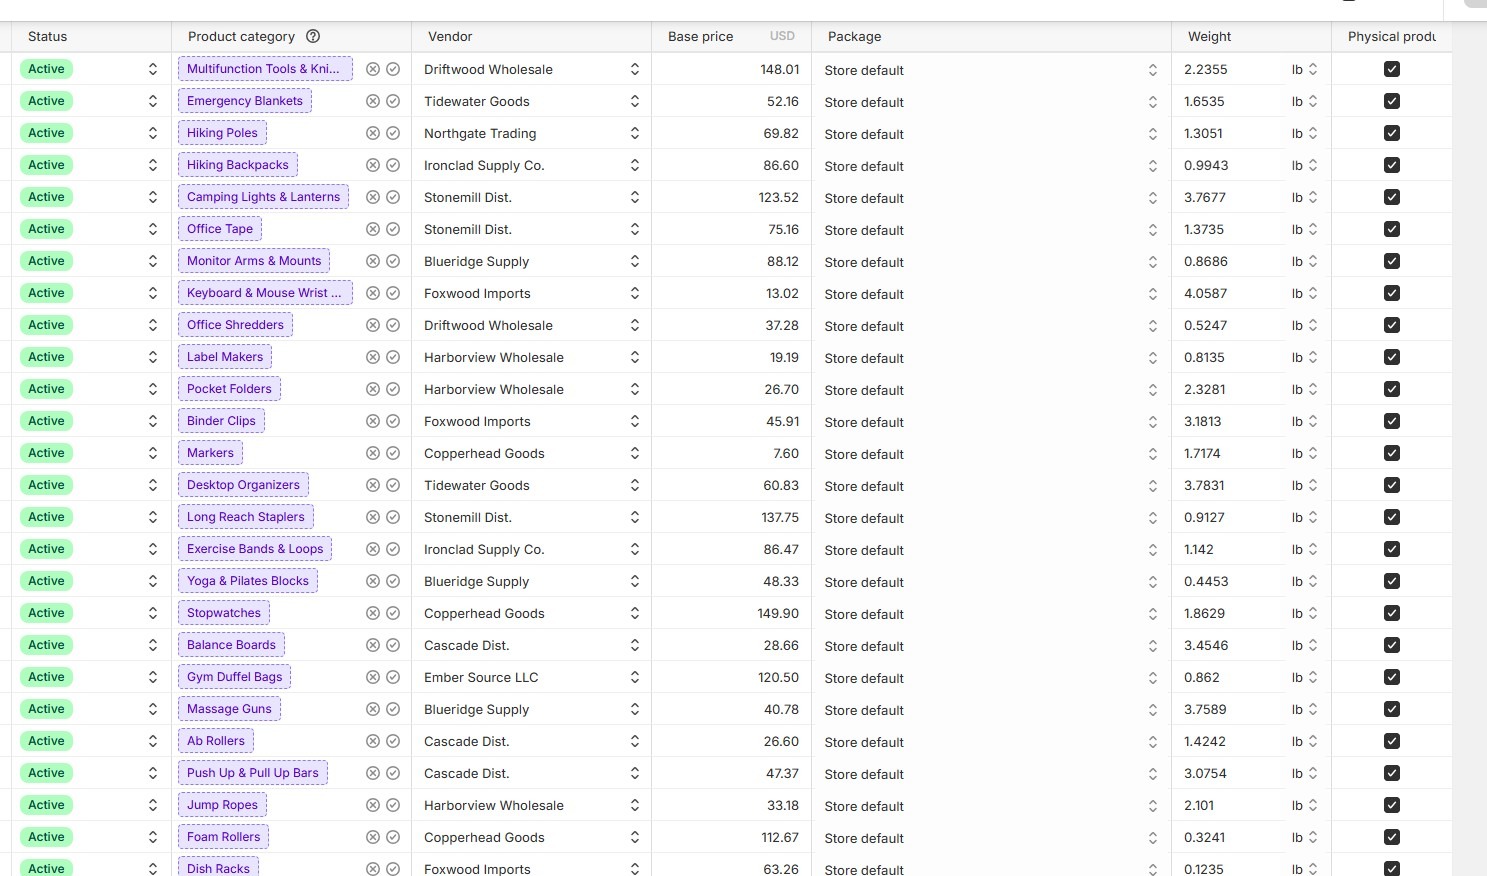
Every product must have the proper information if you want Shippo to handle fulfillment. Natively shippo will not look for digital items since they do not require fulfillment, ensuring the items are set to physical items can be done via products and bulk edit in shopify.
You will also want to make sure the weight unit set to the products is the same weight unit you’re using to calculate shipment in Shippo. If you’re using pounds in shopify, set to pounds in Shippo or ounces to ounces etc.
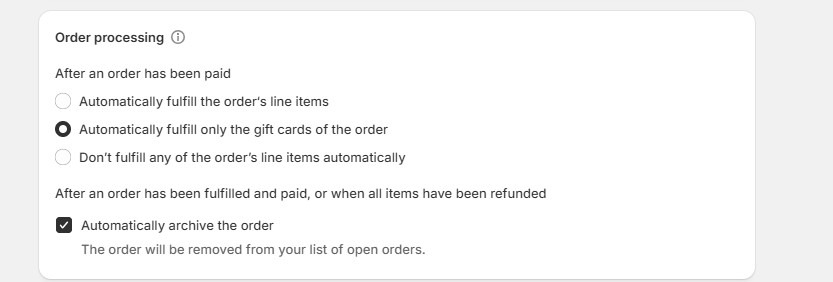
Next you’ll need to make sure automatic fulfillment for all line items is disabled in shopify. If you automatically fulfill your line items you are not requiring fulfillment, therefore Shippo will not look for these orders.
If you sell gift cards or use any type of drop shipper there are workflows that can be put in place via shopify flows to look for specific item tags and split fulfillment. If you are using a workflow such as these you must configure your store properly or you run the risk of orders not being sent to Shippo as their fulfillment has been automatically completed by shopify.
This is the step new stores miss most often, and it causes the most sync problems. If even one item in an order is set to automatic fulfillment, the fulfillment update breaks for that entire order.
Save Your Package Presets
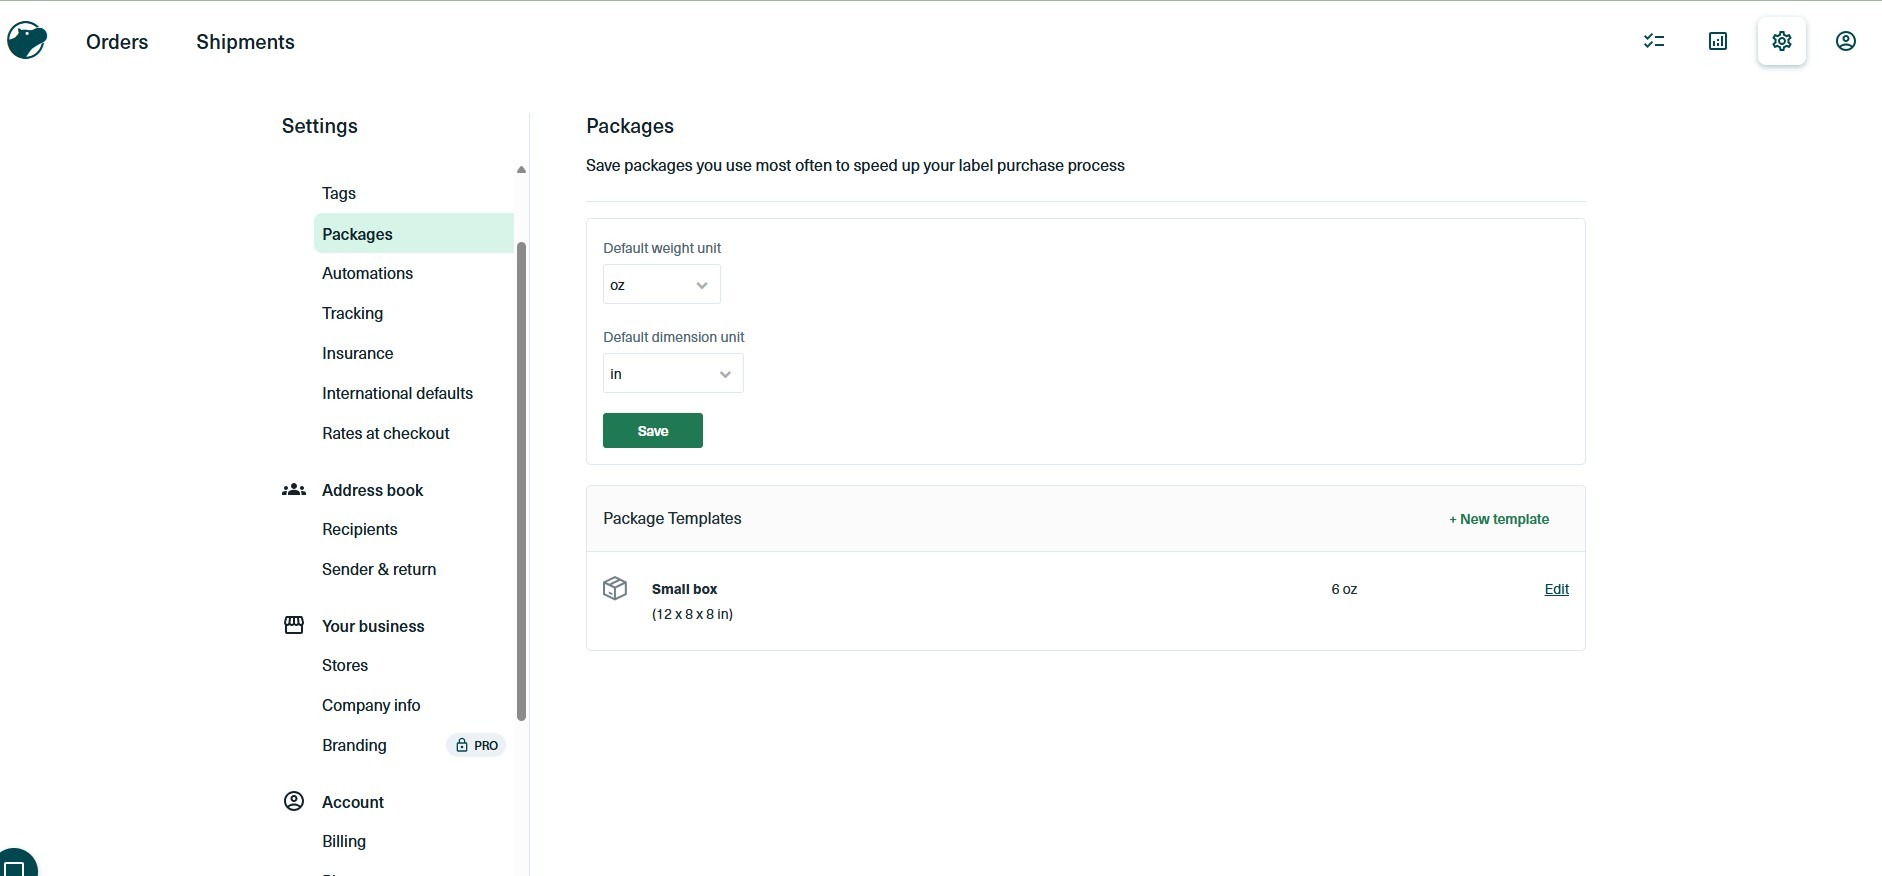
Enter the dimensions of the boxes and mailers you use most often and save them, so you are not retyping measurements on every label later. This also helps with dimensional weight, where carriers bill an oversized box by its volume rather than its actual weight.
Saving a few right-sized presets now, matched to your most common products, keeps you from paying to ship empty space later.
Part 2: Connect Shippo to Your Store
With Shopify configured, connect Shippo and set up the sync that pulls orders in and pushes tracking back out.
Create Your Shippo Account
Sign up at goshippo.com if you have not already. New accounts start on the free Starter plan, which includes up to 30 labels per month with no monthly fee and the same discounted carrier rates as the paid tiers, so a new store can launch at no software cost.
Install and Connect The Integration
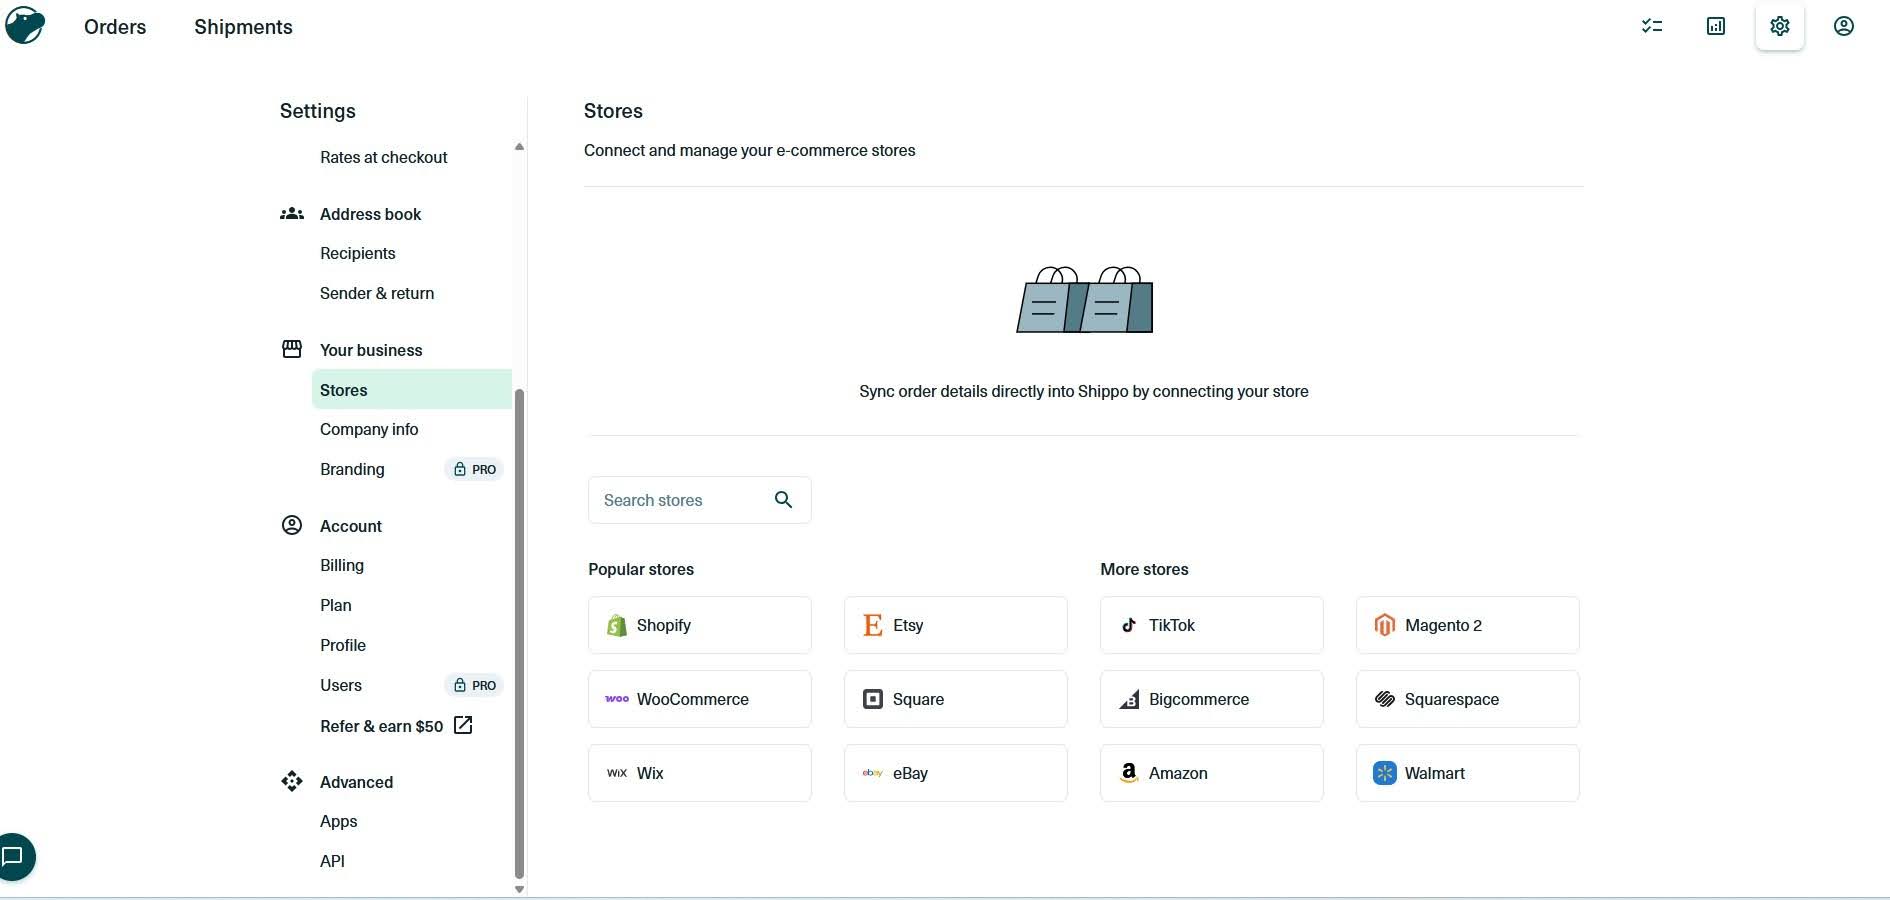
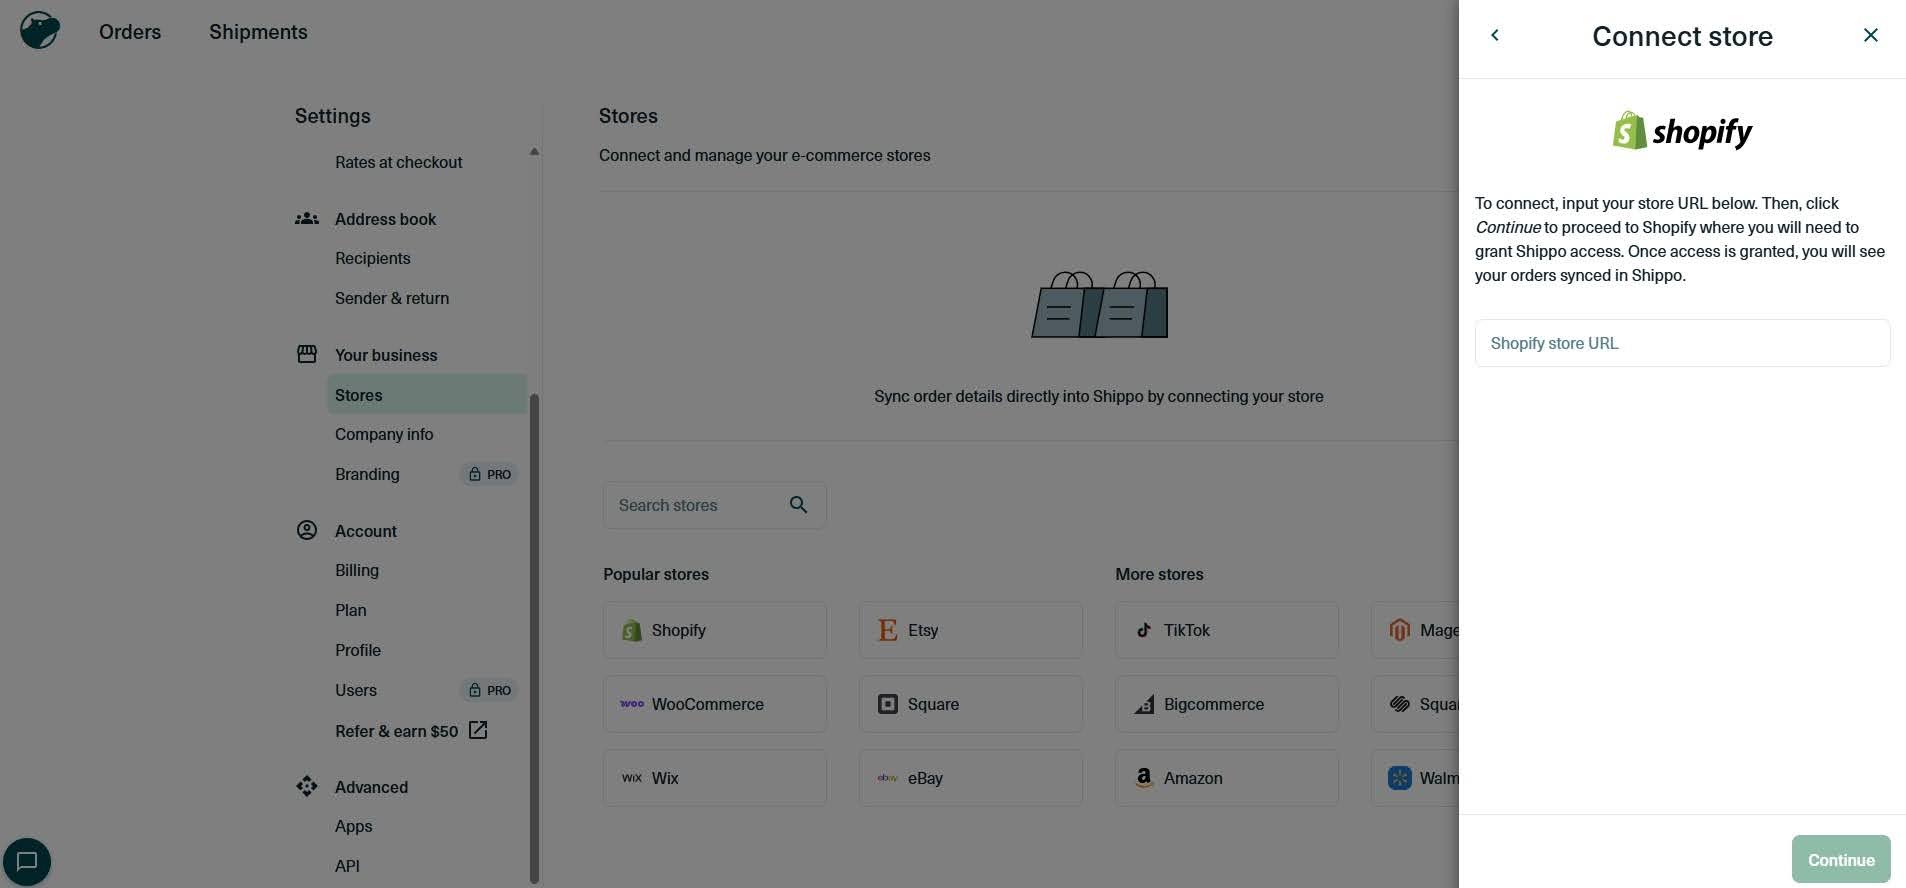
You can start from either side, and both paths link the same two accounts. From Shopify, go to Apps, open the Shopify App Store, search for Shippo, click Add app, and authorize it to access your store data.
From Shippo, go to Settings, then Stores, then Add a Store, select Shopify, and follow the prompts to log in and connect. Authorizing is what lets Shippo read your orders and write fulfillment and tracking back, so accept the permissions when prompted.
Confirm Your Orders Are Importing
Once connected, your Shopify orders populate Shippo’s Orders page automatically, each tagged with a store icon.
That icon matters later: if you connect a second storefront or a marketplace like Etsy or Amazon, it tells you at a glance which store an order came from.
Check that a recent order has appeared in Shippo before moving on.
Configure the Sync Settings
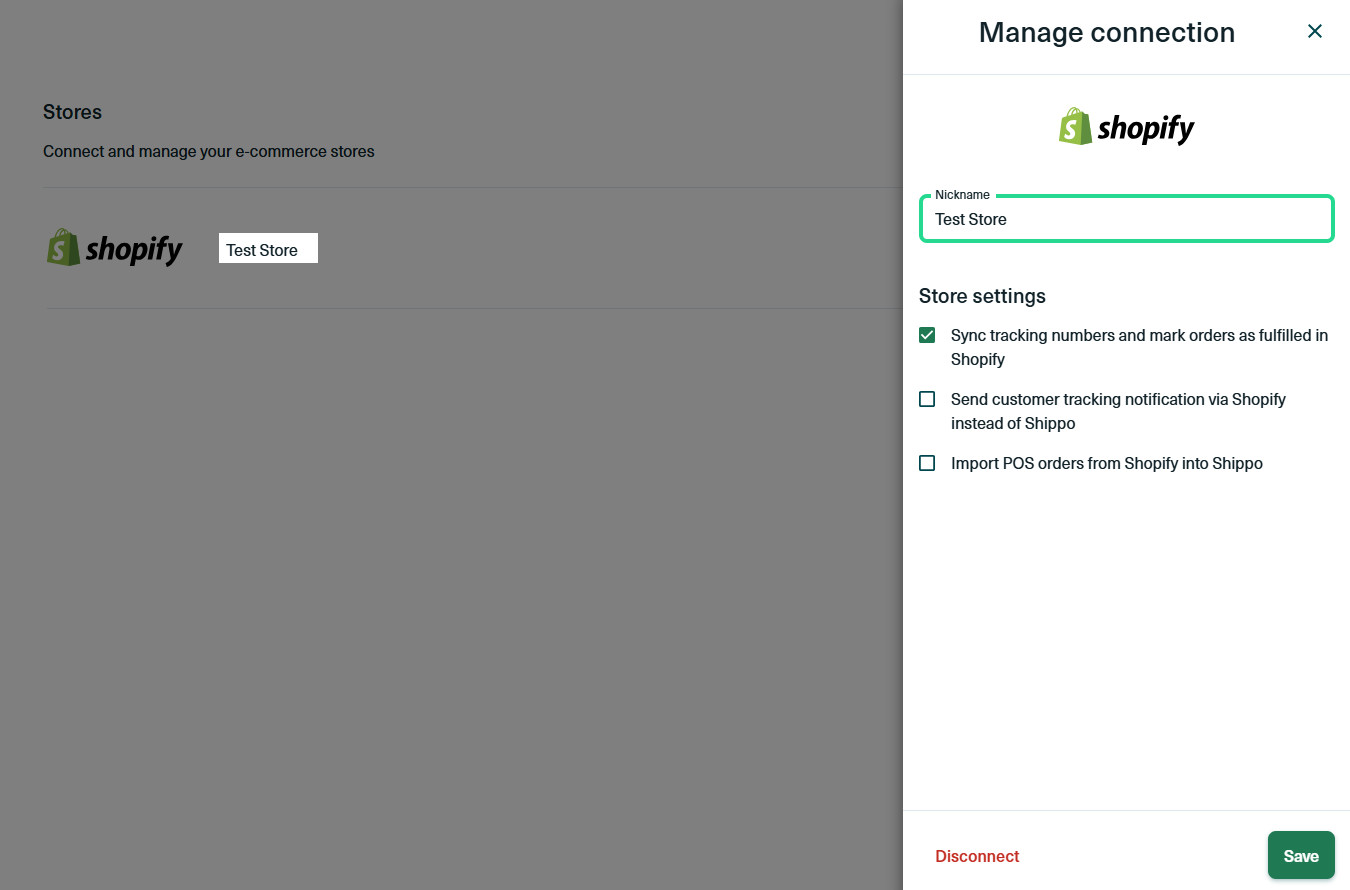
In Shippo, go to Settings, then Stores, then Manage, and turn on the Shopify sync. Then set three options:
- “Sync tracking numbers on Shopify” sends the tracking number back and marks the order fulfilled the moment you buy the label.
- “Send notification to the customer via Shopify” triggers your Shopify email template to send the shipping confirmation; if you would rather send Shippo’s own branded notification instead, leave this unchecked and set up the Shippo email.
- “Include POS orders” is off by default, so leave it off unless you want in-person point-of-sale orders pulled into Shippo too. Save when you are done.
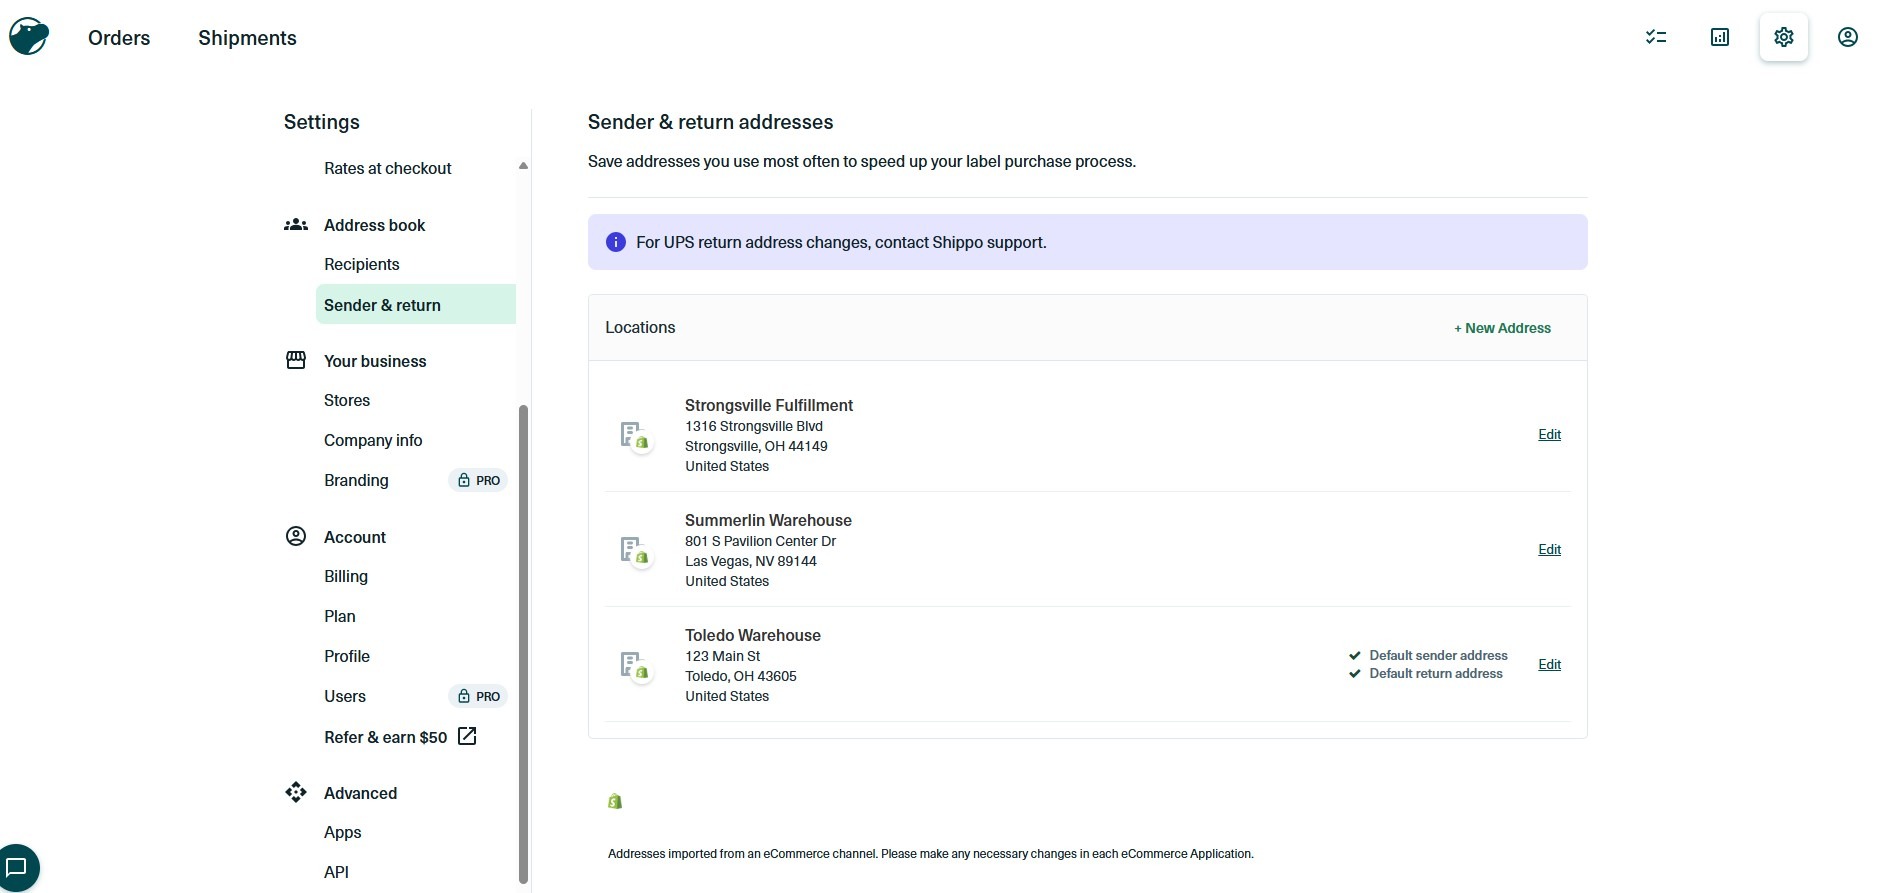
Set Your Sender Address
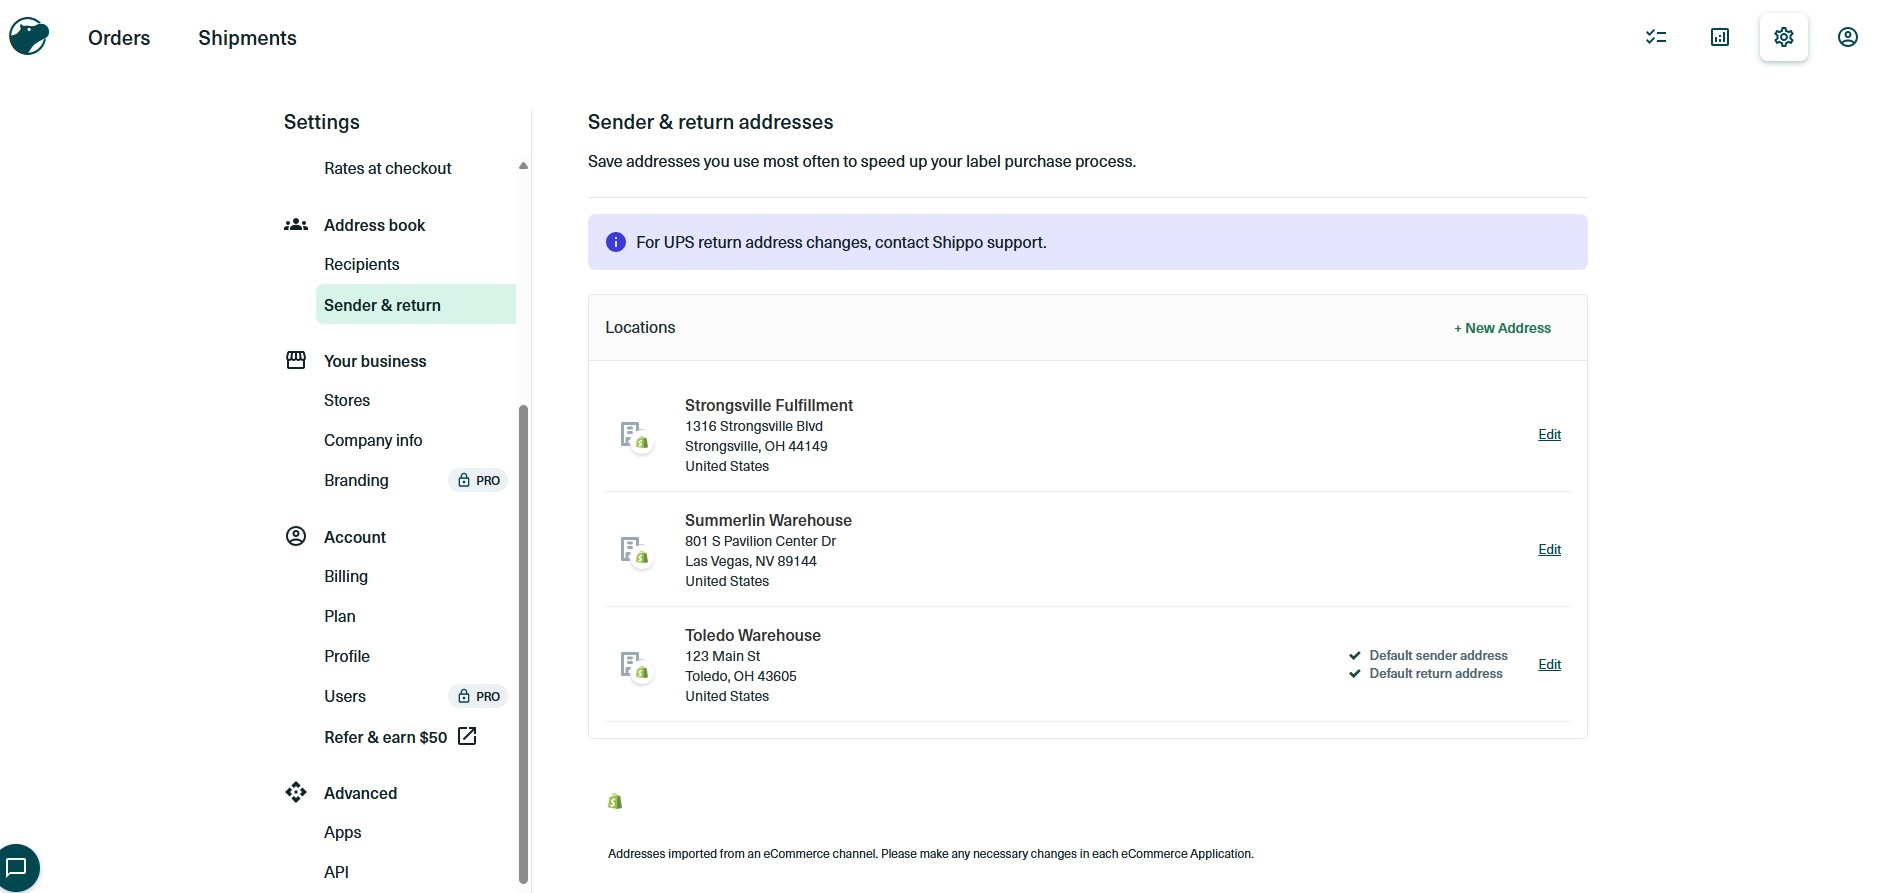
The sender on your labels has to be an imported Shopify Location with inventory assigned to it, or fulfillment will not sync back to Shopify.
In Shippo, set your default sender and return addresses under Settings, then Addresses, and make sure the sender matches one of your Shopify Locations.
This is the second most common cause of broken syncs after manual fulfillment, so confirm it now.
Part 3: Buy and Print Your First Label
Ship Your First Order
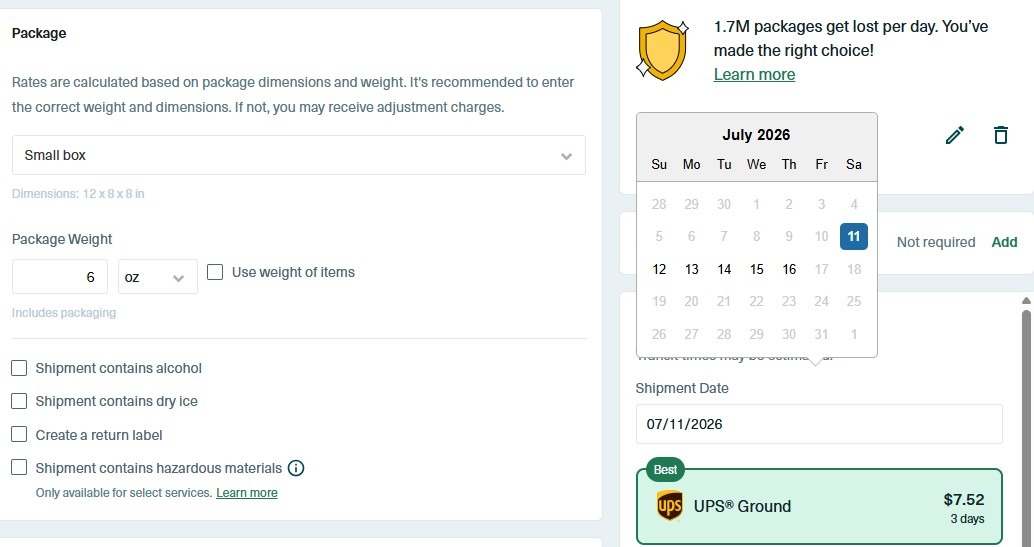
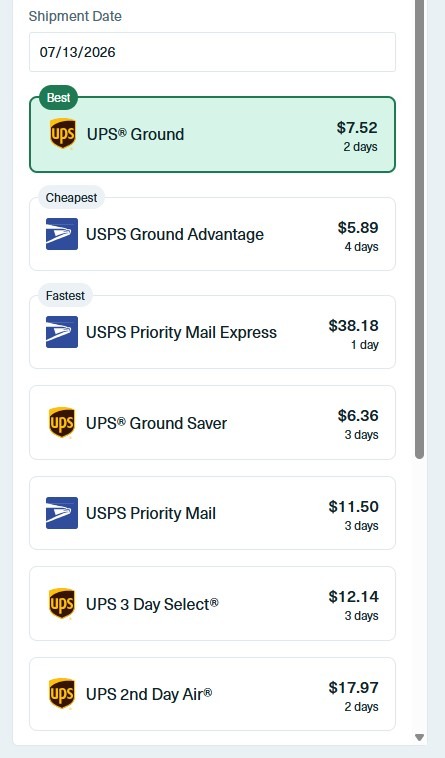
Open an order in Shippo and enter the package weight and dimensions, or pick one of the presets you saved earlier. Shippo shows rates from your connected carriers side by side, with the price and the estimated delivery time for each service.
Compare them and choose based on what the shipment needs: the cheapest service for a small, non-urgent parcel, or a faster service when speed matters. The order address and contents are already filled in for store-connected orders, so you are mostly confirming the package details.
Keep in mind that your ship date may not actually coincide with the ship date for the carrier; for example if you work weekends; most carriers don’t. If you ship an order Sunday you may want to change the ship date to the following business day to prevent customers from being notified of a false shipment date and create unrealistic expectations for delivery.
Buy the label and print it. The tracking number syncs back to Shopify, the order is marked fulfilled, and the customer notification goes out based on what you set in Step 8. Then schedule a carrier pickup or drop the package off, and your first order is shipped end to end.
Before you rely on the setup for real customers, run one test through the whole loop. Place a small test order in your store, let it import into Shippo, buy and print a label for it, then check the order back in Shopify.
The status should read as fulfilled with the tracking number attached, and the confirmation email should match the option you chose in Step 8. Once you have seen tracking land on a Shopify order, you know the sync works.
You can void the test label in Shippo within the carrier’s refund window so you are not charged for postage you did not use.
Once You are Shipping Regularly, Follow These Steps:
After your first few labels, a few features are worth turning on:
- Batch-print labels for many orders in one pass instead of one at a time.
- Set automation rules so routine orders pick their own carrier and service.
- Turn on branded tracking pages and notification emails so customers see your store’s name and colors instead of a generic carrier page.
- Add insurance on higher-value shipments, and let Shippo generate the customs forms automatically on international orders.
None of these are needed to ship your first package; they are where the time savings show up as volume grows. A few, like custom branding, are part of the paid Pro plan rather than the free tier.
Troubleshooting: When Fulfillment or Tracking Will Not Sync
If orders are not being marked fulfilled, or tracking is not reaching Shopify, the cause is almost always one of three things.
Check these first:
- An item in the order is still set to automatic fulfillment instead of manual.
- Every item in the order has to be manual.
- The sender address on the label is not an imported Shopify Location.
- Shopify requires a Shopify Location as the sender for fulfillment to sync back.
- Inventory is not assigned to that location for the items in the order.
- Assign stock to the location you use as the sender, then retry the label.
- Rates are not showing on an order.
- Make sure you have entered a weight and package dimensions, and that the shipping address validated; Shippo needs all three before it can return carrier rates.
Now You’re Ready for Orders to Flow in
Once you’ve completed these steps, your shipping workflow should be ready for real orders. More importantly, you’ve avoided the setup mistakes that cause the most frustration later, like broken fulfillment syncs, missing tracking numbers, or inaccurate shipping rates.
I recommend that, before you launch, you run one final test order from start to finish. Make sure the order imports into Shippo, purchase a test label, confirm the tracking number syncs back to Shopify, and verify that the customer notification is sent correctly. Catching a small issue now is much easier than troubleshooting it after your first customer places an order.
As your store grows, you can start taking advantage of features like batch label printing, automation rules, branded tracking pages, and additional sales channel integrations. None of those are necessary on day one. Getting the foundation right is what makes adding those tools later simple instead of stressful.