
- Step 1: Decide What History You Actually Need
- Step 2: Clean Up QuickBooks Before You Export
- Step 3: Export the Right Data from QuickBooks
- Step 4: Pick the Right Cutover Date
- Step 5: Understand What Carries Over Cleanly
- Step 6: Use Your Destination Platform’s Structured Migration Path
- Step 7: Run Both Systems Briefly
- Step 8: Watch the First Reconciliation Closely
- Step 9: Keep the Old System Accessible
- Common Mistakes to Avoid
- Switching Accounting Software Without Losing Data (or Your Mind)
Last Updated on May 18, 2026 by Ewen Finser
Switching accounting software sounds simple at first — until you remember what lives inside the old system: your chart of accounts, customer list, vendor list, transaction history, bank reconciliations, open invoices, unpaid bills… the list goes on and on.
That’s why I see most business owners stay in the wrong accounting system too long. It’s not because they love the software; it’s because they’re afraid of breaking their books. For example, I’ve seen a Fortune 500 company cripple their AP system for five business days due to a bad implementation. They literally had to sit on tens of millions of dollars of payments for days because they literally could not pay.
The fear of migration is obviously reasonable. A bad migration can create duplicate income, missing expenses, wrong opening balances, broken bank feeds, lost vendor records, and a trial balance that no longer agrees with the tax return. However, a clean migration that avoids these hiccups is not magic; it’s merely a controlled, informed process that’s well within your reach.
The short version: Treat the move like a small accounting project, not a quick software change. First, decide what history you need, and clean up the old system by reconciling everything, clearing undeposited funds, and closing the period. Export all reports, lists, attachments, and statements. Pick a clean cutover date, and use your new platform’s migration tool during setup to import data automatically. Run both systems in parallel for one month to compare trial balances and catch errors. Watch your first bank reconciliation closely and anchor it to the old system’s final balance. Finally, keep the old system accessible through the next tax filing cycle for lookups and audit support.
Now, let’s break it down step by step.
Step 1: Decide What History You Actually Need

It’s easy to say that you just want all your data moved. In practice, it’s not that simple.
Accounting data has layers. At the top, you have summary financial records: your trial balance, balance sheet, income statement, and retained earnings by period. Below that, you have transaction details: invoices, bills, payments, deposits, checks, expenses, transfers, journal entries, and payroll entries. Under that, you have supporting records: vendor names, customer names, W-9s, attachments, receipts, bank statements, loan statements, fixed asset schedules, sales tax filings, and tax returns.
So a good migration plan starts by deciding which layers need to live in the new system and which layers can stay archived.
For a small business, I usually want at least this much inside the new accounting system:
- Current year transaction detail
- Prior year trial balance
- Open accounts receivable
- Open accounts payable
- Bank and credit card balances as of the cutover date
- Customer and vendor lists
- Chart of accounts
- Products and services, if used for invoicing
- Classes, locations, departments, or projects
For anything beyond that, the answer depends on how much you need to look back. If you’re switching from QuickBooks and your new platform can cleanly import a detailed history, go for it. But if the old file is messy, bloated, and full of bad account mappings, it may be better to bring over clean opening balances and keep the old QuickBooks file as a locked archive.
Step 2: Clean Up QuickBooks Before You Export

The new system will only be as clean as the data you feed it. So before you switch, clean your old QuickBooks file as much as possible.
Reconcile all bank and credit card accounts through the cutover date, review undeposited funds and clear old unapplied payments, write off invoices that will never be collected, void stale checks if needed, review negative accounts receivable and accounts payable balances, and make sure that payroll liabilities, sales tax payable, loans, and credit cards agree with outside statements.
The best migration starts with a closed period. For example, if you plan to move on January 1, close December in QuickBooks first and reconcile every bank account through December 31. Run your December 31 balance sheet and trial balance, save them as PDFs and Excel files, and once those reports are locked, they become your baseline.
That baseline is your proof. If the new system says your checking account had $82,418.22 on January 1, but QuickBooks said it had $82,417.22 on December 31, you know you have a $1 problem.
Step 3: Export the Right Data from QuickBooks
At a minimum, export these files from QuickBooks before you begin the migration.
Start with your financial reports; these are pretty much the basic ones you’ll always see:
- Balance sheet
- Trial balance
- Profit and loss for the current year through the cutover date
- Profit and loss for the prior year
- General ledger for the current year
- General ledger for any prior periods you need in detail
- Statement of cash flows
- Accounts receivable aging
- Accounts payable aging
Then export your core lists:
- Chart of accounts
- Customer list
- Vendor list
- Employee list
- Products and services
- Classes, locations, departments, or projects
- Recurring transactions
- Sales tax codes and agencies
Finally, end with everything else:
- Bank statements for each account through the cutover date
- Credit card statements through the cutover date
- Loan statements
- Payroll reports
- Sales tax returns
- 1099 reports
- Fixed asset schedules
- Receipt attachments
- Copies of major invoices and bills
Create a folder where all this will live, with subfolders for reports, lists, statements, tax, payroll, and attachments. Keep it boring — boring folders save lives during audits.
Step 4: Pick the Right Cutover Date

The cutover date is where many migrations go wrong.
What you don’t want to do is sign up for new software on the 17th, connect the bank feed, import some transactions, keep using QuickBooks for invoices, and then wonder why revenue doubled.
Instead, the best cutover dates are January 1, the first day of a quarter, the first day of a month, or the day after the last fully reconciled bank statement — not mid-month, mid-cycle, or during sales tax filing week, loan renewals, audit fieldwork, or a messy cleanup project.
The migration should start from a known accounting point, not from a random day.
Step 5: Understand What Carries Over Cleanly
Not all accounting data moves the same way. Some data usually carries over well:
- Chart of accounts
- Customer names
- Vendor names
- Account balances
- Open invoices
- Open bills
- Bank transactions
- Credit card transactions
- Product and service lists
- Department, class, or location structures, depending on the system
Those are usually straightforward and rather surface-level.
However, some data tends to need much more scrutiny:
- Payroll history
- Sales tax settings
- Inventory
- Job costing
- Projects
- Attachments
- Bank reconciliation status
- Custom reports
- Recurring transactions
- User permissions
- Old bank rules
- Audit trail details
A migration can bring over transaction history and still not bring over the exact reconciliation status from the old system. That doesn’t mean the migration failed; it means you need a cutover reconciliation to find if anything was accidentally missed. It’s annoying, but it’s part of the process.
Digits, which we’ll get into in a moment, is a good example. Their QuickBooks migration process imports historical transactions and balances as of the cutover date, but their documentation says that historical reconciliation status from QuickBooks doesn’t come over in the same way. As such, they recommend a one-time cutover reconciliation to establish a clean starting point for future reconciliations.
That is the kind of detail business owners miss when they treat migration as a login screen instead of an accounting project.
Step 6: Use Your Destination Platform’s Structured Migration Path
This is where paths can diverge a bit, because depending on what you’re migrating from, certain tools can make the process a lot easier. For example, a lot of modern accounting software recognizes the ubiquitous nature of QBO and lays out very structured migration paths to make your life easier.
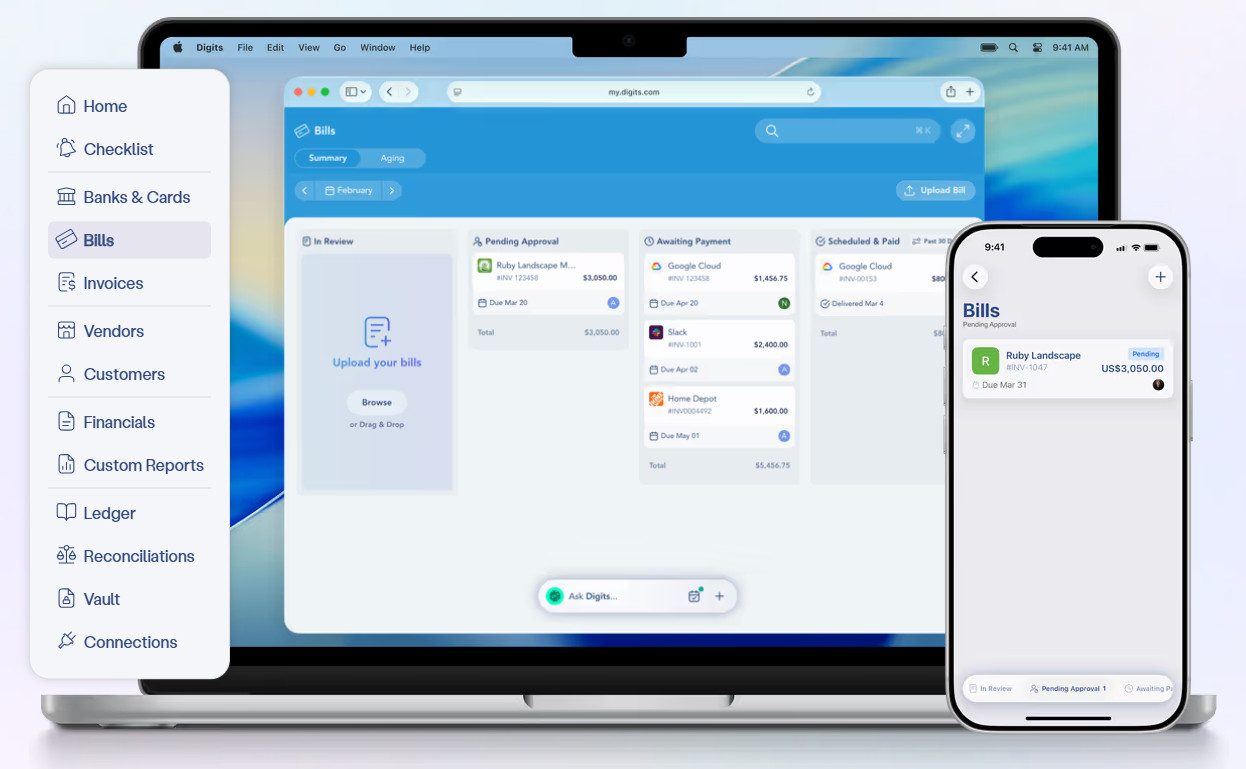
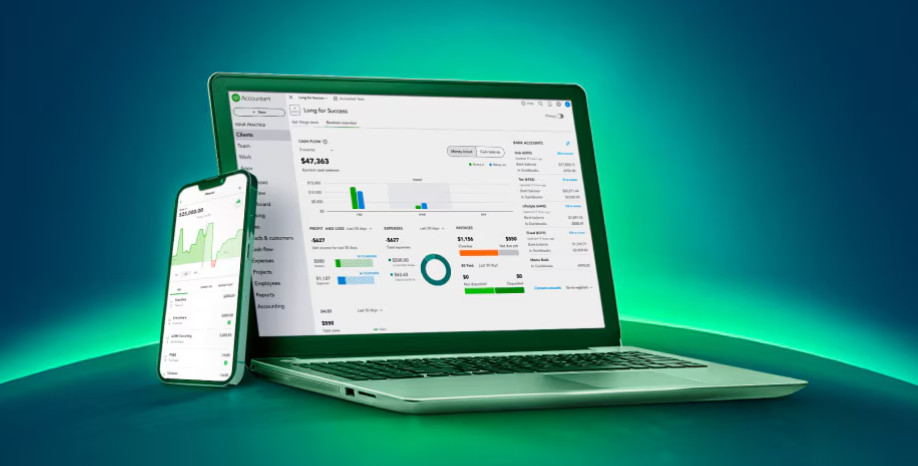
Let’s look at Digits, which allows for QuickBooks migration during initial setup in a far more robust way than a plain CSV import. During onboarding, you just choose “Migrate from QuickBooks Online,” sign into QuickBooks, approve the connection, and set a cutover date. Digits then imports the chart of accounts and other data from QuickBooks without requiring a CSV upload.
Using Digits as an example, then, the cleanest migration path is:
- Close and reconcile QuickBooks through the cutover date
- Export your backup reports and lists
- Start Digits setup
- Select the QuickBooks migration option during initial setup
- Connect to QuickBooks Online
- Set the cutover date
- Review the imported chart of accounts and balances
- Connect banks, cards, and apps
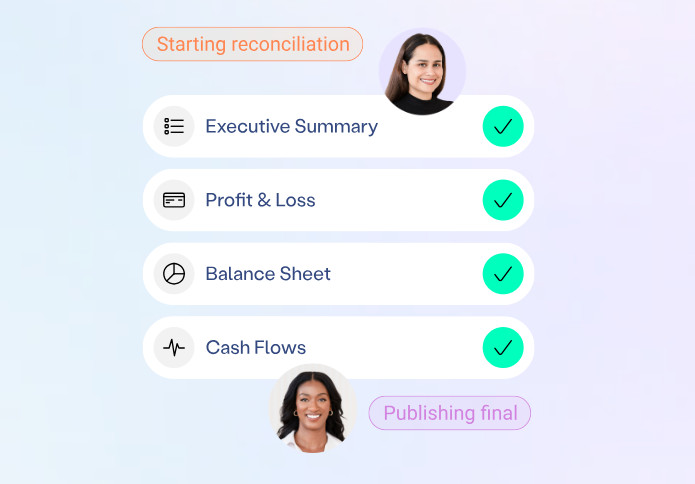
- Complete the cutover reconciliation
- Run one parallel close before fully switching
If you’re not in QBO, Digits also supports manual setup paths, such as chart of accounts uploads via CSV. The documentation notes that users can upload category names, optional category numbers, and category types such as income, expense, and asset or liability.
Step 7: Run Both Systems Briefly

After migration, it’s wise to run a parallel close, meaning running the old system and the new system side-by-side for a short period.
For the first month after migration, compare:
- Trial balance
- Balance sheet
- Profit and loss
- Bank reconciliation reports
- Accounts receivable aging
- Accounts payable aging
- Sales tax liability
- Payroll liability accounts
- Loan balances
- Credit card balances
- Undeposited funds or clearing accounts
Don’t just compare net income — net income can match while the balance sheet is wrong. Instead, compare the full trial balance account by account.
If there are any differences, sort them into buckets:
- Timing differences
- Duplicate bank feed transactions
- Missing transactions
- Wrong opening balances
- Mapping issues
- Accounts merged incorrectly
- Transactions coded to different categories
- Payroll or sales tax entries posted differently
Most differences are easily fixable. The key is finding them before you fully trust the new system.
You won’t want to do this forever; maybe a month or two at most. Just long enough to review, catch mistakes, and possibly save yourself from a bad migration.
Step 8: Watch the First Reconciliation Closely
The first bank reconciliation after migration is the danger zone.
For example, you might see old transactions that were already reconciled in QuickBooks, duplicate bank feed activity (often due to importing transactions and connecting the bank feed for the same period), or transfers coded as income or expense.
Don’t panic. Reconciliation problems after migration are common and are dealt with all the time.
The fix is to anchor the new system to the old system, using the final reconciled bank balance from QuickBooks as your starting point. In Digits, for example, this is handled through a cutover reconciliation. If you need to make an AJE or two, it is what it is — just don’t make them without a good reason.
Step 9: Keep the Old System Accessible
After you switch, don’t cancel the old software too soon. You may need it for:
- Audits
- Tax returns
- Customer payment history
- Vendor disputes
- Old invoices
- Receipt images
- Payroll detail
- Sales tax notices
- Loan underwriting
- Litigation or insurance claims
At a minimum, keep exports and PDFs. Better yet, keep read-only access to the old system for a period of time. The exact length depends on your business, tax needs, and document retention policy.
For many small businesses, I like to keep the old QuickBooks file accessible through at least the next tax filing cycle. That way, if the tax CPA asks for details, you’re not digging through disconnected spreadsheets.
Common Mistakes to Avoid
As you proceed through migration, here are a few things you should avoid:
- Switching before the old system is reconciled: That creates a moving target and just leads to heartache later.
- Connecting bank feeds too early: If you connect a bank feed before the chart of accounts and opening balances are ready (an easy mistake to make), transactions may map to the wrong places.
- Relying on software support to make accounting decisions: Software support can help with the tool, but it won’t know whether your payroll clearing, WIP, sales tax payable, or loan accounts are correct.
- Failing to export attachments: If your receipts live in QuickBooks, export them before you cancel. This is small, but it can definitely bite you later.
- Skipping the trial balance comparison: The trial balance is the migration scoreboard. If it doesn’t match, something changed and you’ve given yourself a pile of homework to sift through.
Switching Accounting Software Without Losing Data (or Your Mind)

Migrating to a new accounting software isn’t dangerous in and of itself… unless you do it without a process.
Thankfully, QuickBooks gives you several ways to export reports, lists, chart of accounts data, attachments, and other records. At the same time, platforms like Digits give QuickBooks Online users a structured migration path during initial setup, including a cutover date and imported historical data.
However, no software can replace the accounting discipline behind the move.
Close the old books first. Export the data. Pick a clean cutover date and then import into the new system. Compare the trial balance and reconcile the bank accounts. Run one parallel close, and then finally keep the old system available for support.
That’s how you switch without losing data and prevent an immense headache. It’s that simple. We hope this guide to switching accounting software without losing data helps make the transition a little easier.