
Last Updated on August 11, 2025 by Ewen Finser
Static product videos no longer meet buyer expectations. Audiences today want more than a passive watch-through on YouTube. Instead, they expect to engage with the product directly and explore it on their own terms.
Interactive product demos support this shift by letting users take the lead, choosing what to view and how to engage. I think these numbers speak for themselves: Interactive videos generate 300% more engagement and hit 90% completion rates. In comparison, non-interactive formats average just 58%.
Tools like Storylane and Guidde are built to help companies meet this demand. Both simplify demo creation, but they serve very different purposes. One is better suited for creating personalized, interactive demos that accelerate sales, while the other is designed to help you publish fast, polished walkthroughs that explain key product features.
So, which one is right for your product demo goals? This guide breaks down Storylane vs. Guidde to help you decide.
My Bottom Line Up Front
If you don’t have time to read my full Storylane vs Guidde comparison, here’s the quick lowdown:
- If you’re creating demos that need to feel dynamic and tailored to each prospect, I think Storylane provides more opportunities for personalization and viewer interaction.
- On the other hand, I find that Guidde offers a faster way to create clean, straightforward product walkthroughs that clearly show how your product works, without the need for complex setup.

Guidde puts it ALL together for me. I've used many screen recording tools (like Loom). I've used many SOP buiding tools (like Trainual). But Guidde puts the best of both together for a quick, easy to use mixed media documentation builder in one (less expensive) workflow. A small, but signficant (compounding) time saver in our business.
Guidde vs Storylane’s Core Differences
Storylane helps teams build interactive product demos with clickable elements, branching paths, and embedded CTAs, whereas Guidde focuses on helping you produce video walkthroughs that are easy to create and share, offering light interactivity, such as chapter navigation and call-to-action buttons.
Storylane captures workflows using screenshots, HTML clones, or video, then assembles them into step-based interactive demos. You can record your demo via Storylane’s extension or upload your own content, whereas Guidde records your screen and automatically generates annotated video steps with AI-powered text and voiceovers, streamlining the entire creation process.
Storylane offers detailed account-level demo analytics, including interactive behavior and embedded video engagement, along with built-in CRM syncing (HubSpot, Salesforce) to support lead tracking and sales pipeline management. In comparison, Guidde focuses more on video engagement analytics across teams and integrates with tools like Salesforce, Zendesk, and Intercom to support documentation and support workflows.
Storylane is a great fit for sales and marketing teams looking to create interactive product tours that drive engagement and conversions, whereas Guidde is ideal for teams that need to produce clear, professional product walkthroughs quickly, especially for customer onboarding and internal training.
Storylane Pricing
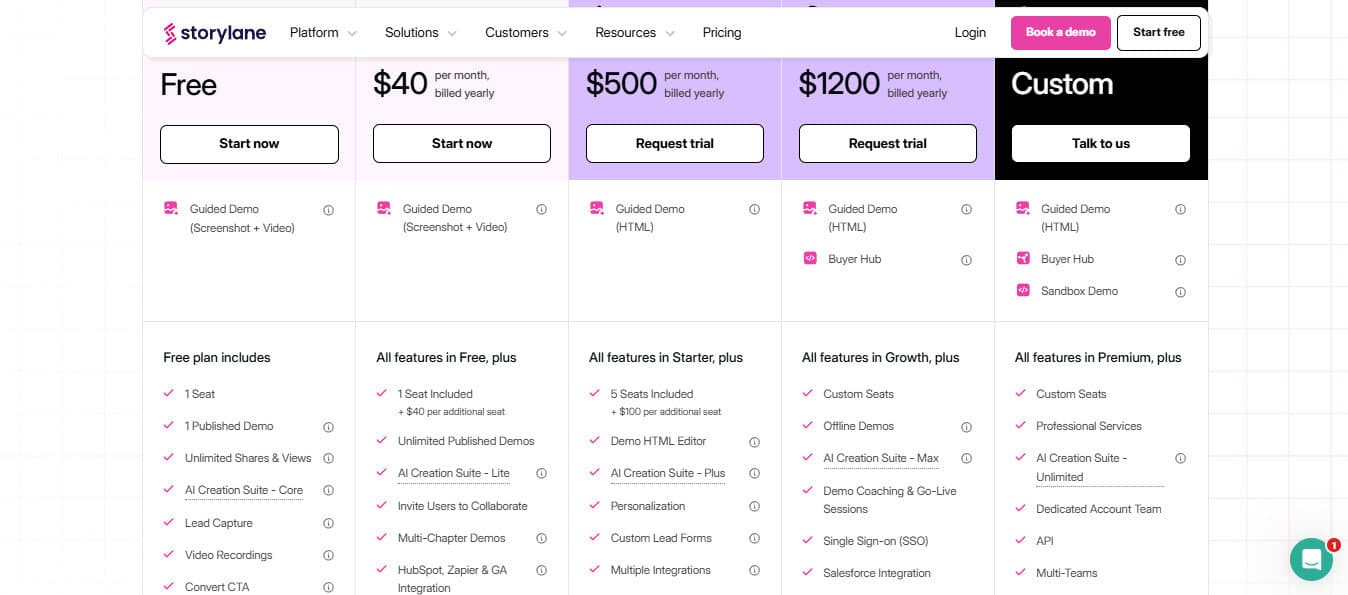
Storylane has five pricing tiers, and if you choose annual billing, you’ll get 20% off (as priced below):
- Free: Includes basic guided demos (screenshot + video), basic analytics, Slack integration, lead capture tools, and more.
- Starter ($40/month): Adds unlimited published demos, multi-chapter demos, watermark removal, advanced analytics, and more.
- Growth ($500/month): Introduces HTML demos, custom branding, a dedicated CSM, de-anonymizes demo visitors, and more.
- Premium ($1,200/month): Adds advanced features such as offline demos, demo coaching, Salesforce integration, a white-label demo URL, dedicated Slack support, and more.
- Enterprise (Custom): Includes a dedicated account team, API access, multi-team management, private demo links, and more.
Guidde Pricing
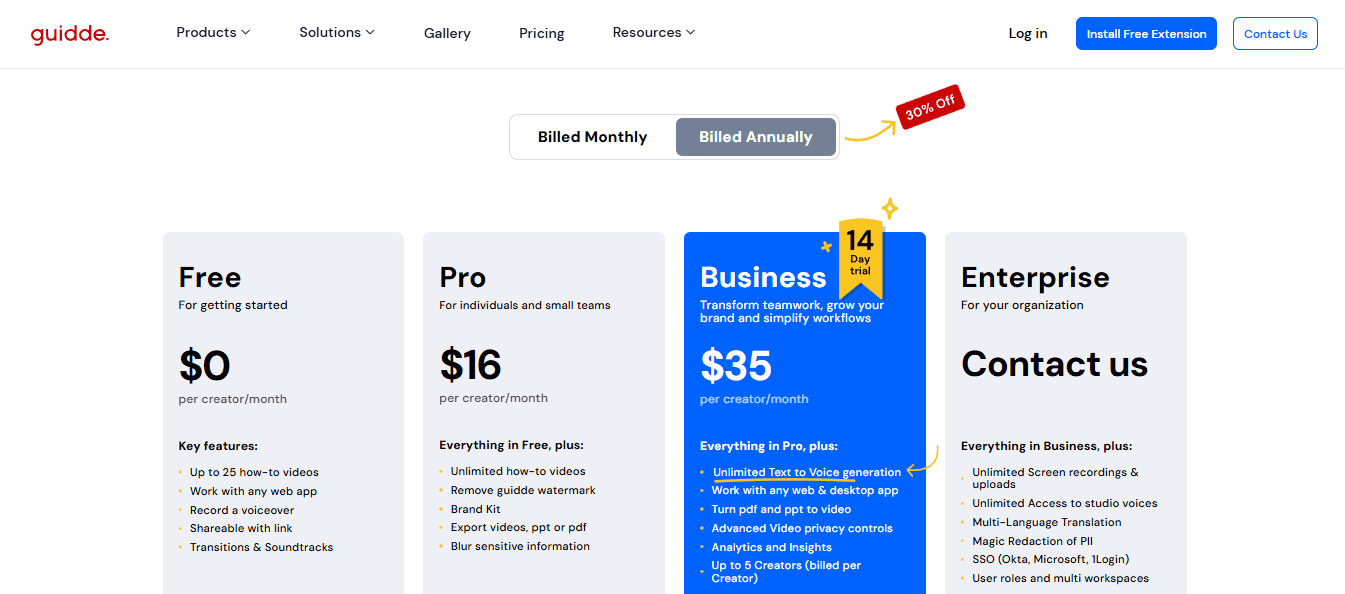
Guidde has four main pricing tiers, and you’ll save 30% if you go with annual billing (as quoted below):
- Free: This includes up to 25 how-to videos, works with any web app, voiceover recording, sharing via public link, and access to transitions and soundtracks.
- Pro ($16/month/creator): Unlimited how-to videos, watermark removal, brand kit, export videos as PPT or PDF, and you can blur sensitive information.
- Business ($35/month/creator): Unlimited text-to-voice generation, work with any web & desktop app, turn PDF and PPT to video, advanced video privacy controls, analytics and insights, and you can register up to five creators.
- Enterprise (custom pricing): Includes unlimited screen recordings and uploads, unlimited access to studio voices, multi-language translation, magic redaction of PII, SSO (Okta, Microsoft, 1Login), user roles, and multiple workspaces.
How to Build a Demo in Storylane
Storylane offers a structured yet flexible approach to creating interactive product demos. Its user interface is very clean and easy to navigate, so you should be able to hit the ground running with no prior experience.
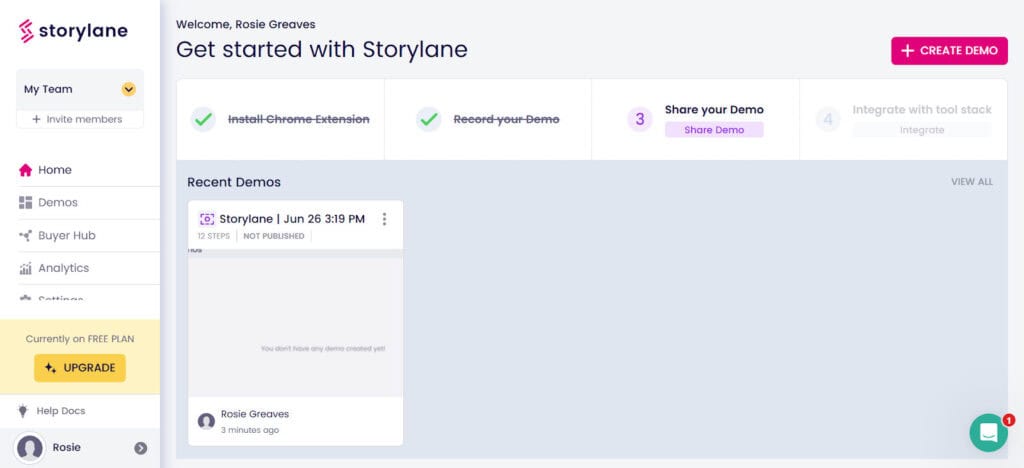
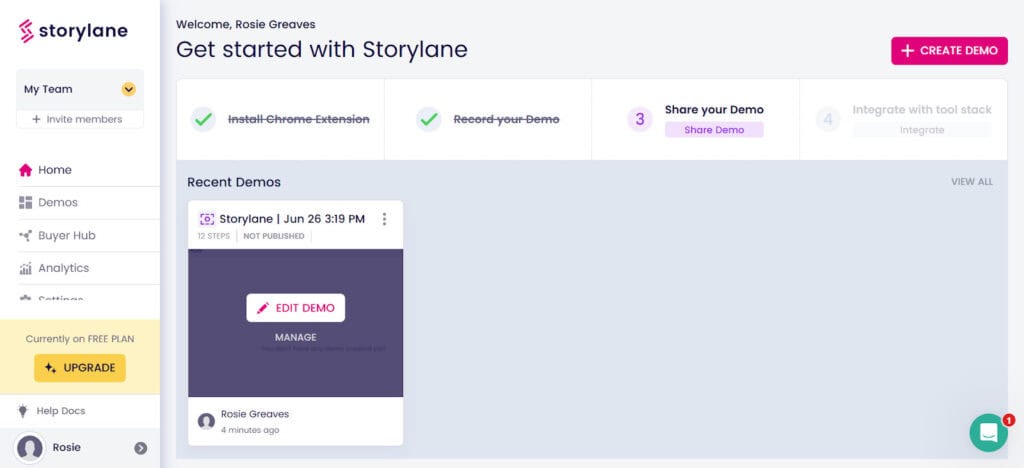
Once I had created a Storylane account, I was taken to this dashboard. In the top right, there’s a pink ‘CREATE DEMO’ button. You just hit that to get started.
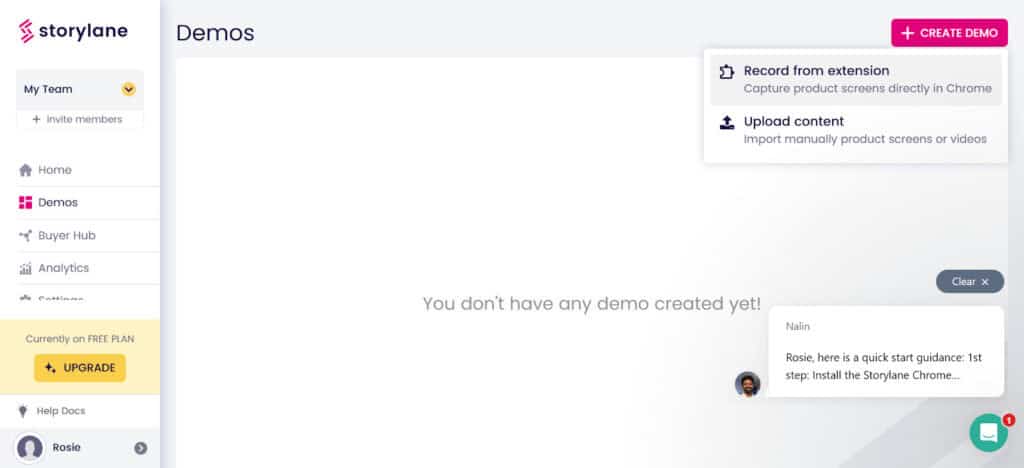
I decided to test the ‘Record from extension’ function, and this took me straight to the necessary page to download the extension on Google Chrome:
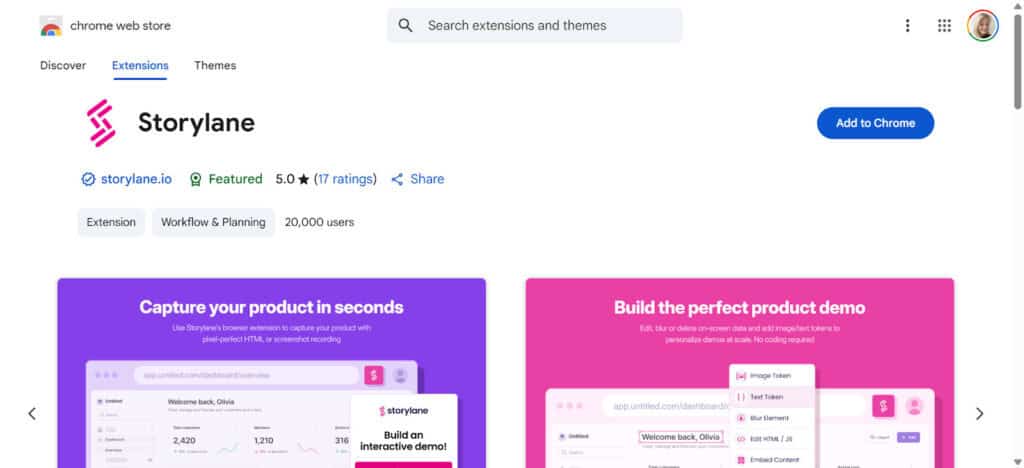
Once I downloaded the extension, I was presented with the following options:
- Screenshot demo: Uses static images to build a self-guided demo for your users
- HTML demo: Replicates your product, allowing you to create a fully editable demo
At this point, I would like to mention that I like that you’re able to easily adjust the screen size of the recording. I think that’s pretty handy!
For fun, I thought it would be a good idea to create a demo of Storylane itself. This is what happened…
- I clicked the ‘Record new demo’ button in the above screenshot, and this pop-up appeared:
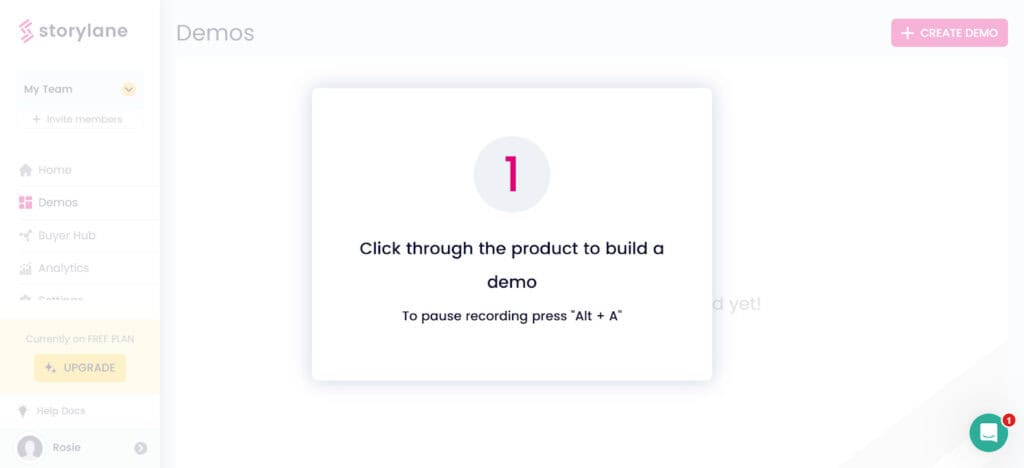
- As instructed, I proceeded to click around the dashboard
- Once I had captured everything, I hit ‘Stop recording’ via the Storylane Chrome extension
- Within minutes (closer to seconds), the demo appeared on the home page of my Storylane dashboard:
- When I hovered over the thumbnail pictured in the screenshot above, an ‘EDIT DEMO’ button appeared:
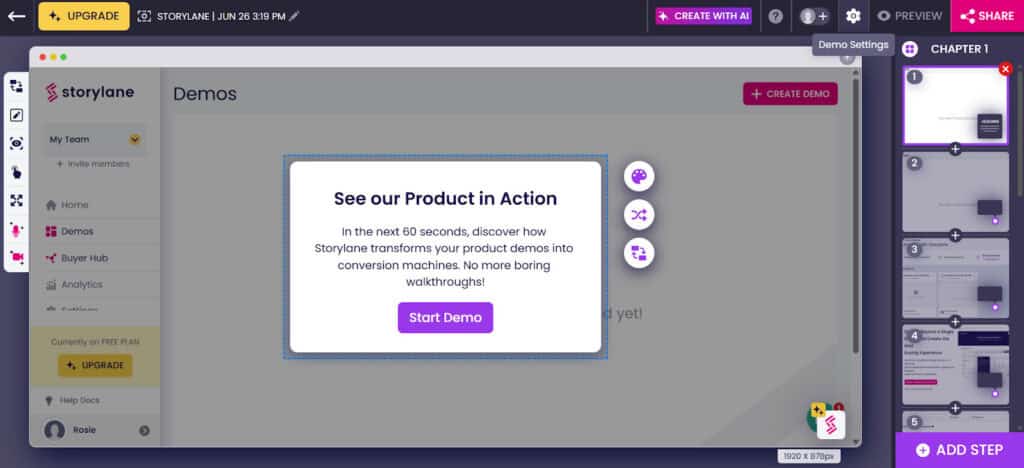
- Clicking this took me to a drag-and-drop interface where I could customize the demo I had just recorded (as pictured in the screenshot below). Here are my initial thoughts:
- First of all, I’m struck by the first slide. I love that Storylane automatically created an interactive pop-up for viewers. I didn’t configure the text, the ‘Start Demo’ button, or anything about the dialog box at all; it was just there!
- Side note, I also like that in the bottom right corner, you can add a step. This would be handy if you accidentally forgot to click on a specific area of your screen that you wanted to appear in the demo during the initial recording.
- To the left of the editor, you’ll see an array of icons, which allow me to:
- Change the background
- Edit the screen (blur, crop, annotate)
- Track and zoom (to direct the audience’s focus to specific parts of the product, only available on hotspots and tooltips)
- Add an interactive CTA
- Add voiceover
- Add video avatar
- To give you a sense of just how much of the heavy-lifting Storylane does for you. I’m going to share the demo as-is. I haven’t made any edits.
- To do this, I just clicked on the pink ‘SHARE’ button in the top right corner, which opened up the sharing and embedding options:
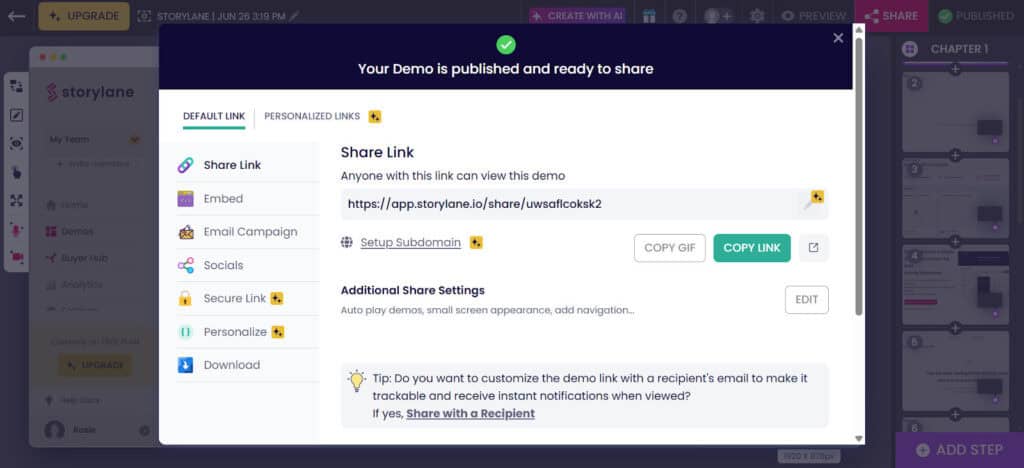
Here’s the finished product! Honestly, I was pleasantly surprised by how quick and easy the workflow was and how professional-looking the finished product is!
How to Build a Demo in Guidde
Unlike Storylane, Guidde takes a video-first approach. It uses AI to turn your screen activity into clean, step-by-step how-to guides.
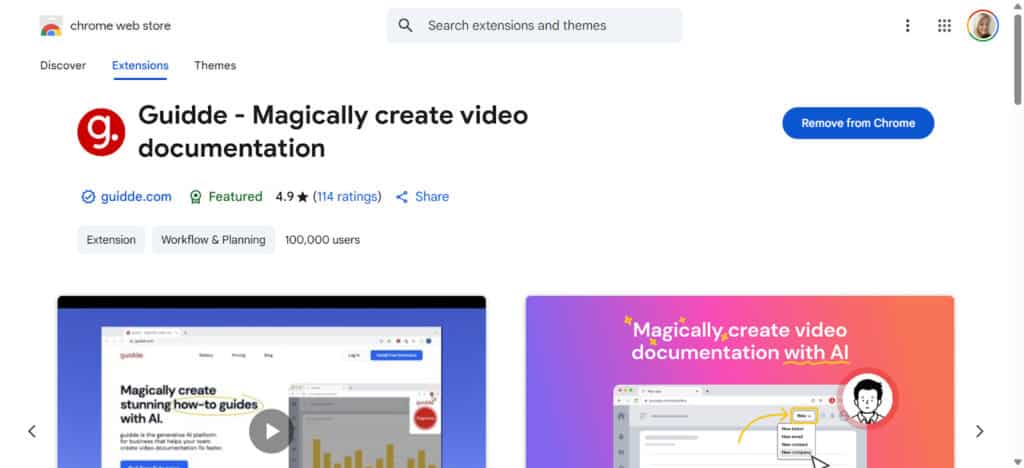
After signing up for a Guidde account, I was immediately prompted to download the browser extension to get started:
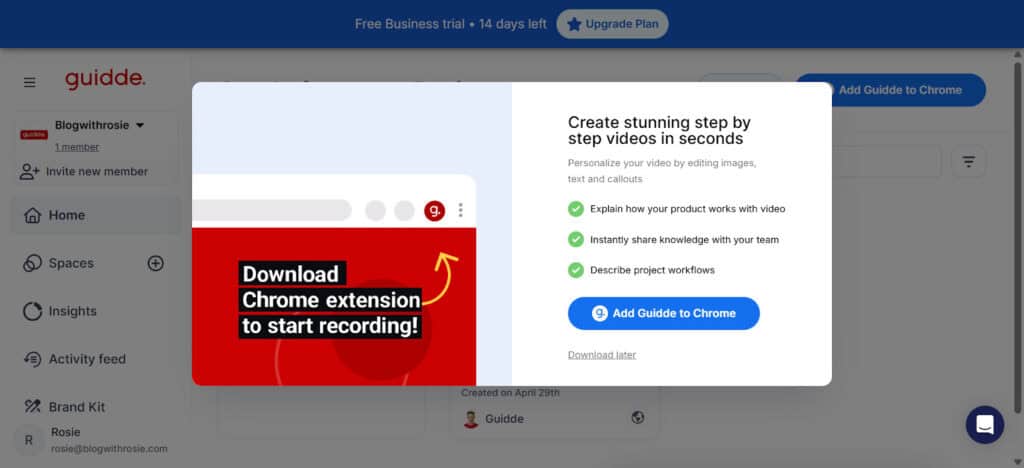
That sent me straight to the right page, where I downloaded Guidde’s Chrome extension.
Once I had downloaded the extension, I headed back to Guidde’s dashboard, which I think we can all agree is pretty sleek-looking:
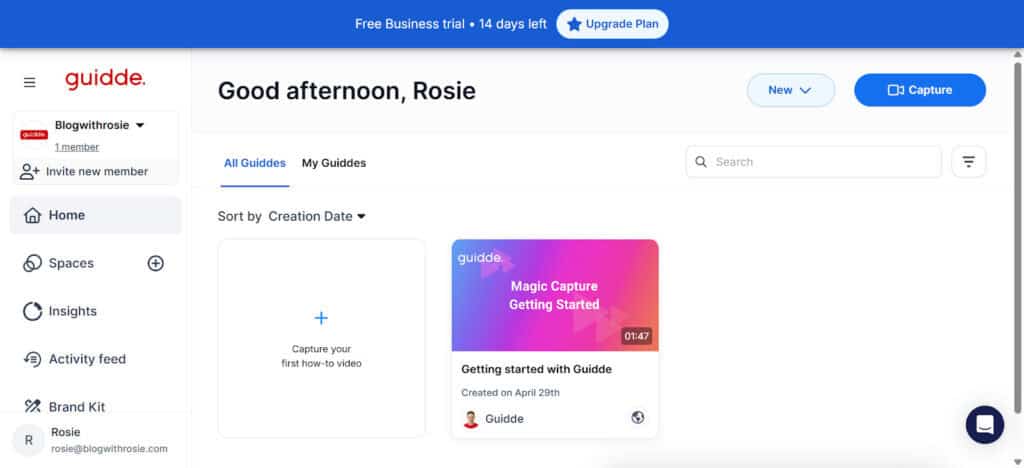
Just as I did with Storylane, I was keen to make a demo using Guidde. So, I clicked ‘Capture your first how-to video.’ This then directed me to the Guidde extension, which I clicked on, and this appeared:
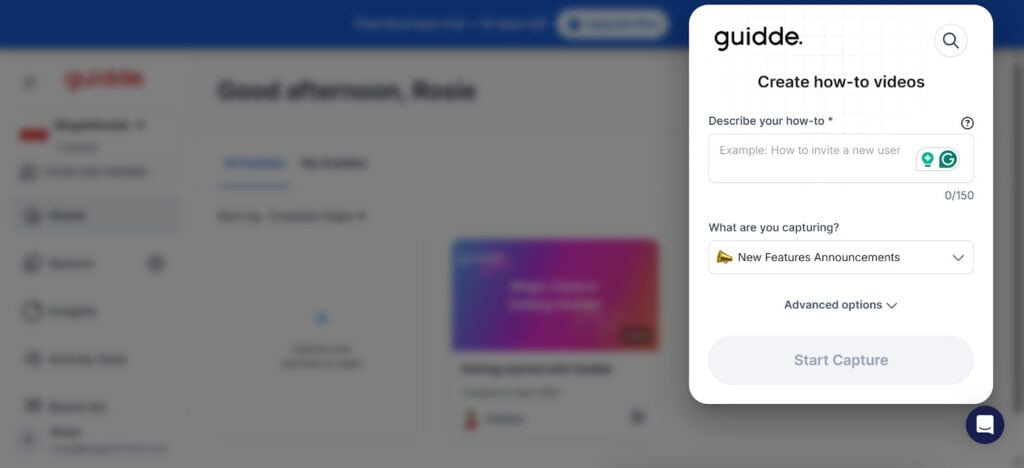
What I liked about this, is that you can tell Guidde the kind of demo you’re recording:
- New features announcements
- Customer onboarding
- Employee training
- Knowledge and documentations
- Product how-tos
- FAQs
- Support tickets
- Other
For our purposes, I decided to go with ‘Product How-tos,’ which I rather creatively described as ‘Example.’ Just as I did with Storylane, I set out to create a demo of Guidde itself.
Here’s how it went:
- As soon as I hit ‘Start Capture’, a screen came up that said ‘About to start capture.’ I liked this because it gave you a few seconds to position yourself.
- You then proceed to click around your screen, exploring whatever you want to appear in your demo.
- Then, when you want to end the recording, you click on the ‘g.’ logo. For me, this appeared in the left corner of my screen as soon as I started recording. It will look like this:
- Then click ‘Done’
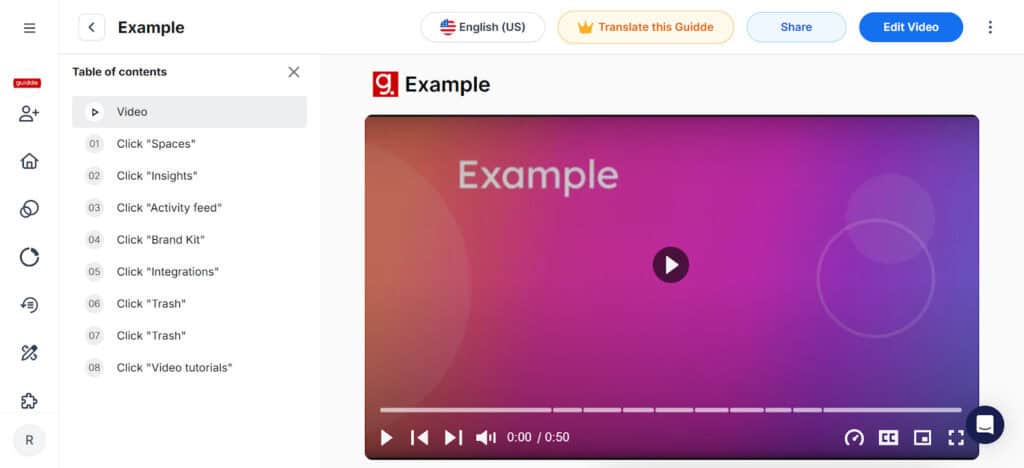
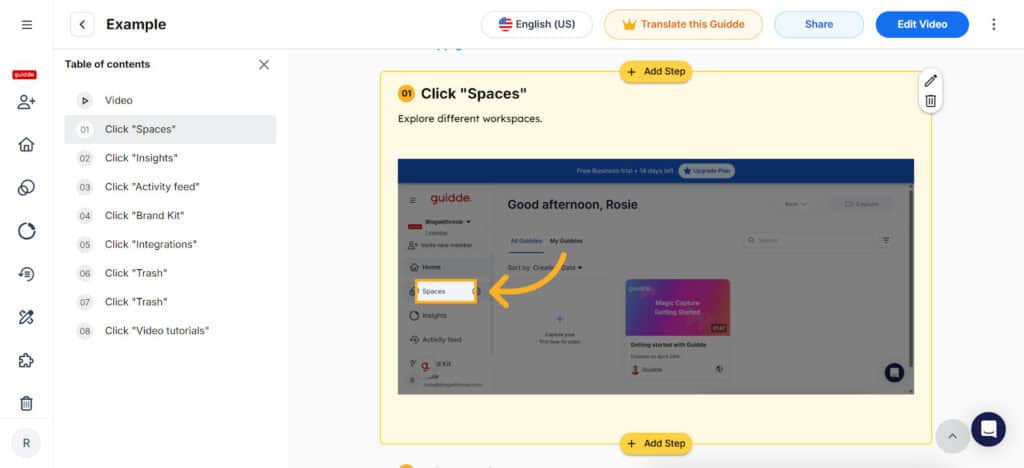
- Within seconds, Guidde produced my demo video, which, as you can see below, is neatly organized into different steps down the left-hand side.
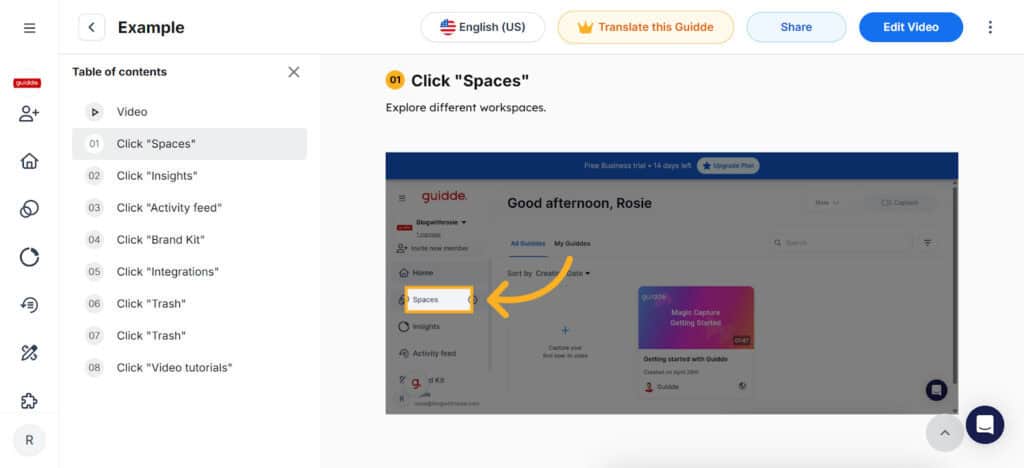
This is what step 1 looked like. Guidde’s AI automatically added the arrow and the highlighted where I had clicked which I think is pretty cool.
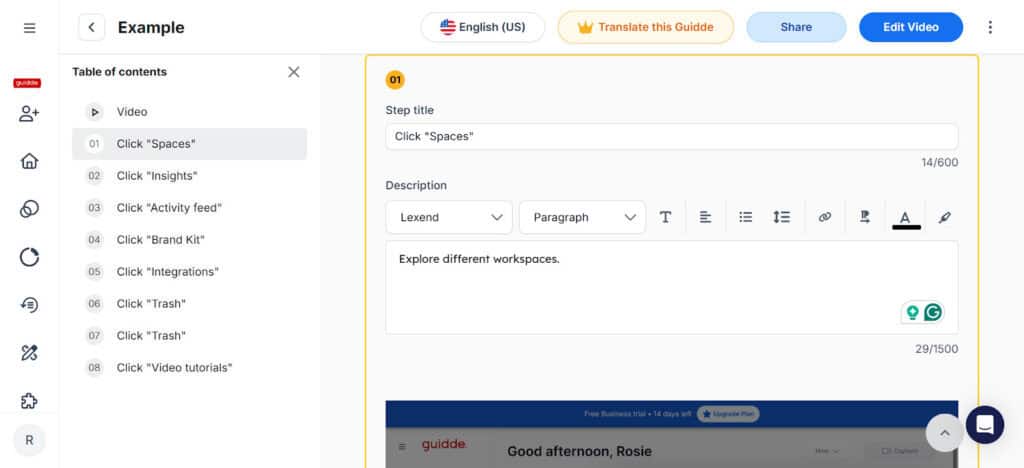
- To make changes to any of the steps, hover over them. This will highlight it in yellow. Then, towards the top right, there will be an arrow you can click to edit things like:
- Step title
- Description
- Font
- Heading type
- Hyperlinks
- Formatting
- Font color
- Text background color
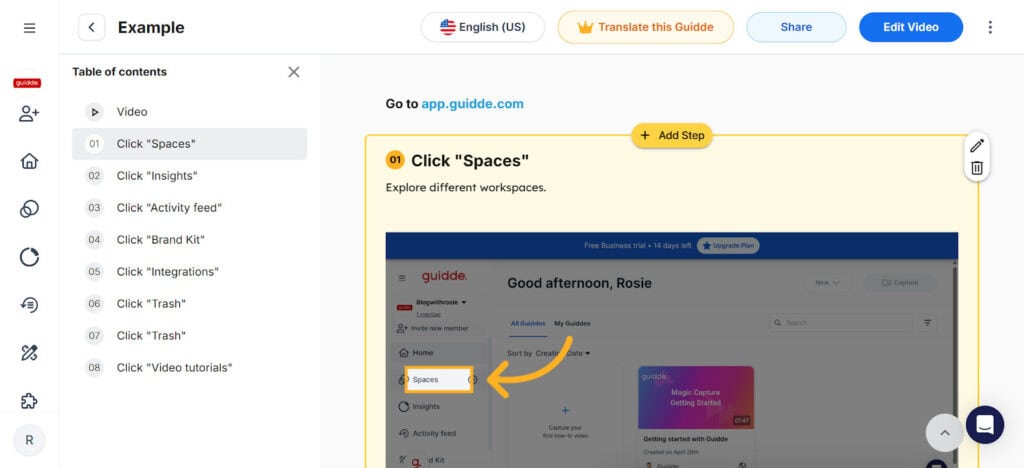
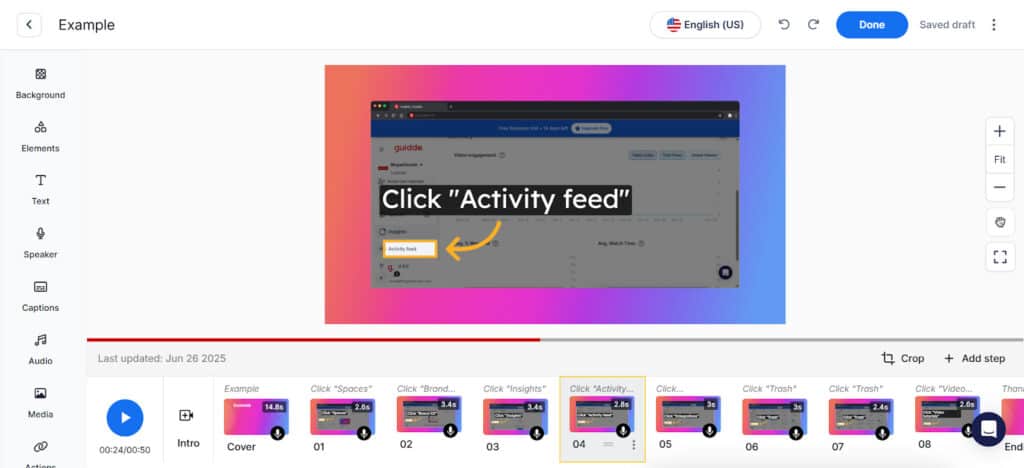
- To add a step on either side of the one you’re working on, just hover over it and you can click ‘Add Step’.
- To edit the video in more depth, click the blue ‘Edit video’ button in the top right. This brought me to Guidde’s video editor:
Now that we’ve landed in Guidde’s editor, it only makes sense to give you a brief overview of its main features:
To the right you’ll see the zoom and canvas controls. This allows you to, yes you guessed it, zoom in or out to fine-tune placement. But, don’t worry, you can reset this at any time with the “Fit” button.
To the left, you’ll see the editor side panel. From here you can:
- Pick a background color or upload your own background
- Drop in shapes, emojis, arrows, blur effects, overlays and decide whether to show the step numbers or browser bar
- Add text
- Add a voiceover (this is a little more involved, so I’ll circle back to this in a sec)
- Add captions or edit the AI-generated captions Guidde provides for you
- Add audio from Guidde’s sound library
- Upload your logo or profile picture
- Add call to actions (again, there are a couple of options here, so we’ll circle back)
- Insert transitions
All in all, I was pleasantly surprised by the level of creative control available.
As promised let’s take a closer look at the voice-over features:
As you can see from the screenshot below, I’ve selected the ‘Speaker’ tab on the left menu. Adjacent to that, you’ll also see the step-by-step transcript for easy scrolling and editing.
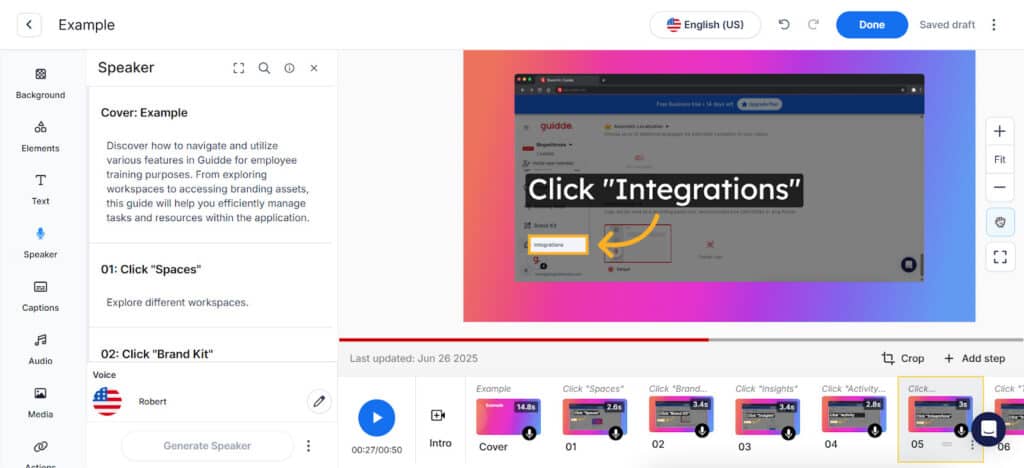
You can click any step to edit its text. Then, you can preview the voiceover by clicking the play symbol in the upper right.
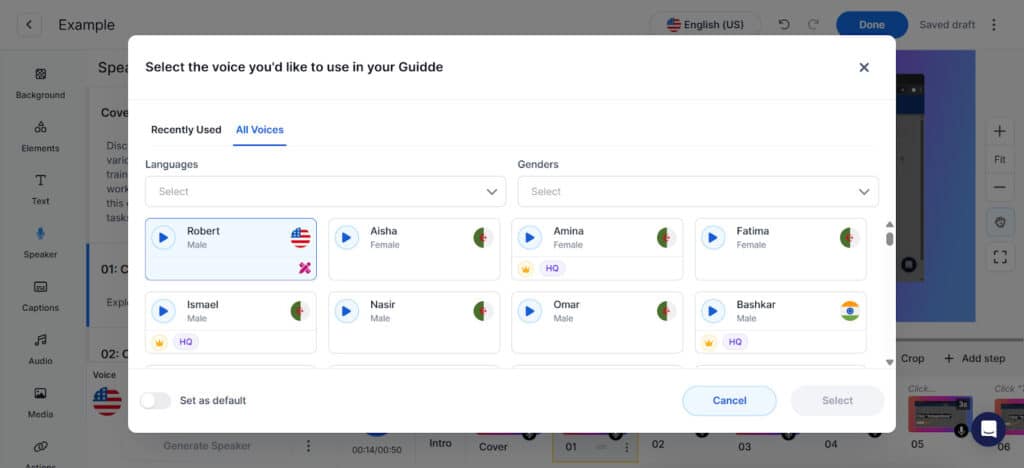
To switch voices, scroll to the bottom and click the pencil icon next to the current speaker’s name. For me, ‘Robert’ was the default voice.
As you can see, there are numerous voices to choose from, which is quite impressive! I also appreciate that you can filter by language or speaker gender.
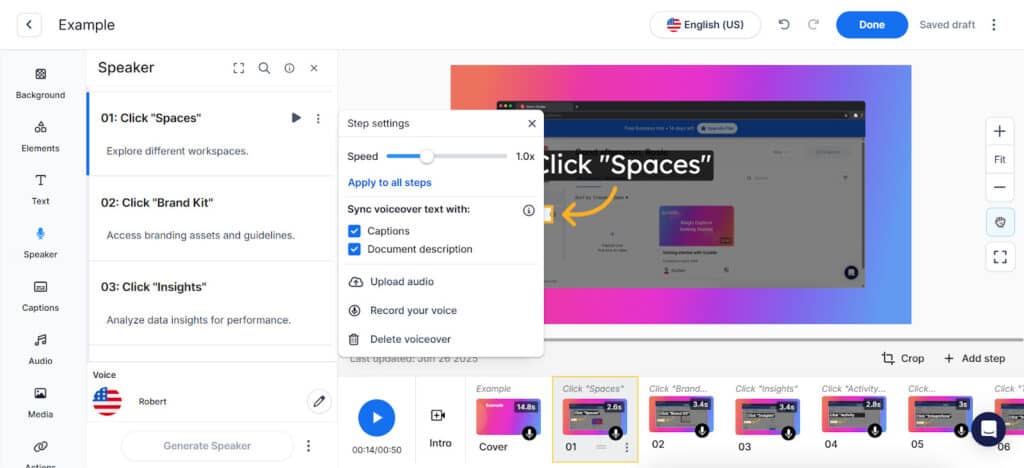
To access advanced speaker settings, click the three dots on the top right of the step. This allows you to adjust the speed of your voice over, sync with captions, upload audio, record your own voice, and more.
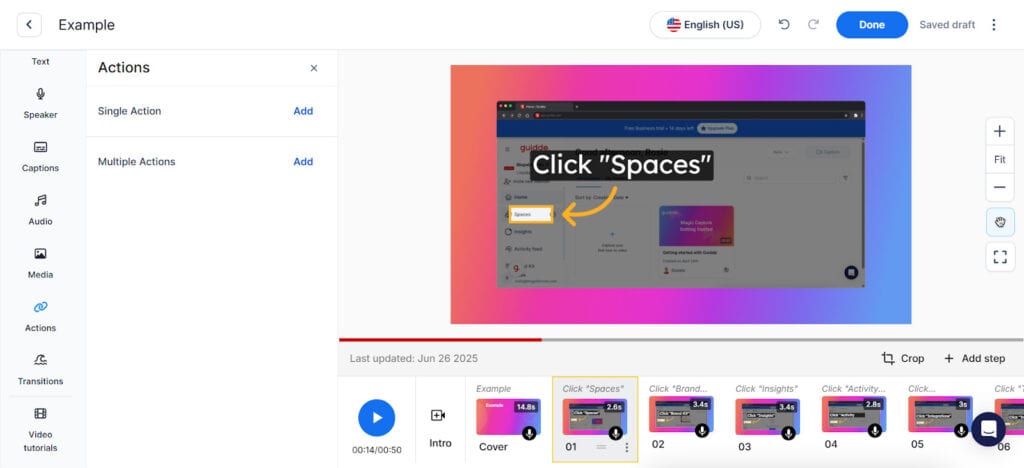
Before I share the final result, as promised, here’s a closer look at the ‘Actions’ tab. As you can see, you have the option to add a single action or multiple actions.
When I click multiple actions, this is what it looks like on the screen:
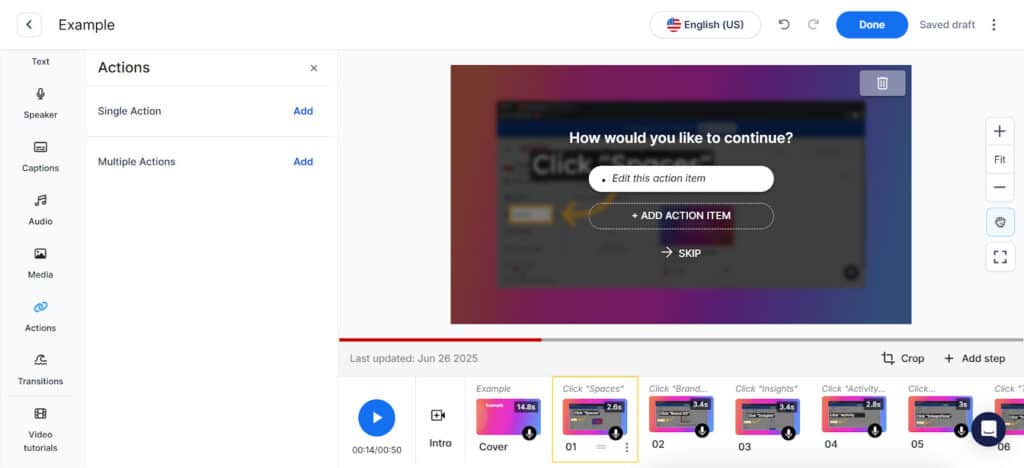
When you hover over the ‘Edit this action item’ (as shown above), a pencil appears. Once you click, a pop-up will appear displaying the following options:
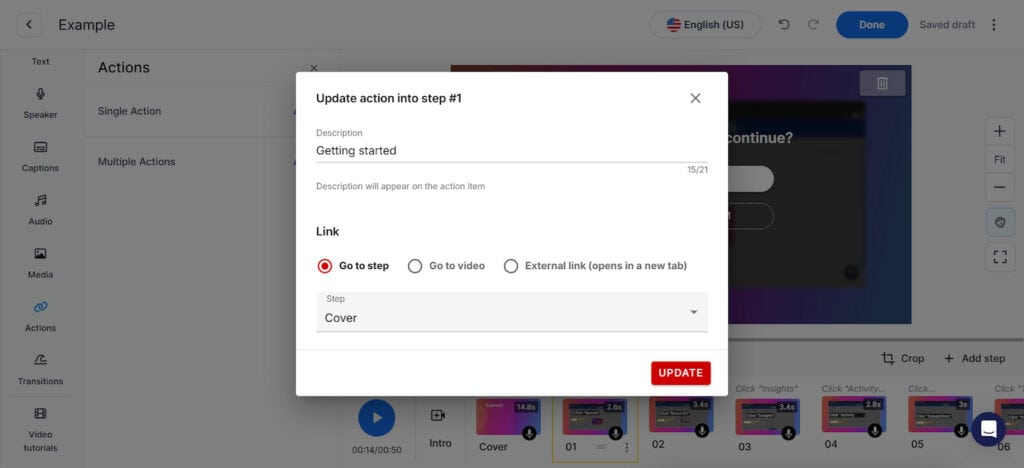
This is what you need to do:
- Name the first action item
- Choose where you would like the action to lead the viewer (skipping to a specific step, navigating to a different Guidde video, or to an external link. Please note that these options exist for a single action too).
- Click ‘Done’ once you’re finished.
- Repeat the process for the second action. Once saved, these call to action buttons will pop up for viewers after the step has played.
Now for the finished product! Other than the CTA buttons (which I didn’t fine-tune), I have kept the demo as-is, so that you can see how much of the work Guidde does.
To share the video, all I had to do was click ‘Done’ in the top right of the video editor. This brought me back here:
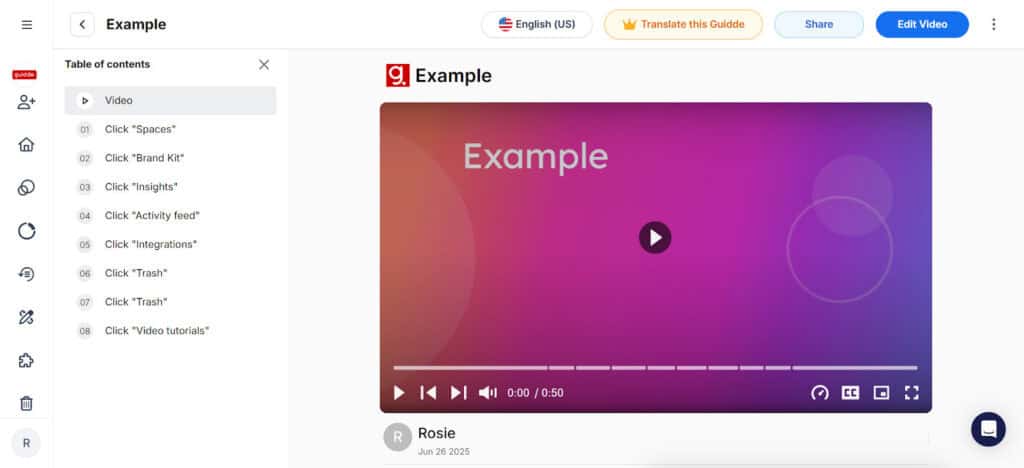
I then clicked ‘Share’ in the top right, which showed me the following options.
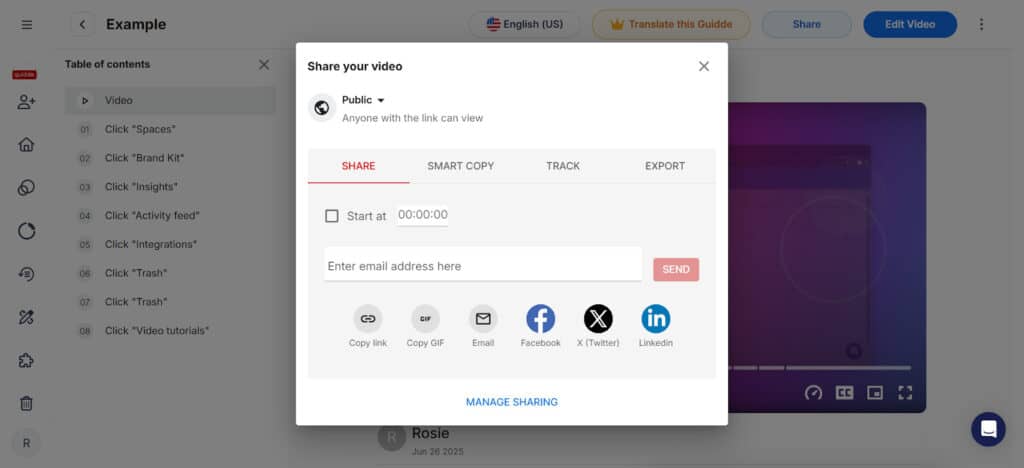
Here it is!
Storylane Pros:
- I like that you can create highly interactive and customizable demo experiences
- Multiple capture modes are available (HTML, screenshot, video)
- If customization is important to you, you’ll like the personalized tokens for buyer-specific demos (however, you’ll have to upgrade to the Growth plan to access this)
- I love that the user interface is incredibly easy to navigate
Storylane Cons
- I don’t like that many of the features that make Storylane stand out (like personalization, custom lead forms, and account reveal) are locked behind higher-tier plans.
- I’ve seen some users complain about glitches
- The design capabilities are a bit limited
Guidde Pros
- I love that demo creation was so quick
- It’s pretty cool that you can pick from a variety of voices and languages for your voiceovers
- You can keep walkthroughs on-brand by uploading your own logo, colors, and overlays.
- I like that when sharing your demo, you can link to specific parts of a video, making it easier to direct users to relevant steps.
Guidde Cons
- Limited interactivity features
- No personalization for sales demos
Both Storylane and Guidde are excellent tools for creating product demos, but they serve different needs.
If you’re focused on sales enablement and want demos that feel interactive and tailored, I think Storylane might be the stronger choice for you.
Alternatively, if you’re prioritizing speed, simplicity, and want more design freedom, Guidde makes it incredibly easy to produce polished walkthroughs for onboarding, customer support, and internal documentation.
Whichever you go with, both platforms offer free tiers, so as always, my advice is to test them out and see which fits your workflow best!
Guidde puts it ALL together for me. I've used many screen recording tools (like Loom). I've used many SOP buiding tools (like Trainual). But Guidde puts the best of both together for a quick, easy to use mixed media documentation builder in one (less expensive) workflow. A small, but signficant (compounding) time saver in our business.