
Last Updated on April 20, 2023 by Ewen Finser
It’s not easy to convince people to trust you, even if what you’re giving them is highly valuable and free. But you have something to offer people that they need, or that they don’t even realize they need yet.
That’s where website pop-ups come in.
Bottom Line Up Front: I personally prefer the ability to set advanced targeting logic with Hello Bar here. Sumo is good as well, but the targeting is less effective and it’s a bit overpriced for what I need.
Pop-ups are those windows and eye-catching bars that show up on a website to let you know about a great deal, discount, giveaway or downloadable product. Most of the time, these offers are somehow a steal – they either have a big percentage off or they’re a freebie.
The point of these pop-ups is to convert website visitors into email subscribers. Email marketing is huge, and the more subscribers you have – especially when they’re people who are expressly interested in exactly what you’re offering – the better chance you have of turning them into actual paying customers or clients.
In this article, we’re going to introduce you to two pop-up creators, Hello Bar and Sumo; walk you through the first steps of getting started; and then share our experiences using each tool to design a pop-up.
We’ll talk about the installation process, pop-up design options and settings, and pricing. We’ll also touch a bit on customer support, mention perks and drawback of each tool, and then give you our final verdict about which tool to use and when.
[compare_two_products]
What is Hello Bar?
Hello Bar has the most advanced TARGETING logic I've seen, plus a super EASY TO USE navigation with plenty testing options for tweaking that perfect CTA. Best of all, the pricing structure is affordable and transparent.
Hello Bar comes from the Neil Patel team, and since Patel is a total maven in the world of digital marketing, growth hacking and business tech, I would trust anything he puts out.
From the minute you go to the Hello Bar homepage, you can see what this service will do for you. They use their homepage to showcase what they offer, including a bar at the top of the page, an embedded signup form and an exit pop-up.
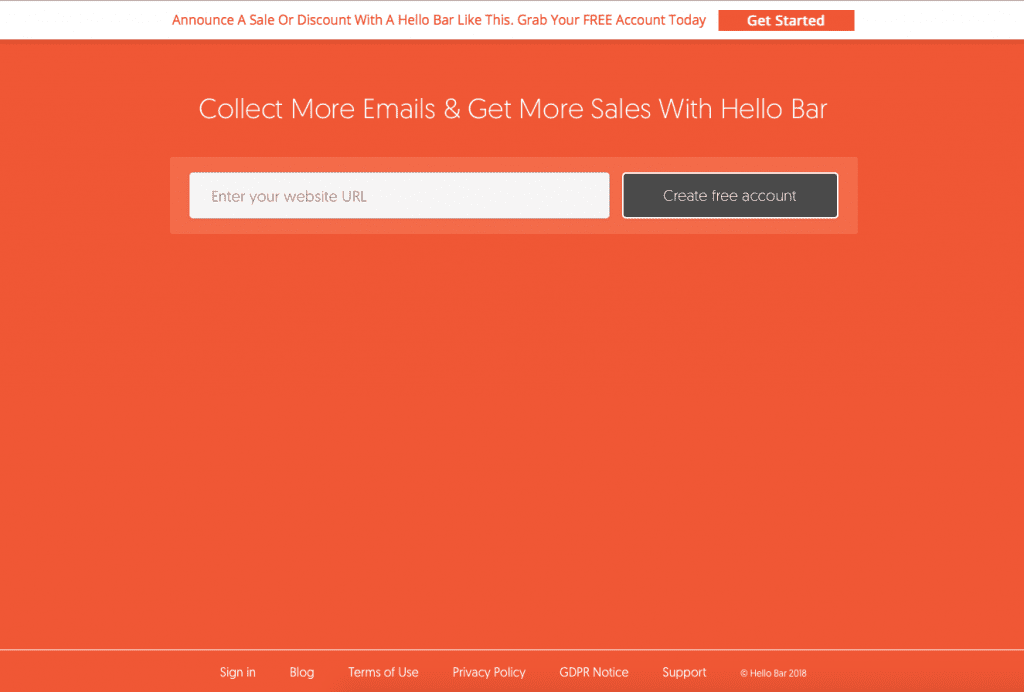
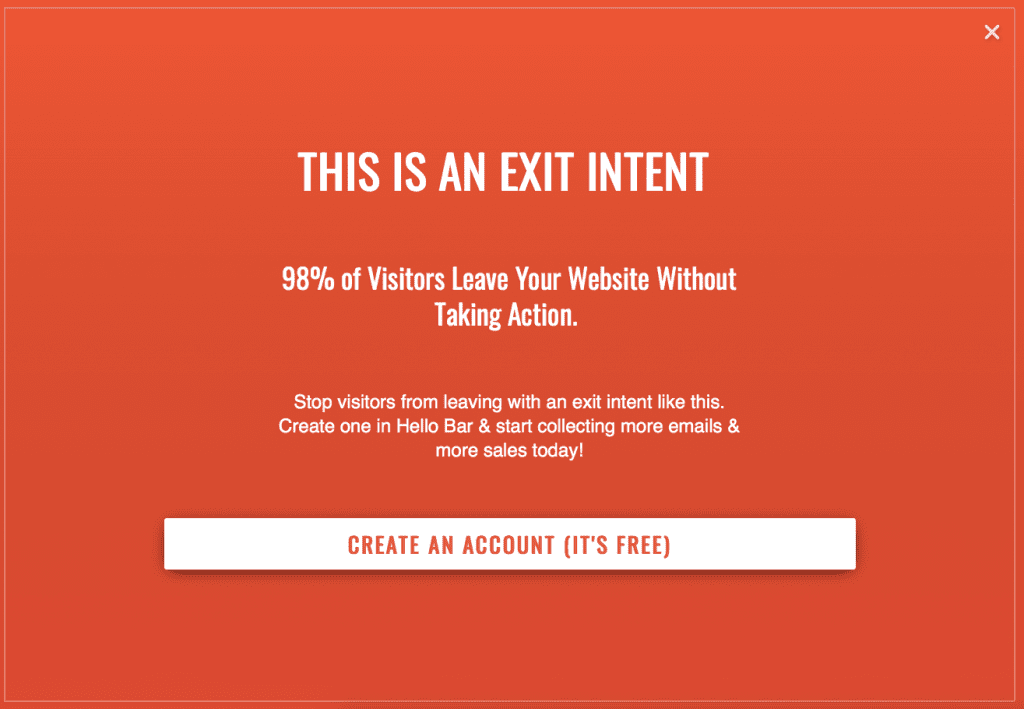
I love that the services they offer are illustrated right on their website and without having to sign up or login. I can tell exactly what they’ll do for me without having to read any documentation or sales pitches.
Basically, Hello Bar is a service that lets you design and install all sorts of pop-ups for your website. Intuitive design options let you target specific audiences and create pop-ups that fit with your brand and cater to certain goals.
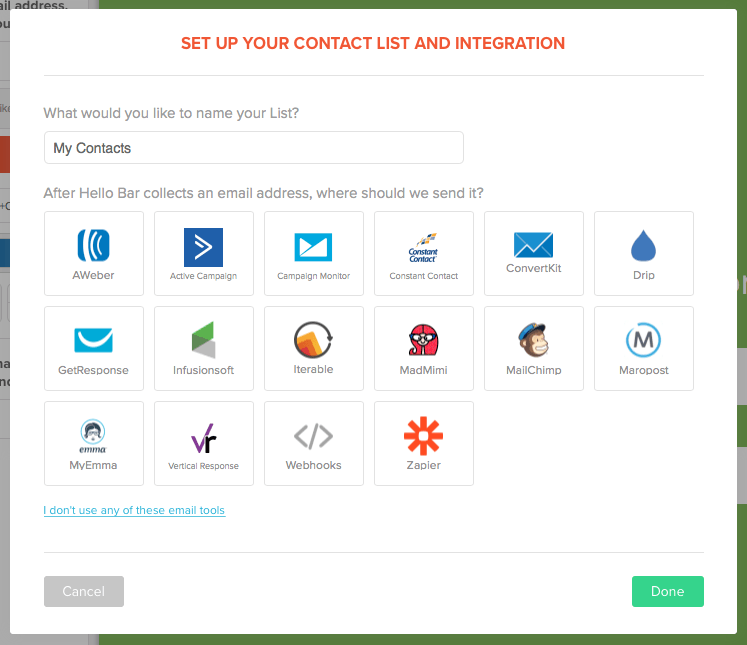
Once a visitor converts by providing their email address, you can add them to your Hello Bar contacts list or to another email provider you’ve linked to your account, like AWeber or MailChimp.
Getting Started with Hello Bar
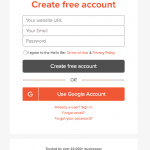
The signup step is super simple:
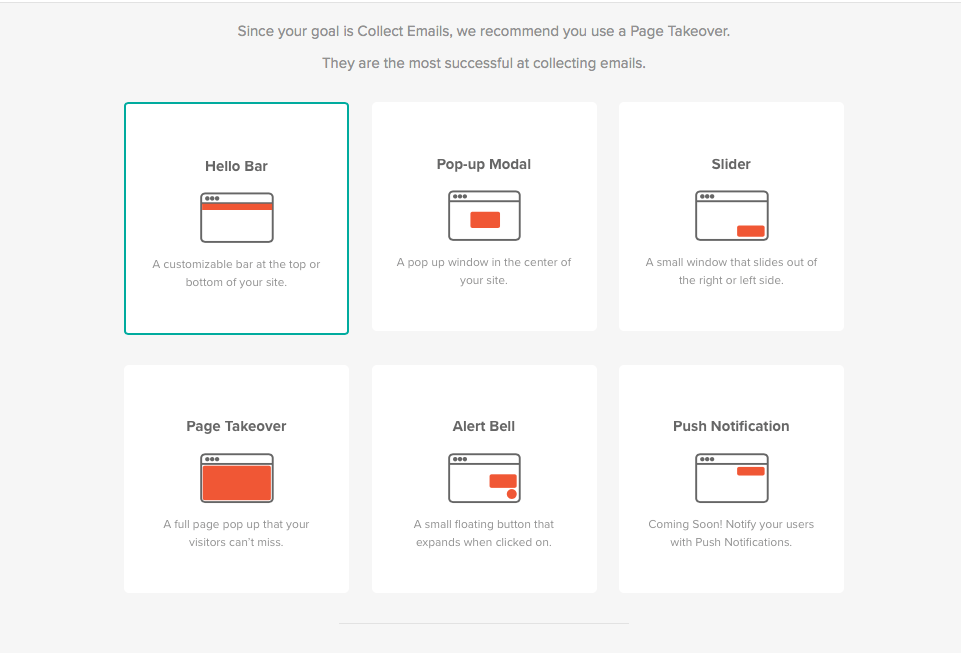
The first thing you have to do is choose a goal. The options are:
- Collect Emails
- Target a URL
- Generate Sales
- Make Announcement
- Get Phone Calls
- Social Engagement
There are brief descriptions for each goal, too, in case you’re not sure which is right for you.
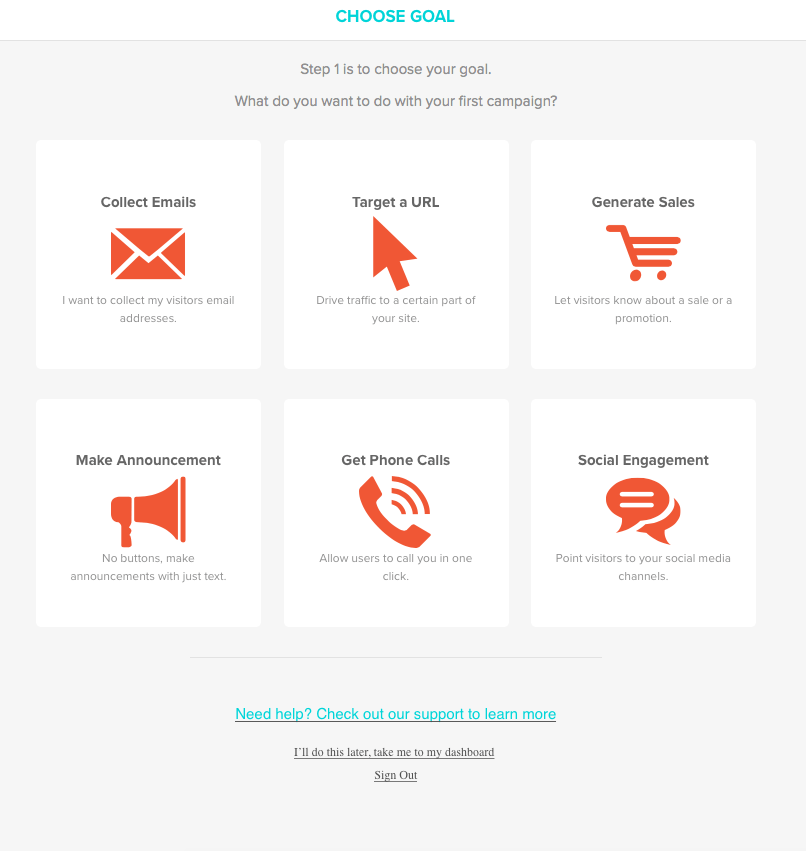
For now, I skipped this step so that I could go straight to checking out the dashboard.
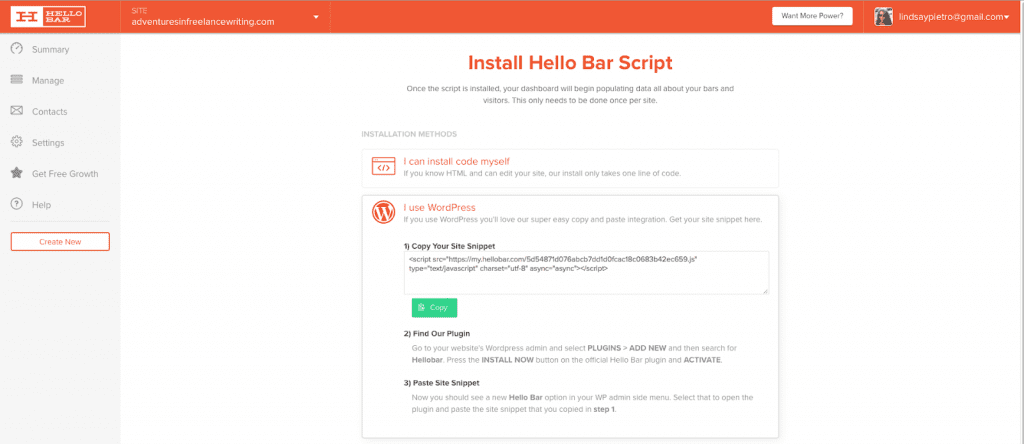
Installing Hello Bar
Hello Bar took me right to a page with directions. I had several options:
- Install the code myself, which takes a bit of HTML experience (there’s only one line of code, so I could definitely handle this if I wanted to).
- Three-step installation directions for WordPress, which utilizes the Hello Bar plugin.

- An option if I use Wix for website hosting.
- The option to email installation instructions to my web developer, if I have one.
- A way to contact Hello Bar customer service if I have no idea what to do next or need help with the installation.
Even though this wasn’t a natural first step – creating a Hello Bar would be the first thing to do to see if I liked the pop-up designs and the Hello Bar user interface – I liked that I immediately saw how easy this was going to be to install.
I have HTML and WordPress experience, so there are at least two options that will work well for me, and I could also pass this along to a pro or ask for help from customer service if I want. Knowing that I wasn’t going to hit a roadblock after designing my Hello Bar encouraged me to keep going.
Also, instead of having to install code on each page based on where I want the pop-up, you just install the code once and then all of your other decisions regarding when, where and how the pop-up works are made within Hello Bar.
Installing Hello Bar couldn’t have been easier. I have a WordPress site, so I just installed and activated the plugin, then pasted the code that Hello Bar had supplied me.
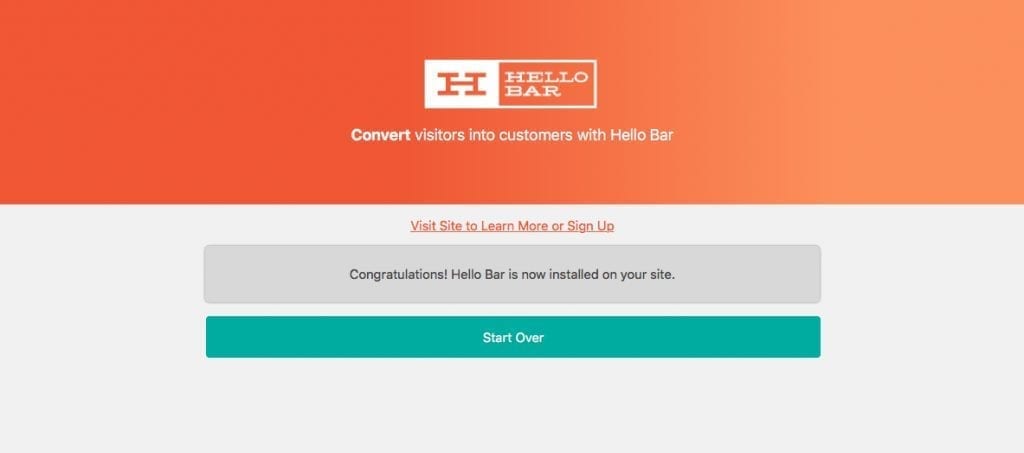
The dashboard didn’t immediately recognize the plugin as being installed. It said I might need to clear my cache and try again. I did that – twice – and even switched over to Chrome in case that helped, but nothing worked.
I decided to continue creating a Hello Bar and to revisit this later. I sent an email to customer support in the meantime asking for help, and they responded the next business day with instructions.
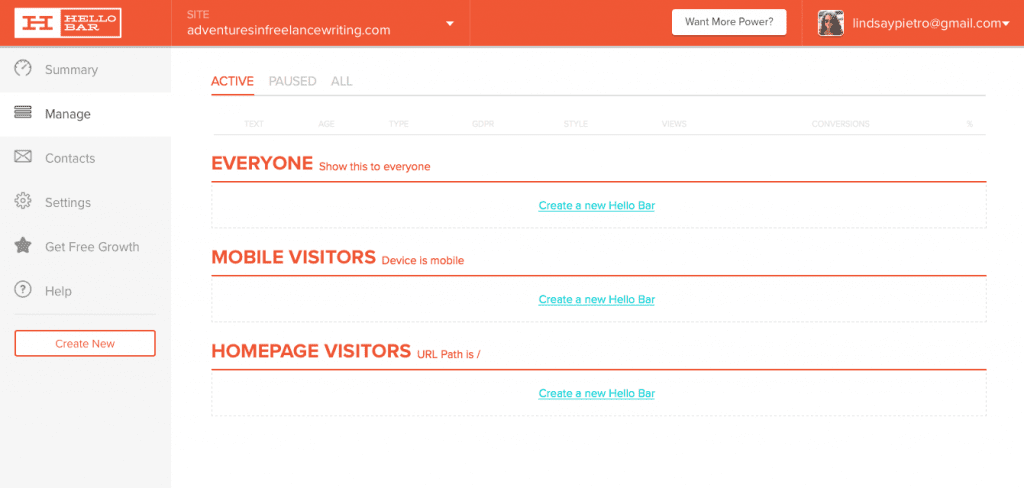
Creating a Hello Bar
I clicked on Manage on the left and was taken to a page where I could create different Hello Bars.
 The ability to preview what the pop-up will look like on my website (in three versions: desktop, tablet, mobile) is excellent. One of the most frustrating things about website design is making changes, saving them and then clicking back and forth to see live previews. This streamlines the process and puts everything in the same window.
Let’s walk through the process, but keep in mind that dependent on the type of plan you have, you may see different options. This will give you an idea of how user-friendly the designer is and what sorts of options you can expect.
Goal and Type
I chose to create a Hello Bar in the “Show this to everyone” section. From here, I had to choose a goal, so I opted for “Collect Emails.” Then I was asked to choose a type of pop-up:
I chose to create a Page Takeover, which is a full-page pop-up.
Design
I was shown an example and template, and I had the option to change the template if I wanted.
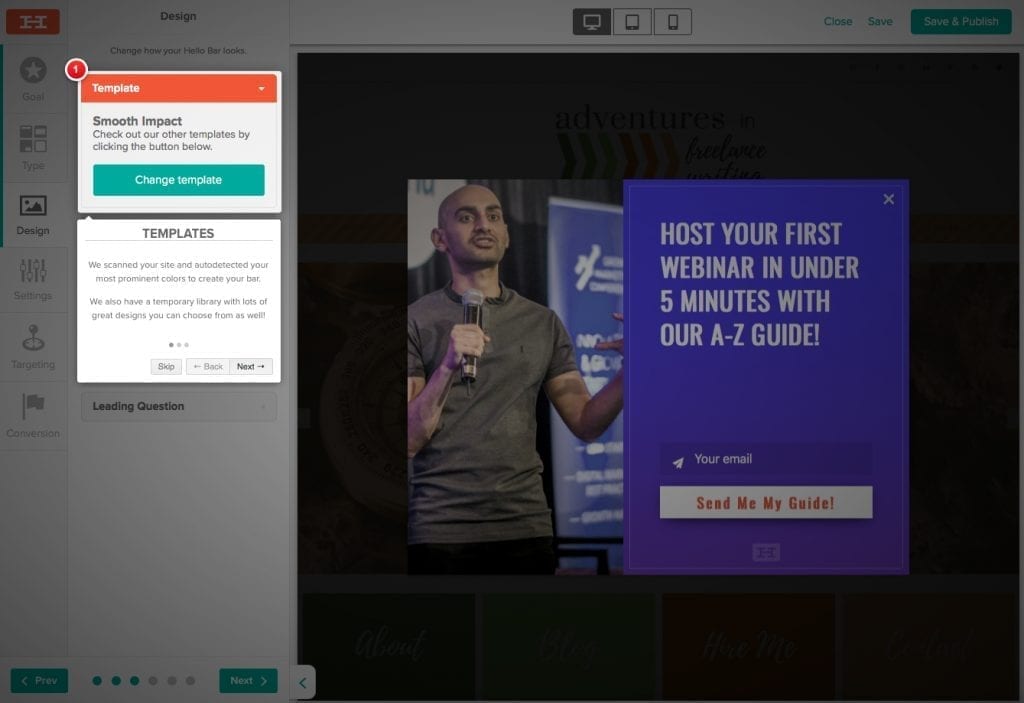
Hello Bar claims to have scanned my website and auto-detected the best colors to use, but the template suggestion had a bold blue, while my website has a range of greens and oranges. I didn’t really see how they auto-detected the best colors to use, but since you can customize colors, it didn’t make much of a difference.

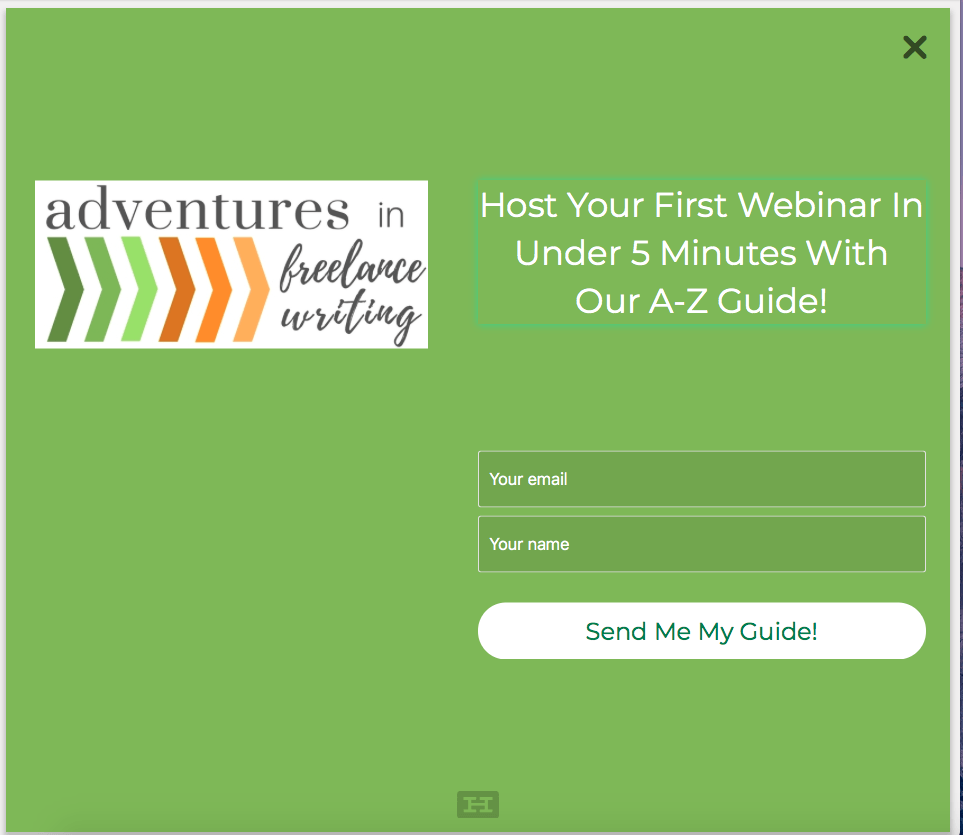
I chose the Evergreen Meadow template to fit with my brand colors.
Then I walked through the different options to customize my pop-up.
Text Fields: I chose to include email and name fields. There was also an option for a phone field, as well as the ability to create custom fields.
Page Takeover Styling: I decided to change the color of the pop-up to one of my brand greens.
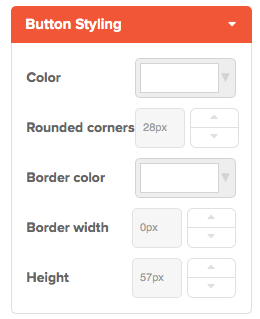
Button Styling: I left the buttons as they were, but there were a lot of tweaks I could have made if I felt like it.
Text Field Styling: I didn’t change the text field styling default settings, but these are the options you can play with:
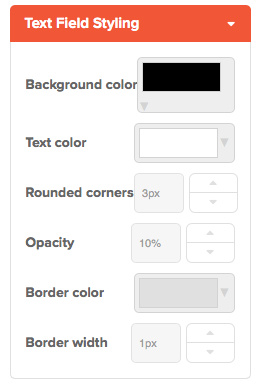
Image: You can add an image if you want. I added my logo just to see what it would look like. I’m not crazy about it, so I removed it, but an image with a different ratio would probably look better here.
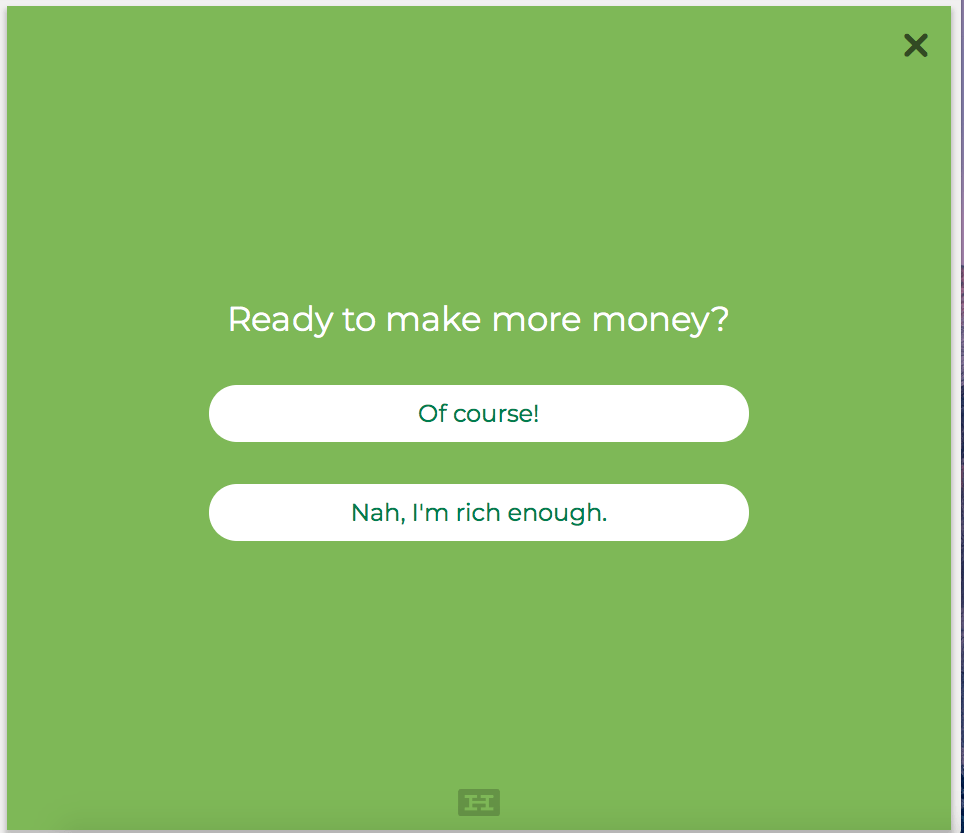
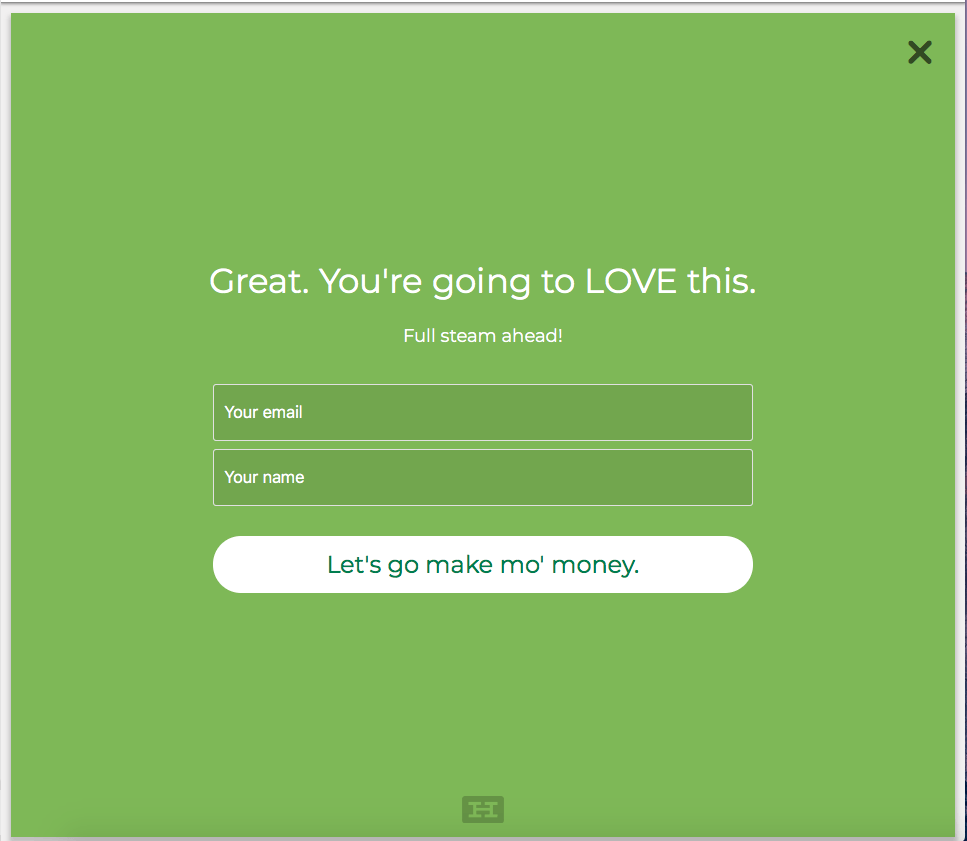
Leading Question: You can turn the Leading Question on or off. This is what it looks like turned on:
You can then customize the question and what the visitor will see based on their answer.
Here’s my question:
Here’s what happens if you choose “Of course!”
Here’s what happens if you choose “Nah, I’m rich enough.”

(Okay, so I would probably want to make the answer to the second option something not-so-pushy, but I’m just playing around with design here.)
Settings
There are only a few Settings to update:
- Hello Bar branding, which you can only turn off if you have a paid account.
- Animate the entry and exit, which when enabled displays the pop-up right after your page loads by either dropping down from the top or popping up from the bottom. Enabling the animation can make your visitor pay more attention to the Hello Bar.
- GDPR compliancy, which means that people who convert have to go through a second opt-in (double opt-in forms) before they’re added to your list.
- When the pop-up will display, with options including exit intent, which is when the user is about to leave the website; four delay settings ranging from 5 seconds to 1 minute; and three “after scrolling” settings (scrolling a little, to the middle or to the bottom).
Targeting
The targeting page lets you choose who will see the popups, but without a paid account you can only choose “Everyone.” With a paid account, you can show the pop-up to just mobile or just homepage visitors, if you want, or create more targets.
You’ll also choose how long you want to wait after a visitor converts before displaying the pop-up again. Options range from 1 to 120 days.
Conversion
Here are the options in the Conversion section:
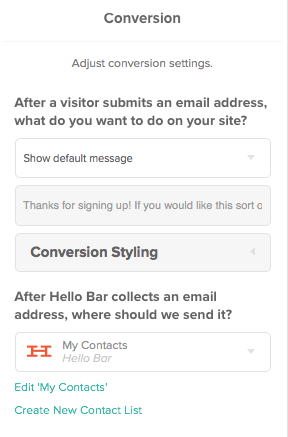
When a visitor converts and gives you their email address, you can either show them a default message, a custom message or redirect them to a URL. The only free feature is the default message.
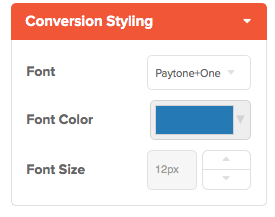
You can also play with conversion styling to boost conversion rate, which I’m assuming is what happens on the default or custom message page. There isn’t a preview for me to see.
At this point, I’m ready to finish this pop-up and publish it on my website. I can’t figure out what to do next, though. I have all of the options chosen, but the “Next” button isn’t letting me click it, and this is what happens when I hit “Save and Publish” at the top:
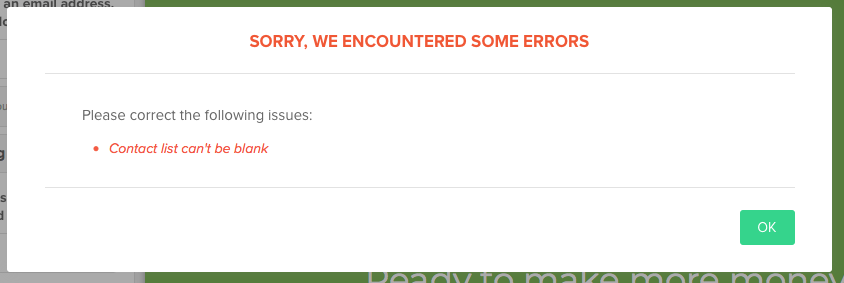
The contact list isn’t blank – I have “My Contacts” in Hello Bar selected. I decide to connect my MailChimp to see if that makes a difference. That seemed to work, and it let me save and publish the pop-up.
Hello Bar Pricing
Hello Bar is free to sign up for and start using, but if you end up needing more functionality, you can upgrade to a paid plan.
With the free plan, you’ll have a small Hello Bar logo on the pop-ups you create. There are also limited design options and email integrations. However, if you’re just starting out, this may be a good branching off point, since you’re allowed as many as 5,000 views per month.
The Growth plan is $29 per month and has the following perks:
- Option to turn off the Hello Bar logo
- More design options and email integrations
- Audience targeting by various demographics
- Up to 50,000 views per month
- Unlimited A/B testing
The Enterprise plan is $99 per month and includes the Growth plan features as well as the following:
- Premium design options and email integrations
- Up to 500,000 views per month
- VIP customer support
A soon-to-be added Enterprise feature will have access to a dedicated marketing specialist.
If you opt for annual billing, you’ll save 15 percent. The Growth plan costs $289 per year and the Enterprise plan costs $999 per year.
What I like most about these plan options is that they evolve in a fair, realistic way. As a beginner with under 5,000 views per month, you may be tight on your budget and still building your brand, so having the Hello Bar logo on your pop-ups won’t bother you as much. As you grow, though, you’ll get more views and will be rounding out your branding, and once you reach the Enterprise level, you’re bound to need some in-depth help from customer service.
The one drawback is that I wanted there to be a free trial for the paid accounts, but there wasn’t. Yes, you can do a lot with the free account, especially when it comes to getting used to the interface, but a lot of people are going to want to test out those more advanced features, too.
What is Sumo?
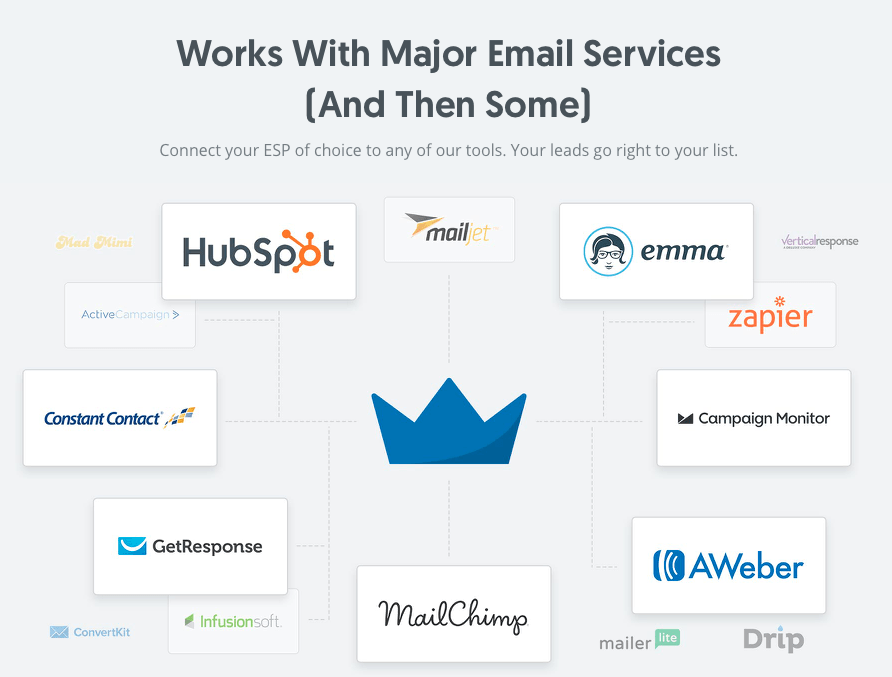
Sumo is another company that lets you design pop-ups in order to convert visitors. Focused on e-commerce customers, Sumo lets you choose from goals like reducing cart abandonment and increasing your order value. You can also use it just to grow your email list (list builder). Sumo integrates with major email services so that you can add your leads directly to your list of choice.
You can also use Sumo Mail to email your customers.
If you want help when it comes to growing your business, you can sign up to chat with one of their Growth Experts.
Getting Started with Sumo
This is the first step of signing up for Sumo:
Next, I was brought to this screen:
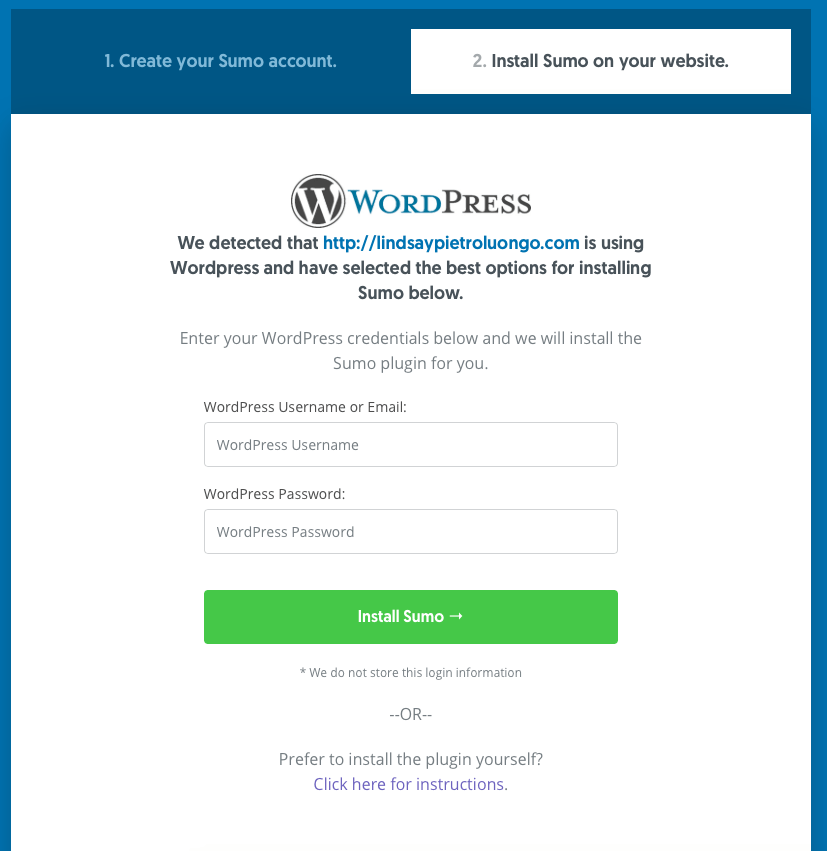
I love that they’ll install Sumo for you if you provide them with your WordPress information. I wanted to quickly move on from this, though, because I already knew how easy the installation process could be and I really wanted to start creating a pop-up.
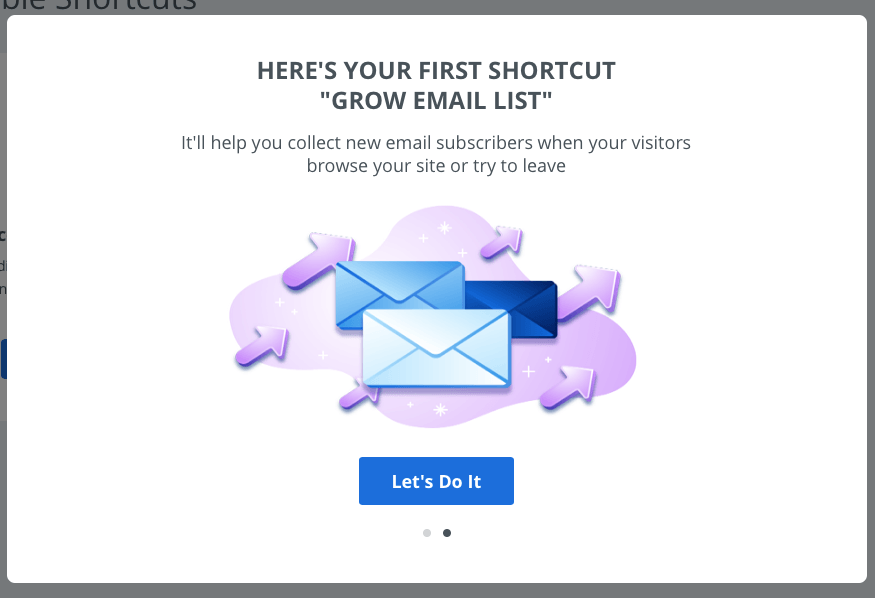
I was given this option for starting, and since my Hello Bar pop-up had the goal of collecting email addresses, I figured this would make for a good side-by-side comparison.
Designing the Pop-Up
The interface isn’t as sleek or user-friendly as Hello Bar’s, but it’s not outdated or difficult to use, either.
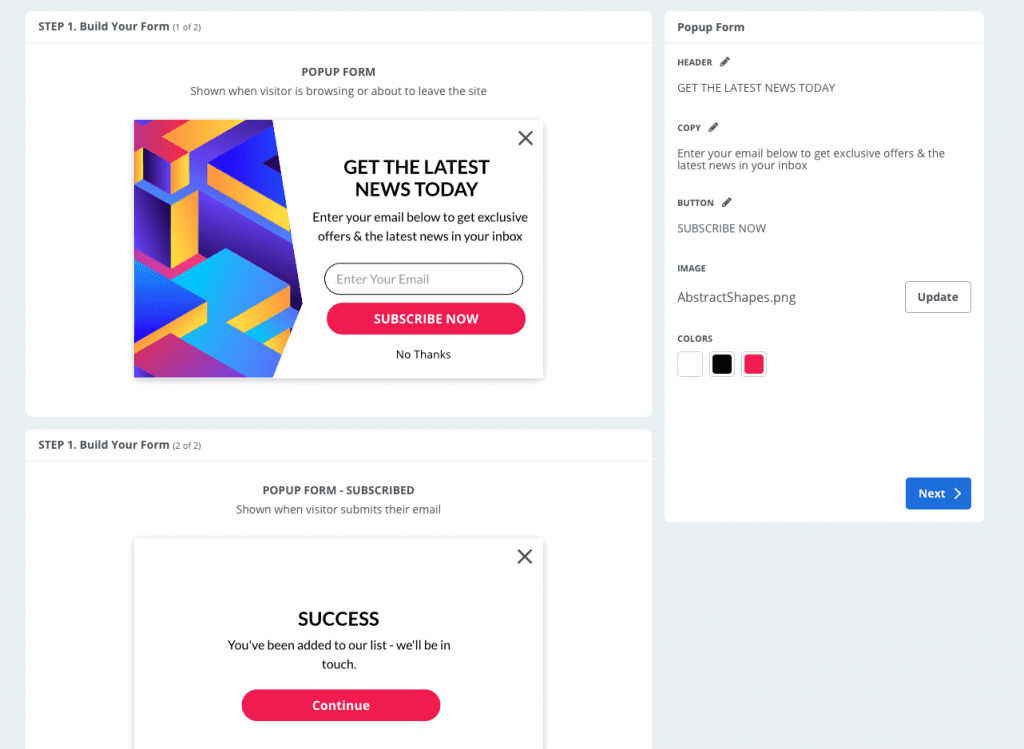
I clicked to change the header and I had three default options, as well as the option to customize the text. I chose one of the defaults.
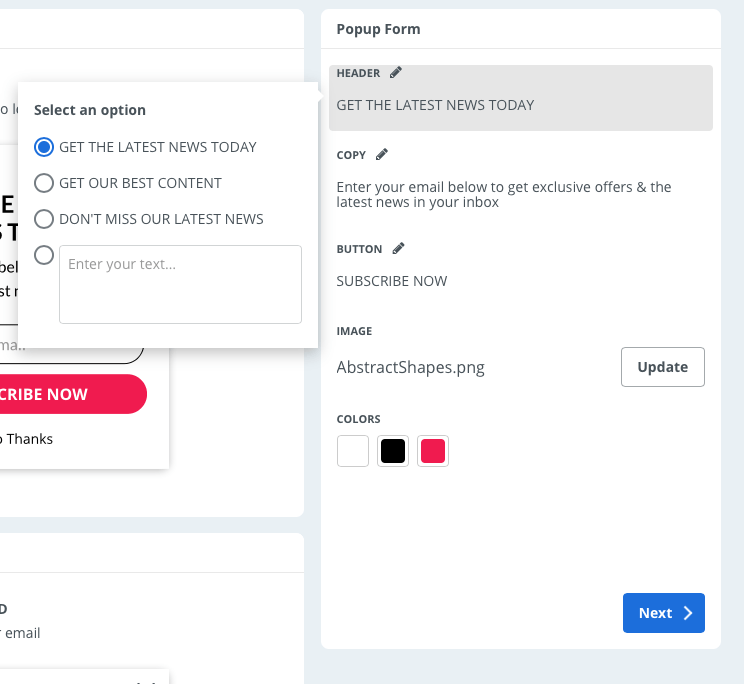
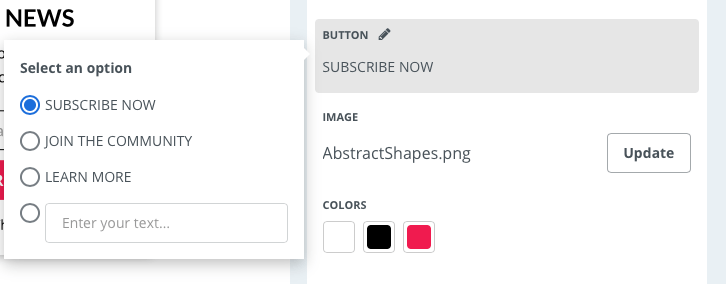
The copy and button sections had the same thing: three defaults and a customization box.
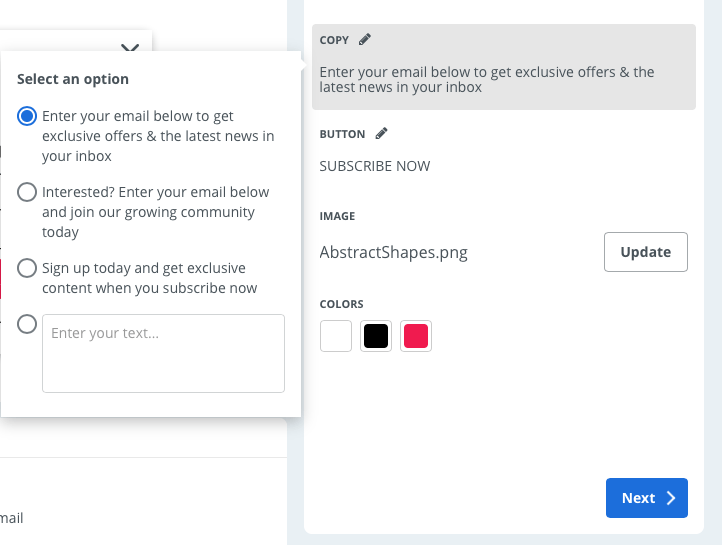
I went to select an image and I had the choice of a handful of stock photos or uploading my own image. I chose one of the stock photos.
The “Colors” section could’ve been a bit more clear. There were three options to change the background, font and button colors, but they didn’t say what the colors were for. I played around with them.

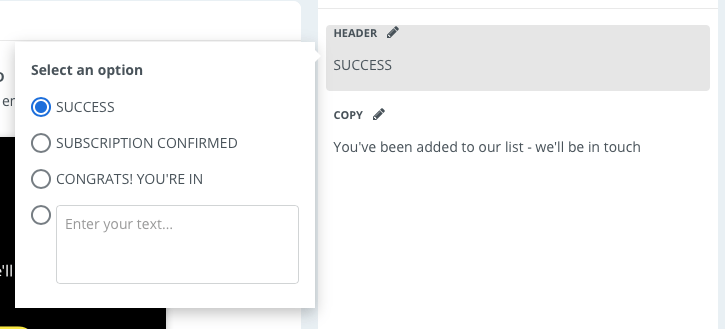
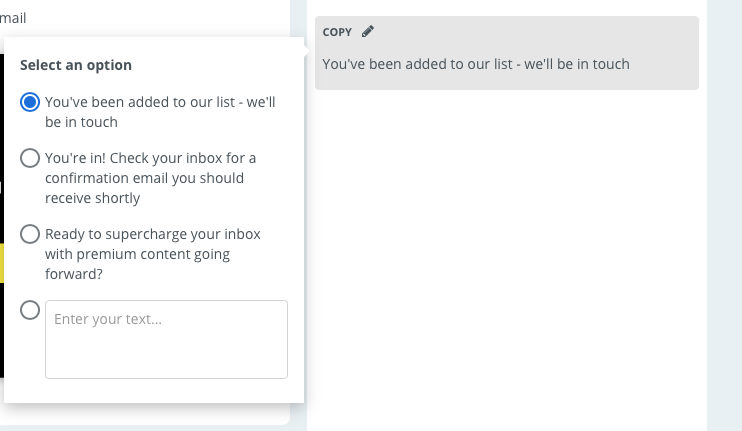
Designing the Subscribed Form
After hitting next, I was brought down to the Pop-Up Form – Subscribed designer. These were the header and copy options:
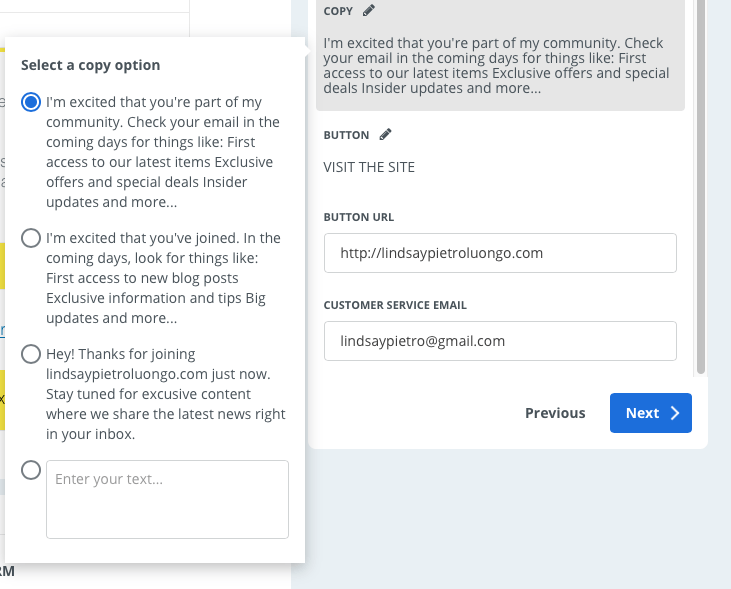
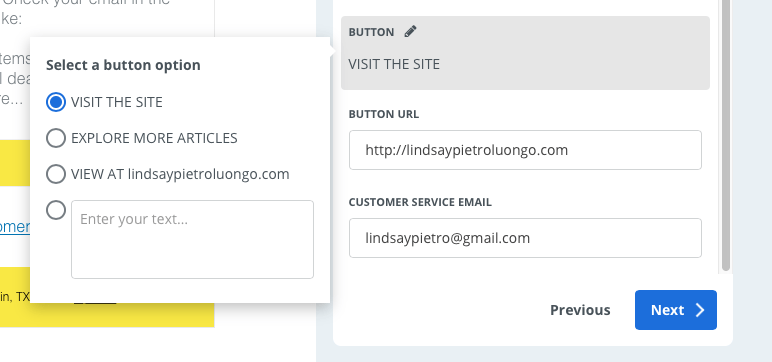
Designing the Welcome Email
Next is the welcome email design. I love that I do this right after the two form designs. It gives me a good view of how my visitors will flow through the series of forms and emails. You can also opt to remove the welcome email.
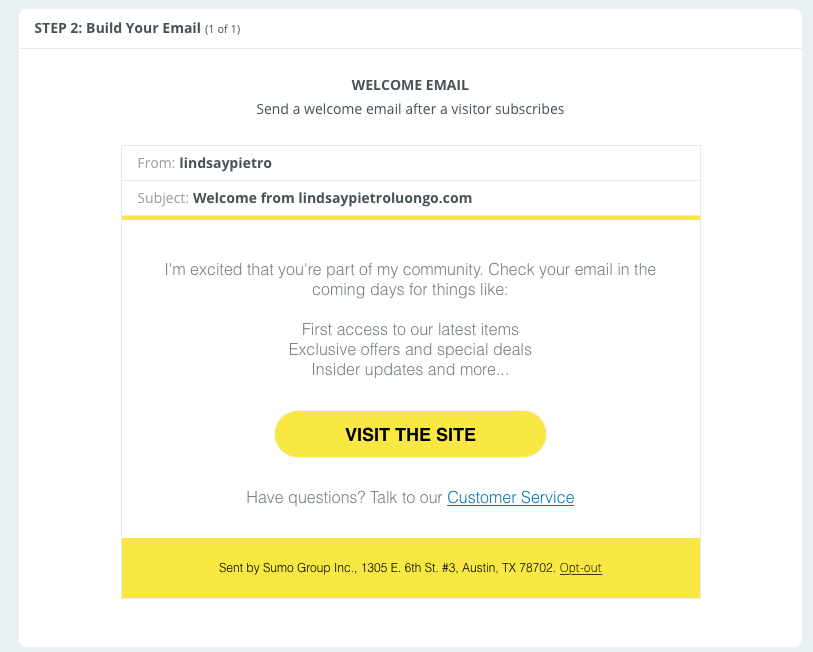
Same thing here as with the other form design options: three defaults and a custom section for the subject, copy and button text.

Display Settings
You can choose to show your pop-up five seconds after a visitor enters your website or right when they’re about to leave.
Sumo Pricing
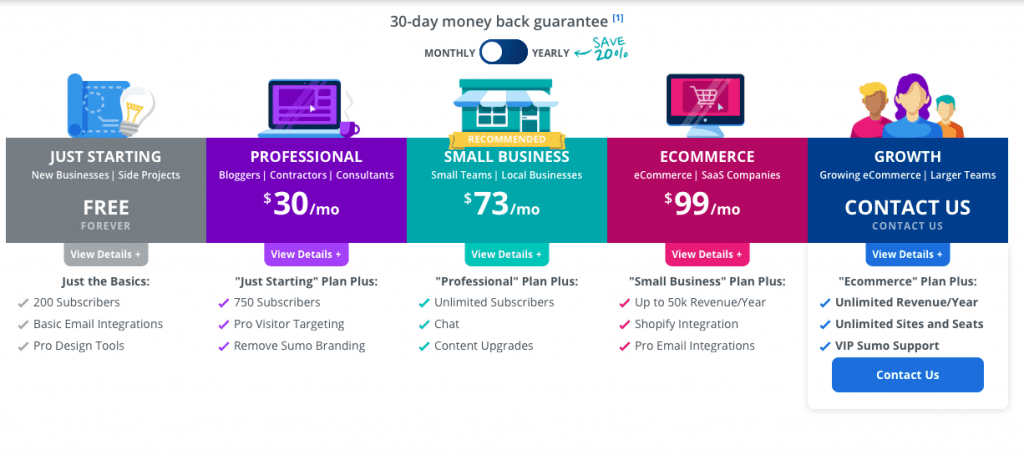
Sumo has several pricing options, starting with a free account and going up to an E-commerce account for $99 per month and then a Growth account that you need to talk to a support agent to learn more about. With an annual subscription, you’ll save 20 percent.
Just like with Hello Bar, though, you can’t test any of the paid plans during a free trial. You have to see how you like the free features, then decide if any of the paid plans have the features you feel like you’re missing.
Final Verdict: Hellobar or Sumo?
Hello Bar has the most advanced TARGETING logic I've seen, plus a super EASY TO USE navigation with plenty testing options for tweaking that perfect CTA. Best of all, the pricing structure is affordable and transparent.
Hello Bar is ridiculously easy to use, which can’t be said for a lot of pop-up creators. Even if you’ve never created a pop-up before, you’ll breeze right through the process with Hello Bar, including installation. There are enough design and settings options to make you feel like you’re making a customized pop-up, but not so many that you get overwhelmed or feel like you don’t know what to do next.
In short, it’s dead-simple to increase both the quantity and quality of your click-through rate.
Sumo was great, too. The installation process is simpler, and even though the design tool isn’t as attractive as Hello Bar’s, it has fewer options, which means you can get those pop-ups designed fast. The default text options make it possible to throw something together now if you don’t feel like putting time into customizing the copy.
In terms of quality, I prefer Hello Bar. The preview is large and the overall design tool is just nicer to work with. Hello Bar isn’t perfect, though. While the main drawback to Sumo is its simplicity, Hello Bar had bigger issues:
- When I was customizing the conversion page, I wanted to see a preview, especially because I was playing with font and font color.
- I also couldn’t figure out what I was doing wrong with the last step when I tried to finalize my design. It seemed like everything ran smoothly until I got right to the end of the process, which was frustrating.
- Hello Bar wouldn’t update the website to say it was installed, which meant I couldn’t get my pop-up on my website once I finished designing it. I had hoped there was a live chat option for customer service, but there wasn’t, so I had to send them an email and then just wonder how long it would take them to respond.
My Bottom Line: Personally, I really needed the advanced customization (and targeting) built into Hellobar. Judging be which service I stuck with, Hellobar is my pick here..
Runner Up: Still, if you just need something simple to get a popup live, Sumo is a great option.
Ultimately, both of these pop-up tools come with feature-packed free plan versions for small businesses, so you could use both freebies or pay for one and use the free version of the other to maximize both services. For a high quality pop-up experience with a lot of options, go with Hello Bar. If you need to get something up fast for your marketing campaigns, though, or you’re not able to come up with compelling copy, Sumo is a great choice, too.
Hello Bar has the most advanced TARGETING logic I've seen, plus a super EASY TO USE navigation with plenty testing options for tweaking that perfect CTA. Best of all, the pricing structure is affordable and transparent.
Further Tools to Research